
• Filed to: Android Root • Proven solutions
How to Root Samsung Galaxy S7?
The Samsung’s model, ‘Galaxy S7’ with a mixture of its amazing features, left a big impression among other smartphones. It comes in two versions, Exynos and Snapdragon. The latter version doesn’t allow root on the device. It means, users in the US, sorry to say, are not able to root their Samsung Galaxy S7 in view of the fact that US models runs in Snapdragon version. But those owning Exynos and wants root access in their S7 are at right place. This article will teach you to root your Galaxy S7 with the best tool available providing simple steps.
Part 1: Things to do Before Rooting Samsung Galaxy S7
You are eager to start rooting process, aren’t you? We do understand that. But there are some important things you need to prepare before beginning what you want. Let’s have a glimpse on the following points:
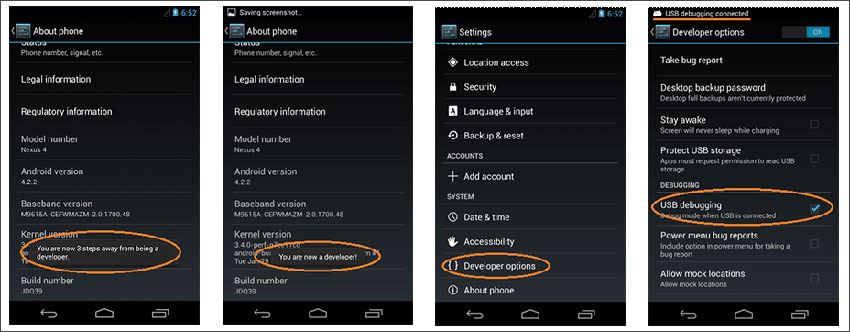
Enable USB Debugging Mode: The primary thing to carry out is turning on USB Debugging Mode. For this, you need to go to “Settings” in your phone. Go to “About Phone” under “Settings”, then get into device information and find device’s build number. Tap on it 5-7 times and the “Developers Option” will appear. Select it and tap on “USB Debugging Mode” under “Developers Option”. 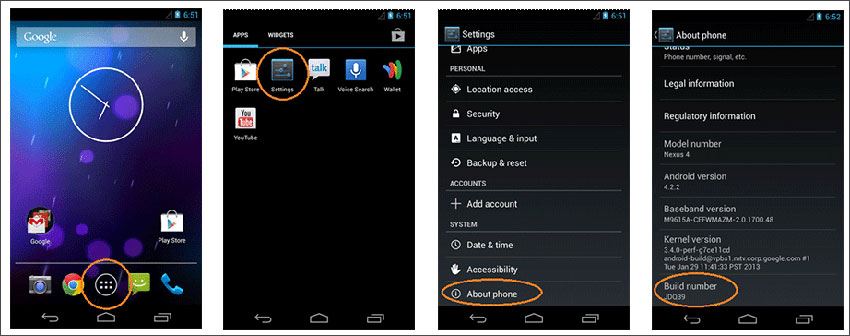
Keep good storage of battery: The rooting process insists enough storage of the device’s battery. Your Samsung Galaxy S7 should have sufficient battery storage. Make sure it is about 80% and above. Remember this key point and get your phone rooted with no trouble. Sufficient battery storage will also ease the process.
Install drivers on the computer: Make sure to install phone drivers on your computer. This is done so that your computer will be able to detect the device while the rooting process is going on. You will need to install them if you want to root the device via a computer.
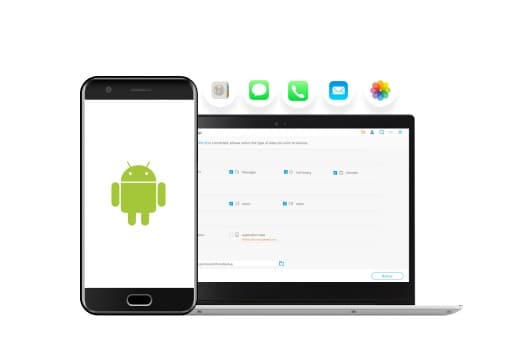
Back up Data – Vital Things to do: We have discussed some important points to do before obtaining root access to the device, but the most important thing you need to do is to backup your data. For this, you need dr.fone - Phone Backup (Android) as it the best software to use. This Android backup software doesn’t take much time and makes the backup thing done easy. This tool assists to back up data altogether at once. Let’s get a peep into its features:
- The software allows you to backup all types of data, be it photos, music, images, videos, texts, call logs or applications.
- It’s friendly with all sorts of Android devices and Android Operating System.
- It’s able to restore the backup data to another device too.
- It takes no less than a minute to back up all the data.
- dr.fone is counted for wide range of success rate and is completely safe among all other tools.
Step 1: Download, install and launch dr.fone. From the main window, click on “Data Backup & Restore”. Then connect the Android device to the computer using USB cable. Hit “OK” (in case, there is instruction that’s asking to allow USB Debugging).
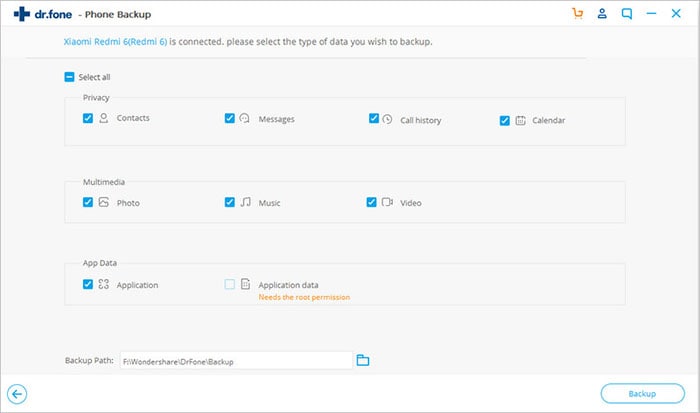
Step 2: After when the Android device is identified by the program, click “Backup”. Select the items you wish to backup or click “Select all” if you want a complete backup of everything. After selecting, you need to click on “Backup”.
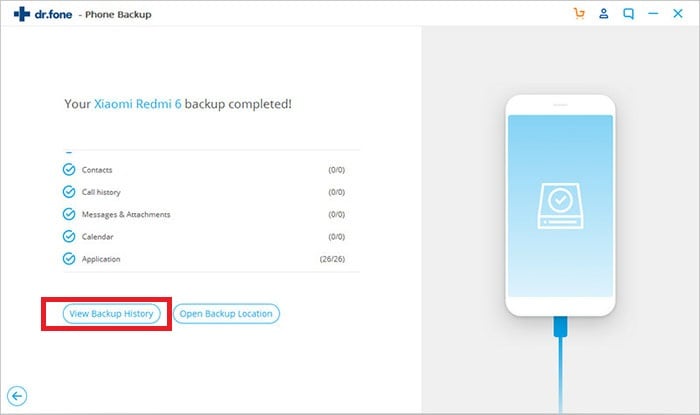
Step 3: The process of backup will begin and you will have to wait according to the size of your data. In other words, time taken for the process will be based on the amount of data you have. Plus, you can verify the backup data by clicking on “View the Backup” following the completion of process.
Yippie! You don’t have to worry about your data any longer as your data is safely backup now.
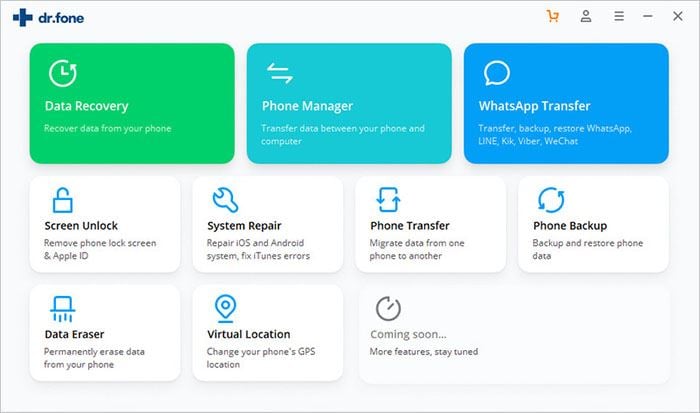
Don’t just read only, bear those instructions in mind since it is going to assist you only, not anyone else. Once you’ve understood every point you need to do before rooting, you are good to go for rooting your Samsung Galaxy S7. The sole and best tool available for rooting Galaxy S7 is dr.fone - Android Toolkit. An easy and one click tool to root Samsung Galaxy S7, it provides 100% safe rooting. It gives you positive results up to your full satisfaction. Let’s check out some features of dr.fone – Android Tool.
- It works on almost 7000 devices and enjoys a higher success rate.
- It ends the threat and possibility of data loss. Feel free to use this software with no worrying about losing data.
- There is no chance of revealing your personal information. iSkysoft, no doubt, is the safest tool to use.
- It has a feature, namely, ‘Tips % Tricks’ which provides fresh instructions on rooting Android.
- The tool is simple to that extent that you need no knowledge of technicalities.
Step 1: Start the rooting process by installing and launching dr.fone. Choose the option “Root”.
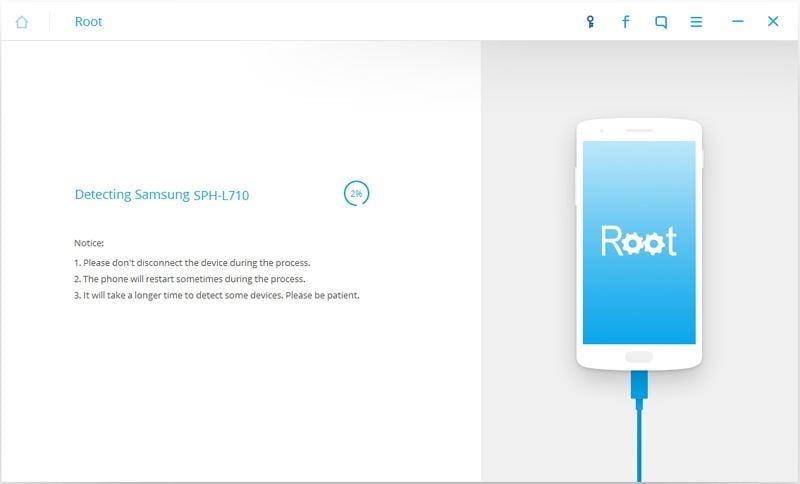
Step 2: The next step will be connecting the device to the computer. Your device will be identified by the dr.fone which will help finding correct package for rooting process to be done in the device.
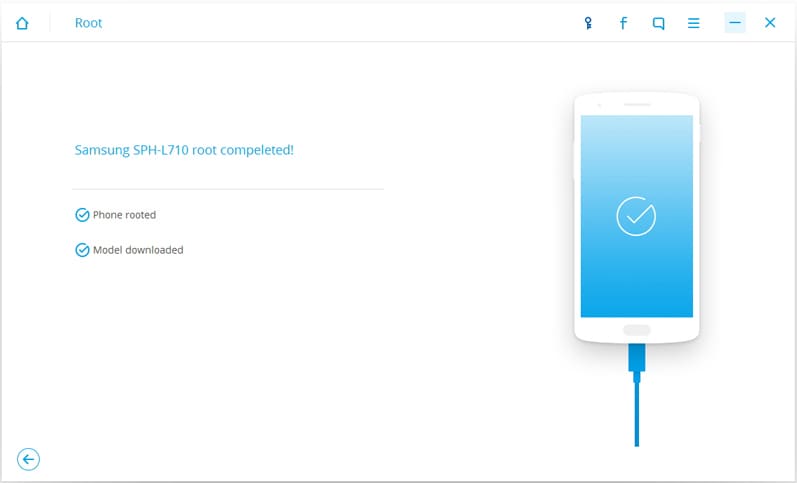
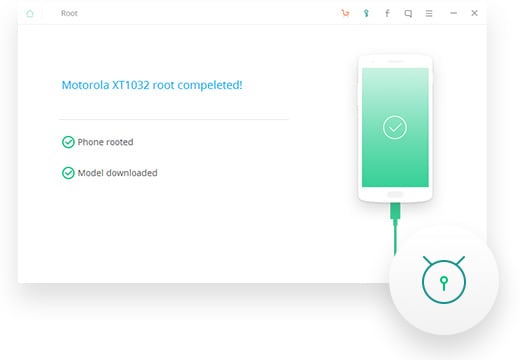
Step 3:Click “Root Now” and then click “Confirm”.
That’s about it. You got root access to your device.
Step 1: Launch the toolbox and select “Data Backup & Restore”.
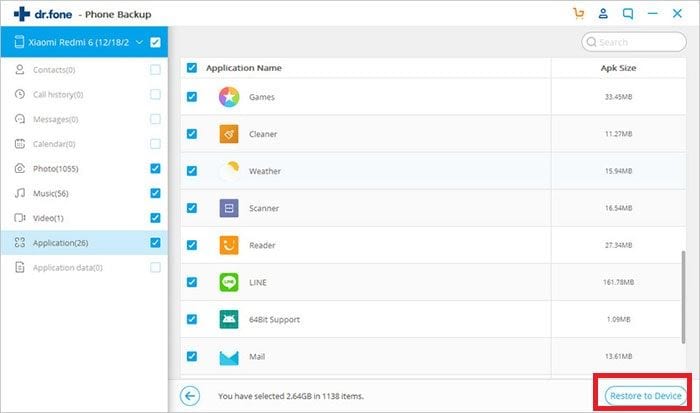
Step 2: Connect the computer and device via USB cord. Click “Restore” which will show the backup files. Select the items to be restored and then click “Restore” at the bottom on the right side.
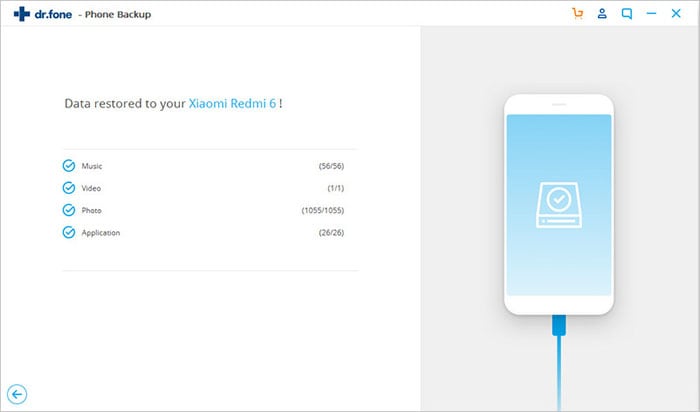
Step 3: After the process will done, you will see “Restoring has been completed!’ on the window.
Elva
staff Editor