How to Root Android with One Click Root APK?

Jul 24, 2025 • Filed to: Device Data Management • Proven solutions
In the world of Android smartphones, rooting has become increasingly popular, and for good reason. Rooting your Android device can give you access to a whole new world of features and customization options that are not available on the stock Android operating system. One Click Root APK is a tool that makes rooting your Android device quick and easy, allowing you to take full control of your phone or tablet in just a few clicks.
Before we dive into the process of rooting with One Click Root APK, let's first discuss what rooting is and why you might want to do it.
Part 1. What is Rooting?
Rooting is the process of gaining administrative access to your Android device's operating system. This allows you to remove pre-installed apps that you don't use, install custom ROMs, and customize your phone or tablet in ways that are not possible on an unrooted device. Rooting can also give you access to features that are hidden by the manufacturer, such as the ability to tether your device's internet connection for free.
Part 2. Why Root Your Android Phone or Tablet?
There are several reasons why you might want to root your Android device. Here are a few of the most common:
1. Remove Bloatware
One of the biggest advantages of rooting your Android device is the ability to remove bloatware. Bloatware is pre-installed apps that come with your device and take up valuable space and resources.
2. Install Custom ROMs
Rooting your Android device allows you to install custom ROMs, which are custom versions of the Android operating system. These ROMs often come with features and customization options that are not available on the stock Android operating system.
3. Improve Battery Life
Rooting your Android device can also help improve battery life by allowing you to disable apps and services that are draining your battery.
4. Increase Performance
Rooting your Android device can also help increase performance by allowing you to overclock your device's processor and adjust system settings to improve performance.
Now that you know why you might want to root your Android device, let's take a look at how to do it with One Click Root APK.
Tips: Looking for an all-in-one mobile management software? Look no further than Dr.Fone App - the ultimate choice for all your needs:
For iOS Users: Free up space with Smart Clean, remove any restriction including screen lock, iCloud activation lock, MDM, or Apple ID, and transfer data easily between devices with our all-in-one iOS solution.
For Android Users: Bypass screen locks and FRP with our Android unlocker, change your location with one click, and repair damaged Samsung devices with ease.
Discover more possibilities for mobile management solutions with Dr.Fone App (iOS) and Dr.Fone App (Android). Don't miss out, try it now and revolutionize your smartphone experience.


Part 3. How to Root Android with One Click Root APK?
Rooting programs such as One Click Root APK can help you in rooting your Android device and help it get back to shape. You can directly install the APK file on your Android phone and root it without the help of a PC. With their live-chat support, you can root your Android device without any trouble.
How to Use One Click Root APK in Detail?
- Step 1: Download One Click Root APK
Installation of One Click Root APK is very easy and simple. All that you need to take care of is, following the instructions carefully to do the same.
Download the APK file for One Click Root to your Android phone. Once the download is complete go through the following steps to install the software and root your Android phone successfully.
- Step 2: Enable Unknown Sources
Before you can install One Click Root APK, you need to enable unknown sources on your Android device. To do this, go to Settings > Security > Unknown Sources and toggle the switch to on.
- Step 3: Install One Click Root APK
Once you have enabled unknown sources, you can install One Click Root APK. To do this, simply open the file you downloaded in Step 1 and follow the on-screen instructions. Go to ‘Settings’ on your Android device. Click on ‘Security’, and check ‘Unknown Sources’. Now, open the downloaded APK file of ‘One Click Root’ and install it.

- Step 4: Launch One Click Root APK
After the installation completed, launch the ‘One Click Root’ app on your Android device. You will see a message asking you to connect your device to your computer.
- Step 5: Connect Your Device to Your Computer
Connect your Android device to your computer using a USB cable. Make sure that USB debugging is enabled on your device. You can do this by going to Settings > Developer Options > USB Debugging and toggling the switch to on.
- Step 6: Root Your Device with One Click Root APK
Once your device is connected to your computer, click the Root button in One Click Root APK. The app will begin the rooting process, which should only take a few minutes.
- Step 7: Enjoy Your Rooted Android Device
Once the rooting process is complete, you can disconnect your device from your computer and enjoy your rooted Android device. You can now customize your device in ways that were not possible before, install custom ROMs, and remove bloatware.

Pros of One Click Root for Android
- It is a time-saving and simple rooting application.
- It Supports more than 1000 Android devices.
- It enables you to access blocked features on your phone.
- It is a freeware and doesn't cost a penny.
- It roots the device without any data loss.
- It is powered with Titanium backup option as well that can help you to perform a backup of your necessary data easily.
Cons of One Click Root for Android
- It is not compatible with HTC Android devices.
- Devices running on Android 3 or previous versions are not supported.
- The app does not support unroot feature which means you will not be having the power to unroot your device once rooted via One Click Root.
- It can brick your Android device the moment any rooting glitch appears.
Part 4. Is Dr.Fone Root Still Available?
Yes, Dr.Fone Root is still available. Dr.Fone Root was a tool designed to assist users in rooting Android devices. Rooting grants users privileged access for deeper customization and control over their devices. The root functionality of Dr.Fone now supports all Samsung mobile phone and tablet models. Follow this step-by-step guide to root your Android device using Wondershare Dr.Fone:
Step 1: Install Dr.Fone and initiate the rooting process using the root feature. Activate USB debugging to guarantee your Samsung device is properly identified. Turn on OEM unlocking to access additional customization options and features.

Step 2: To enter Download Mode on your Samsung device, follow your model's specific steps. Without Bixby, power off your device first. With Bixby, press and hold Volume Up (+) and Volume Down (-) together. If your device has a home button, release these buttons when the Warning Page shows. Then, click "Next" to proceed.

Step 3: Carefully enter the correct device information. Next, follow the customized instructions to access the download mode specific to your device's requirements.

Step 4: Locate, unzip, and upload the firmware to the specified area and click "Start" to begin. Your Samsung device will restart after flashing; this may take a few minutes. Follow the on-screen setup, then install and open the patching tool, following the prompts. Download the patched file to your computer.

Step 5: Our product interface shows a QR code for an Android root tool. Scan the QR code with your Samsung device to install. After installation, your device will restart and be successfully rooted once patching is complete.
Conclusion
Rooting your Android device with One Click Root APK is quick and easy, and it opens up a whole new world of features and customization options. Whether you want to remove bloatware, install custom ROMs, or improve battery life and performance, rooting your Android device is a great way to take full control of your phone or tablet. So why not give it a try today?
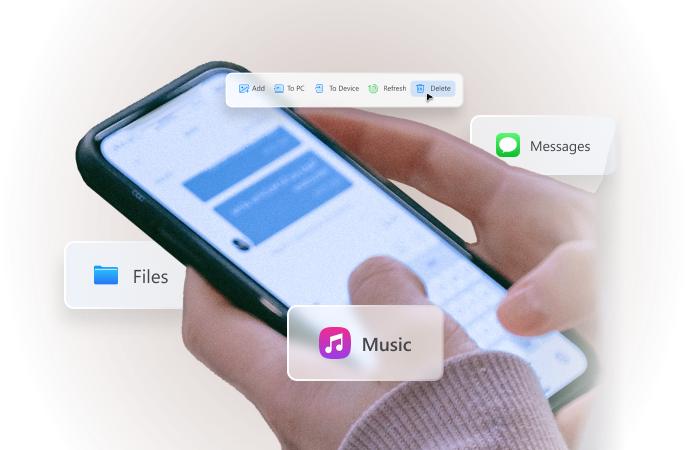
In addition, if you have accidentally deleted important files on your Android device and don't want to go through the hassle of rooting, Dr.Fone - Data Recovery (Android) is a highly recommended tool for recovering deleted files without root access. With its user-friendly interface and powerful scanning technology, Dr.Fone can quickly and easily retrieve lost contacts, messages, photos, videos, and more. So, whether you choose to root your device or not, Dr.Fone - Data Recovery (Android) is a must-have tool for any Android user.
Dr.Fone - Data Recovery (Android)
Recover Deleted Files from Android Without Root
- Recover data from Android devices.
- Supports to recover Contacts, Messages, Call history, Video, Photo, Audio, WhatsApp message & attachments, documents, etc.
- Supports 6000+ Android phones and tablets from brands like Samsung, HTC, Motorola, LG, Sony, Google.
- Highest retrieval rate in the industry.


Android Root


James Davis
staff Editor