5 Ways to Transfer Photos from Samsung to iPhone

Mar 12, 2025 • Filed to: Data Transfer Solutions • Proven solutions
I am sure you all would agree that the iPhone and Samsung are the two flagship devices in maximum demand these days. Hence, it is understandable that you would want to transfer photos from Samsung to iPhone like iPhone 13, although you arguably possess one of the best mobile phone cameras in the world. The reasons can be many, like when you are moving from Samsung to iPhone, want to keep a backup, need to transfer, or just want to have your moments safe in both devices.
Today, we will be looking into how to transfer pictures from Samsung to iPhone using some of the fastest and easiest methods.
- Part 1. How to transfer all photos from Samsung to iPhone in 1 click?
- Part 2. How to transfer photos from Samsung to iPhone selectively?
- Part 3. How to transfer photos from Samsung to iPhone using Move to iOS?
- Part 4. How to transfer photos from Samsung to iPhone using iTunes?
- Part 5. How to transfer photos from Samsung to iPhone using Dropbox?
Part 1. How to transfer all photos from Samsung to iPhone in 1 click?
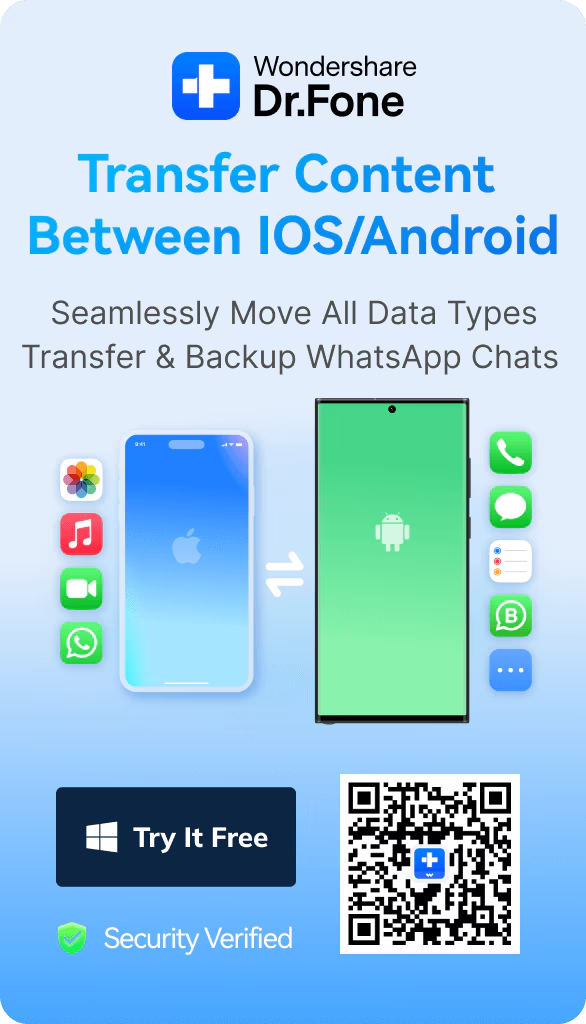
Dr.Fone - Phone Transfer can serve the purpose to transfer photos from Samsung to iPhone or any other mobile smartphone operating on Android and iOS in a single click. This method takes the front line amongst the list of ways to transfer pictures from Samsung to iPhone like iPhone 13. The software can be downloaded directly from the Wondershare website for free, and it is just as easy to install as any other tool.
Dr.Fone - Phone Transfer
Transfer Photos from Samsung to iPhone in 1 Click!
- Easy, fast, and safe.
- Move data between devices with different operating systems, i.e. iOS to Android.
- Supports iOS devices that run the latest iOS

- Transfer photos, text messages, contacts, notes, and many other file types.
- Supports over 8000+ Android devices. Works for all models of iPhone, iPad, and iPod.


Below are the few steps required to transfer photos from Samsung to iPhone 13 in a single click.
Step 1: Launch the Tool
Launch Dr.Fone software which has been installed on your computer. Now on the main interface, click on the “Switch” button.

Step 2: Connect the two devices to your computer
Now grab a durable and fast USB cable for both the devices you wish to transfer photos to and form, that is, the Samsung and the iPhone.
Dr.Fone would automatically detect the two devices, provided they have been well connected to your personal computer.
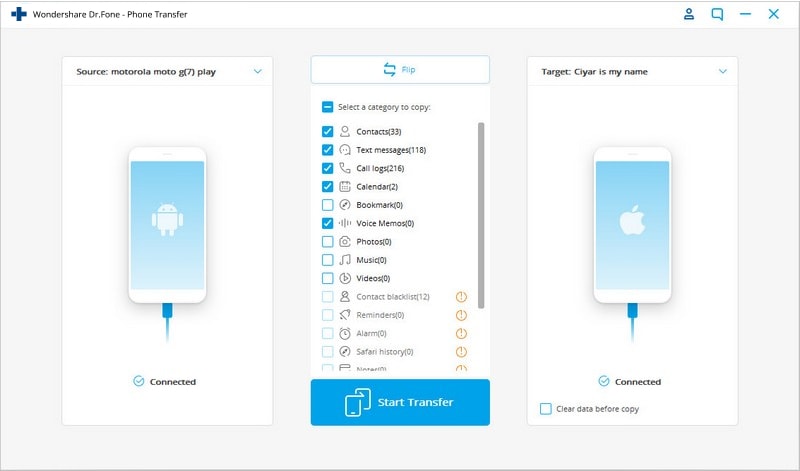
Now you should see both the devices displayed with their names. Ensure that the Source device (Samsung phone) is located to the left of the screen and the Destination device is to the right. If the order is different from what you want, hit the “Flip” button at the top center of the page.
Step 3: Select files to be transferred
To transfer pictures from Samsung to iPhone, you will have to select the files to be transferred, in this case, photos. To make your selection, check the corresponding boxes in the file name.
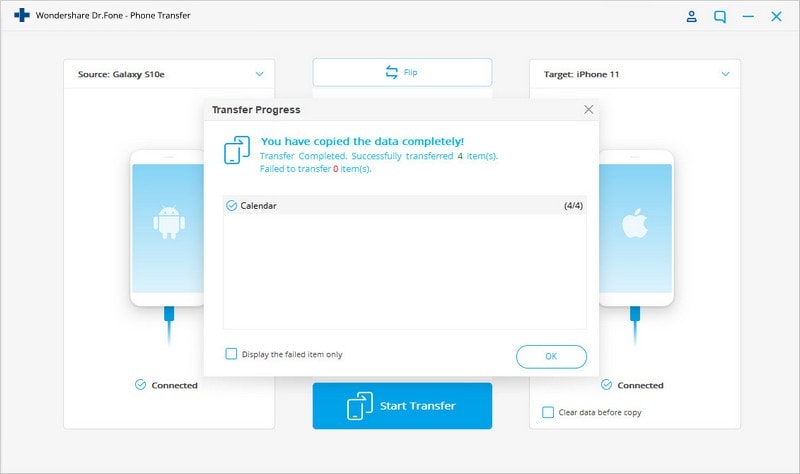
Now, here is where the easy part comes to play. You can now click on the “Start Transfer” button, and immediately, the already selected file types would be transferred in no time to the destination device, that is, the iPhone. How easy is that?
In just a few simple steps, here is how you transfer photos from Samsung to iPhone in a single click.
Part 2. How to transfer photos from Samsung to iPhone selectively?
Another easy method that is very handy to transfer pictures from Samsung to iPhone is the Dr.Fone toolkit software, widely known as Dr.Fone - Phone Manager (Android). This function can also be used to transfer pictures from Samsung to iPhone, but this time you can select each picture you want to send and deselect unwanted ones.
Dr.Fone - Phone Manager (Android)
Transfer Photos, Videos, Music from Samsung to iPhone Selectively.
- Transfer files between Android and computer, including contacts, photos, music, SMS, and more.
- Manage, export/import your music, photos, videos, contacts, SMS, Apps, etc.
- Transfer iTunes to Android (vice versa).
- Manage your Android device on the computer.
- Fully compatible with all Android versions.
Step 1: Connect your Samsung device
Connect your Android device to your computer and launch Dr.Fone software. On the home screen, click on the “Transfer” option, and you will see your connected device on the screen with several options listed on the right. Click on the “Transfer Device Photos to PC” option.

Step 2: Select Files to be transferred
Here, from the list of visible images, please select the desired photos selectively to transfer them.
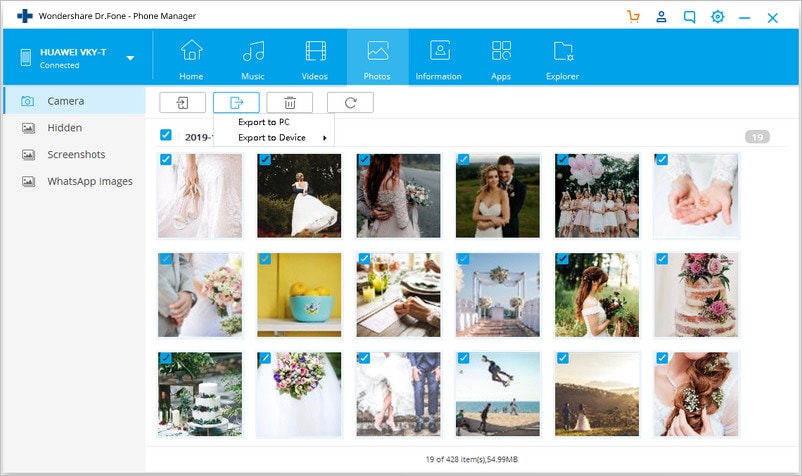
After making the selection, connect your iPhone and then click on the second button above the selected pictures, which is the “Export” button, then click on “Export to Device,” then click on your already connected iPhone (Device Name).
The pictures would be immediately transferred to your iPhone.
Part 3. How to transfer photos from Samsung to iPhone using Move to iOS?
In the quest to transfer photos from Samsung to iPhone like iPhone 13, one of the conventional methods available is the use of the Move to iOS app. Apple itself designed this app to reduce the formally accrued stress while making a transfer to an iOS device only. Although the app might not have completely taken away the trouble, it helps users make a smooth switch from Android to iOS.
Here are the steps that answer how to transfer pictures from Samsung to iOS using Move to iOS.
Step 1: Download and Install Move to iOS.
Move to iOS is an app that is available for Android on Google Play Store. Head to the Google Play Store on your Samsung device and search for “Move to iOS”, then Download and Install the app in the same.
Step 2: Settings on the iOS device
Now on your new iOS device like iPhone 13, you will need to make certain settings by visiting “Apps & Data” from there, choose the option “Move Data from Android” > then proceed with the “Continue” option, doing so will appear a 6-10 digit code.

Step 3: Launch Move to iOS App on the Android device
Now, on the Android device, open the “Move to iOS App”> Click Continue > Agree to terms and conditions> Press the “Next” button to find the code.
When you do so, a screen will appear asking to enter the code, at this screen you have to enter the 6-10 digit code that appeared on the iOS/iPhone device (above step). Thereafter, wait for a while till both devices get connected
Once the two devices have been successfully paired, you can now select the files to be transferred from your Samsung phone from the available display options: Camera roll, Bookmarks, and Google accounts. Select “Camera Roll” and your transfer of photos from Samsung to iPhone should begin immediately.

Once the transfer is completed, press Done on Android, and you can continue on your iPhone to complete the setup process.
Note: The biggest issue with this method is that it can only be used to transfer to an iOS device, it only works when you setup the target iPhone. If the target iPhone has already been set up and used, you need to factory reset the iPhone first.
Part 4. How to transfer photos from Samsung to iPhone using iTunes?
iTunes is one of the other self-created software by Apple that is meant to aid and transfer files from one source to another on Apple products. iTunes is software and also an app built for only Apple devices.
Nonetheless, it can still transfer pictures from Samsung to iPhone if these steps are followed in detail.
Step 1: Copy photos from Samsung to your Personal Computer
Note: Since iTunes cannot connect directly to a Samsung device, the first step will be to connect your Samsung phone to your PC and then copy the photos you want on your iPhone from your computer.
So, first of all, connect your Samsung to the computer by using a recommended USB cable. Ensure that the phone is in Media Transfer Mode for its contents to be visible on your PC.
Now open the phone’s storage and drag the photos into a separate folder. You should probably rename the folder for easier access.
Step 2: Sync photos with iPhone from iTunes
Now launch iTunes on your PC and connect your iPhone to the PC with a USB cable as well.
On the iTunes interface, click on the device button at the top left side of the screen and move on to the left side pane of the screen.
On the main screen of the interface, tap on the “Sync Photos” option. Here click on the “Photos” option. You will be prompted to choose a folder to sync with the iPhone device, navigate to the folder where you have copied the photos from your Samsung device.
Now click on “Sync” to begin synchronizing the selected photos unto your iPhone.

Part 5. How to transfer photos from Samsung to iPhone using Dropbox?
Dropbox is one of the most common reliable cloud storage platforms used as an online storage location. It can also be a valid means to transfer photos from Samsung to iPhone like iPhone 13.
Follow these steps to transfer photos from Samsung to iPhone using Dropbox:
Step 1: Install Dropbox on both Devices and create an account
Navigate to the app store of both your Samsung and iPhone devices, then search for the Dropbox App to download and install the app for free. After downloading the app on your Samsung device, create a Dropbox account, or log in if you already have an account.
Step 2: Upload your pictures
Once you have logged into your Dropbox account, select the desired pictures from your Samsung’s gallery and then click on the “Share button”. Select “Dropbox” out of the list of share options to start uploading the pictures to Dropbox, this might take some time depending on the Internet speed.

Step 3: Download the uploaded pictures
Now pick up your iPhone and log into your Dropbox account. Finally, you can download the uploaded pictures from your Dropbox account.
Note: To use this method, it is advisable to be connected to a Wi-Fi connection to avoid huge data charges.

This way you can transfer pictures from Samsung to iPhone using Dropbox as a mediator.
To conclude, all the 5 methods listed above to transfer photos from Samsung to iPhone 13 or an earlier model are valid and effective. However, if you want us to vouch for any of them, we would bet on Dr.Fone - Phone Transfer and Dr.Fone- Transfer(Android) since these two methods promise zero data loss and zero hassle. So go ahead, download these exclusive tools and get the best experience for your photos transfer process from Samsung to iPhone.


Other Popular Articles From Wondershare
iPhone Photos

Selena Lee
chief Editor