How Can You Transfer Files From Android To iPhone 13?

Mar 08, 2024 • Filed to: Data Transfer Solutions • Proven solutions
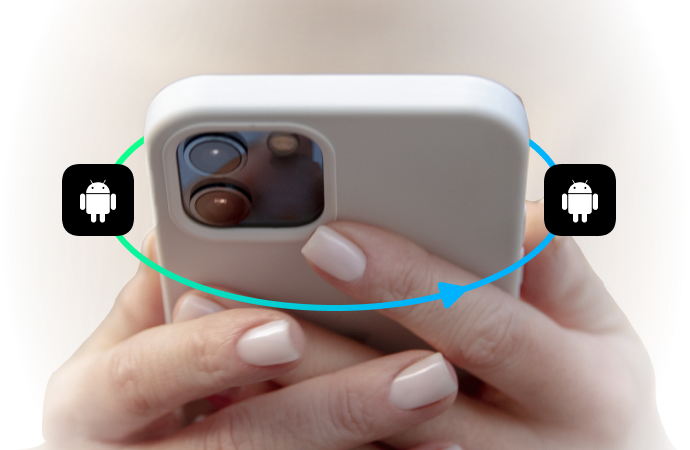
Just got a shiny new iPhone 13 but don't want to lose all your file data from your old Android phone? Transferring information from an Android device to an iPhone can seem daunting, but it doesn't have to be. With the right tools and steps, you can seamlessly move your contacts, photos, videos, apps, and other important files from your Android to your iPhone 13 in no time.
In this guide, we'll walk you through the easiest ways to transfer data from an Android smartphone to an iPhone 13, including both wired and wireless options. Whether you want to move your WhatsApp history, Google Photos library, or entire media collection, we've got you covered. With either a direct USB cable transfer, or dedicated mobile transfer app, you'll have all your Android data on your new iPhone set up just the way you like it.
Follow our simple step-by-step instructions below to get started moving your file data from Android to iOS today!
- Part 1: Transfer Data From Android to iPhone 13 Using Move To iOS
- Part 2: Transfer Data From Android to iPhone 13 Using USB Cable
- Part 3: How Can You Transfer Data From Android To iPhone 13 Using Google Drive?
- Part 4: How To Transfer Particular Data From Android To iPhone 13?
- Method 1: Transfer Contacts Using Sim Card
- Method 2: Transfer Photos Using Google Photos App
- Method 3: Transfer Messages Using SendAnywhere

- Part 5: Transfer Data From Android To iPhone 13 in One Click Using Dr.Fone
Part 1: Transfer Data From Android to iPhone 13 Using Move To iOS
The easiest way for most people is to use the Move to iOS app that Apple created specifically for switching from Android. Here's how:
Step 1: On your Android phone, download Move to iOS from the Google Play Store.
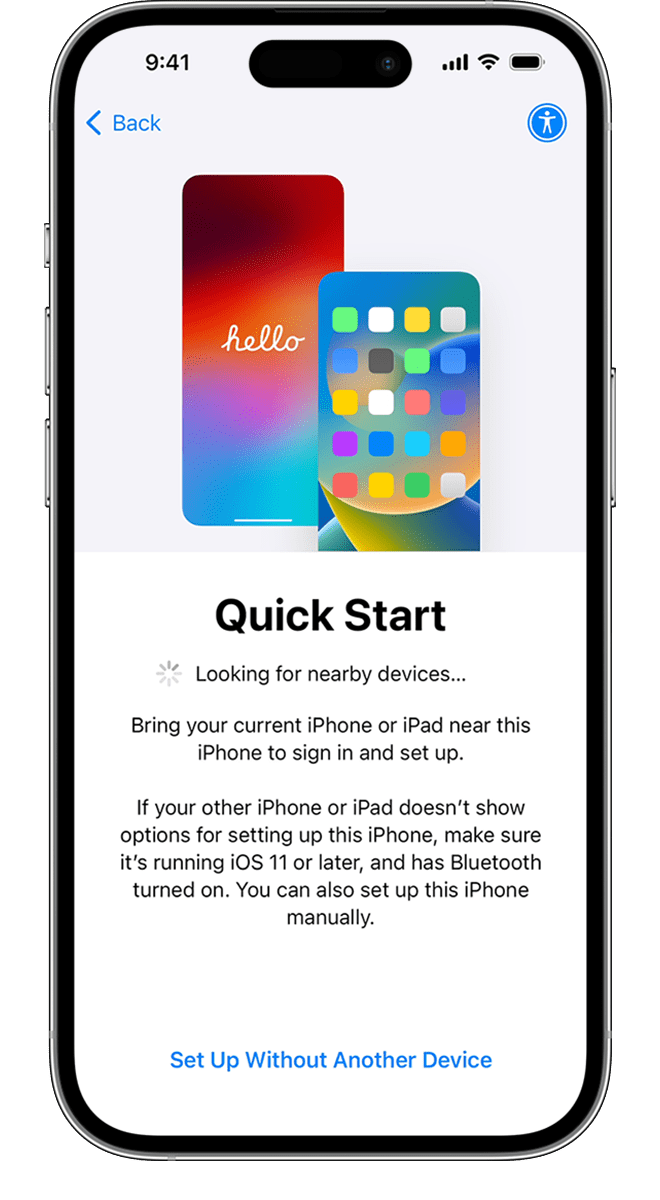
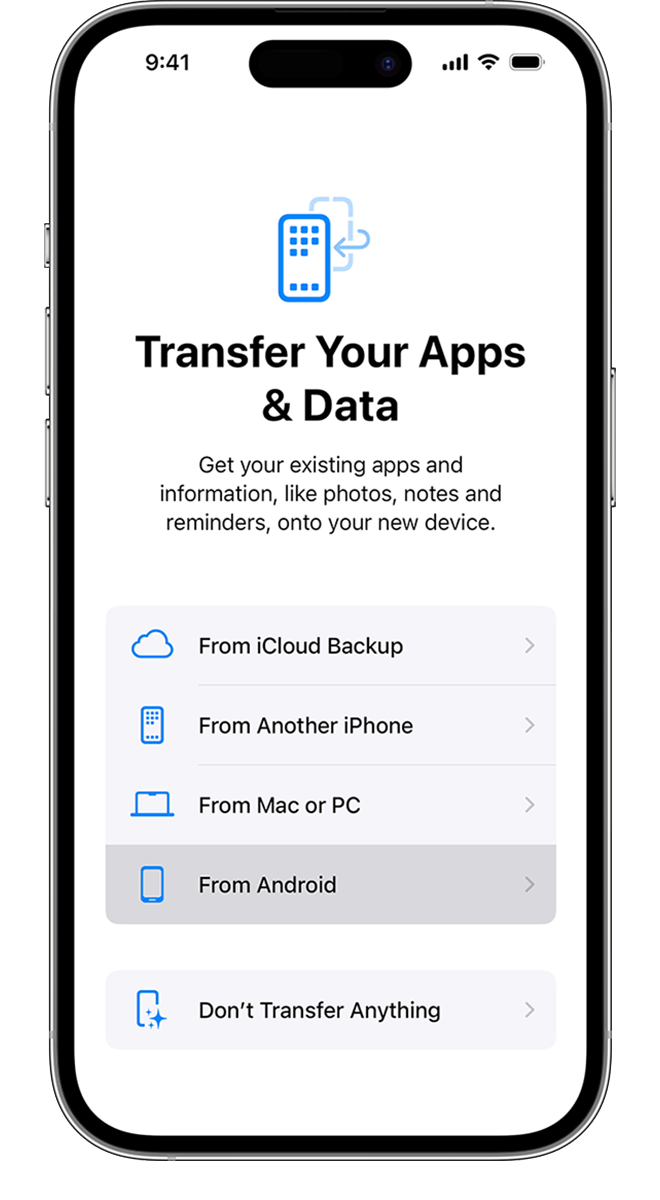
Step 2: When setting up your new iPhone 13, select the option to transfer data from Android.
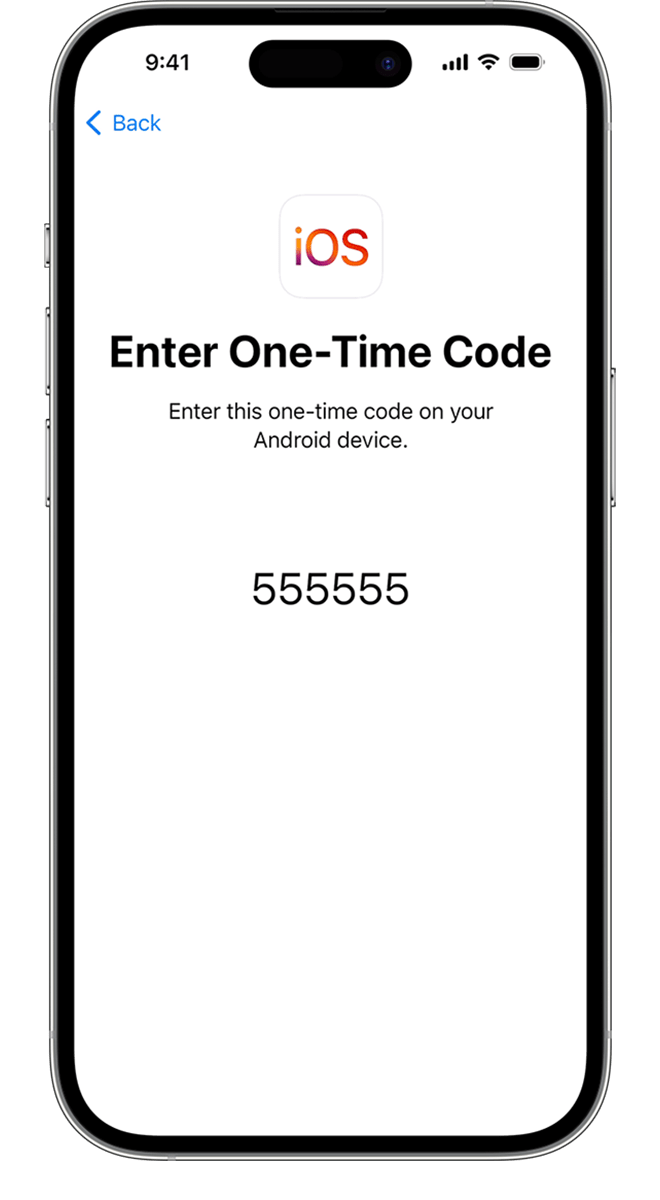
Step 3: Open the Move to iOS app on your Android phone and tap Continue.
Step 4: Wait for a 6 or 10-digit code to appear on your iPhone and enter it on your Android device.
Step 5: Connect both phones to the same WiFi network that your iPhone created.
Step 6: On Android, select the content you want to transfer like contacts, messages, photos, etc.
Step 7: Wait for the transfer process to finish, then tap Done on Android and Continue on iPhone.
Part 2: Transfer Data From Android to iPhone 13 Using USB Cable
You can also connect your Android phone directly to your new iPhone with the charging cable that came with your iPhone to transfer files:
Step 1: Connect your Android phone to your iPhone with the cable.
Step 2: On your Android device, tap Allow to give permission.
Step 3: On iPhone, select Trust when prompted.
Step 4: In Files on iPhone, select the name of your Android device.
Step 5: Select the content you want to transfer and tap Copy or Move.
Step 6: Choose a location on your iPhone like Photos to transfer the files.
And that's it! With these simple steps, you can easily move your important info, photos, videos, and other content from your old Android to your slick new iPhone 13.
Part 3: How Can You Transfer Data From Android To iPhone 13 Using Google Drive?
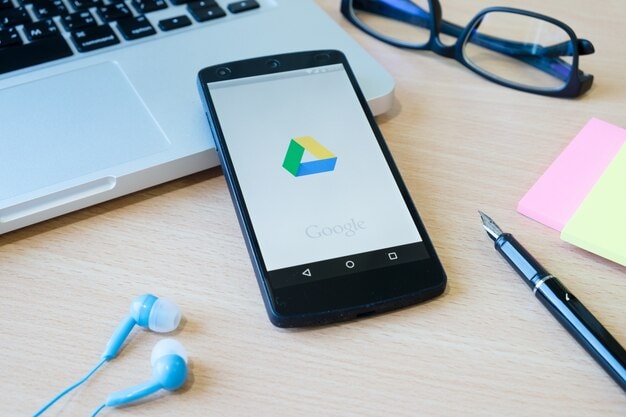
If you have files stored on Google Drive, you can easily access them on your new iPhone by:
Step 1: Make sure everything you want to transfer is uploaded to Google Drive on your Android.
Step 2: On your iPhone 13, download the Google Drive app from the App Store.
Step 3: Sign into your Google account in the app and set Google Drive as a storage location.
Step 4: Your Google Drive content will now be available on your iPhone!
Part IV: How To Transfer Particular Data From Android To iPhone 13?
Want to move all your precious data from your Android device over to your new iPhone 13? With some simple steps, you can easily transfer your contacts, photos, messages, and other key data.
Method 1: Transfer Contacts Using Sim Card
If you stored all your contacts on your Android phone’s SIM card, you’re in luck! This is the easiest way to move them to iPhone 13. Here’s how:
Step 1: Remove the SIM card from your Android device and insert it into your iPhone 13.
Step 2: Open Settings and tap "Contacts Manager".
Step 3: Choose "Manage SIM Card Contacts".
Step 4: Tap "Import from SIM Card".
And it’s done! All your SIM contacts are now safely stored on your iPhone.
Method 2: Transfer Photos Using Google Photos App
The Google Photos app makes it a breeze to transfer all your Android photos and videos over to your shiny new iPhone 13:
Step 1: Download the Google Photos app on your iPhone 13 if you haven't already.
Step 2: In the Google Photos app on your Android device, turn on Backup & Sync in Settings.
Step 3: On your iPhone Google Photos, enable Backup & Sync too.
Step 4: Give it some time, and all your media will transfer automatically from Android to iPhone!
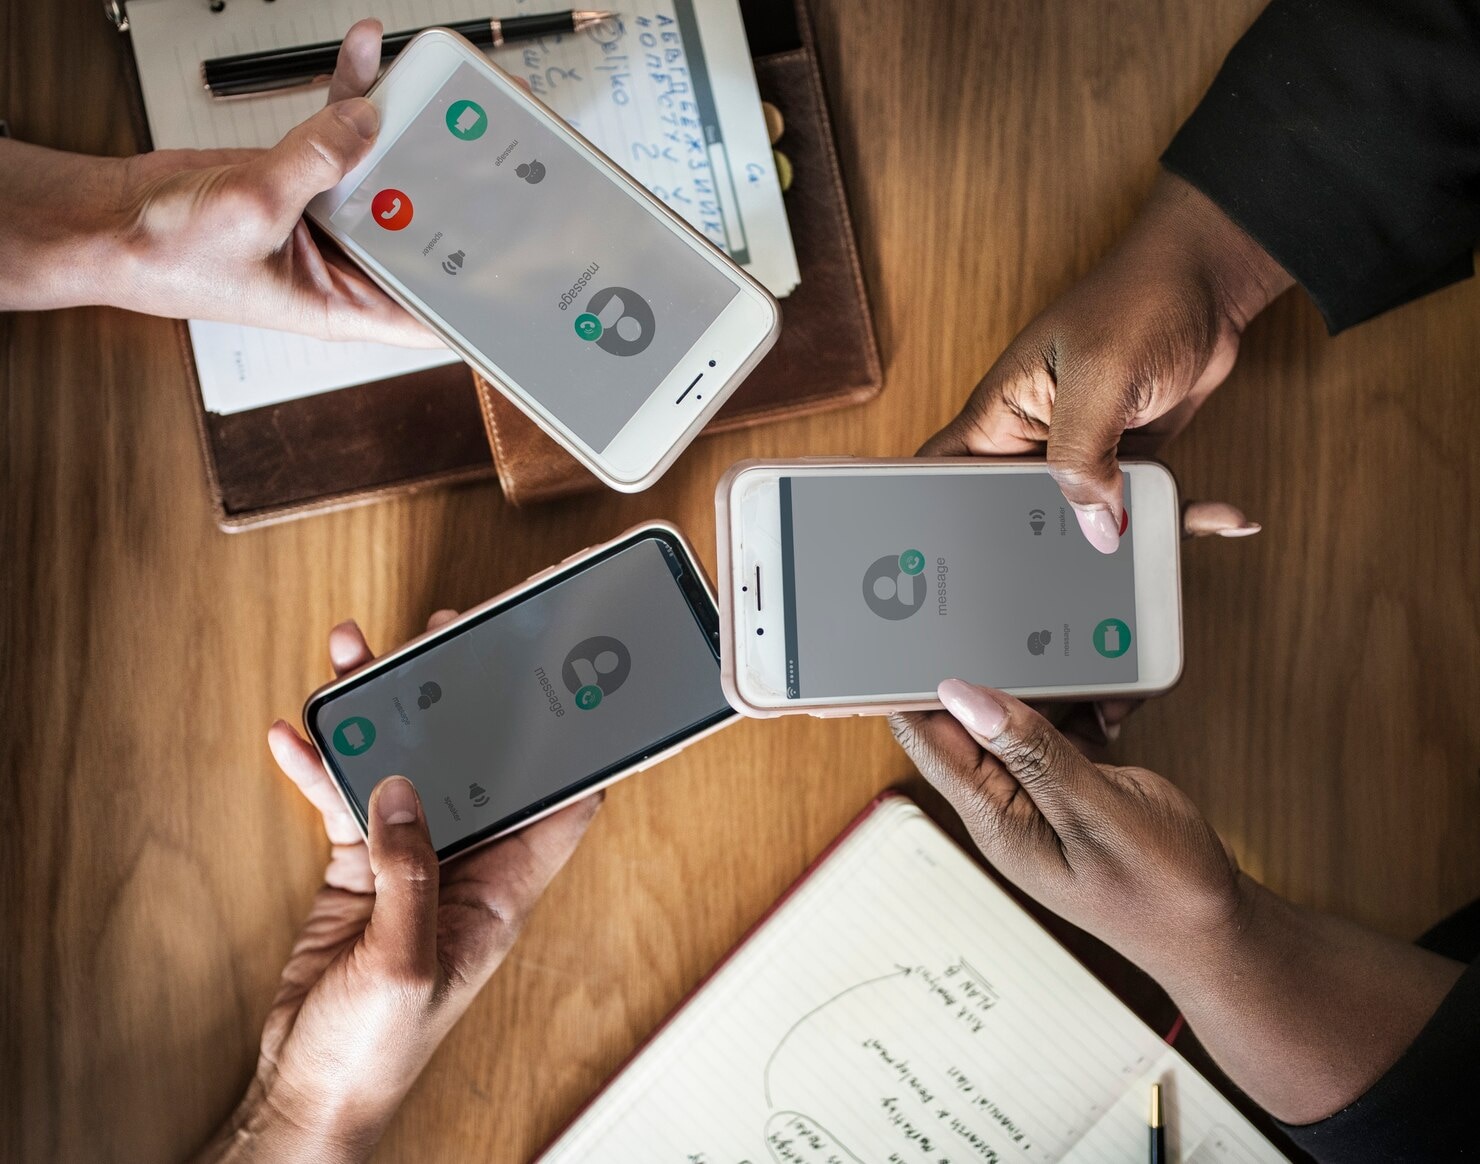
Method 3: Transfer Messages Using SendAnywhere
If you use messages a lot, you'll surely want to move your messaging history from your Android. The SendAnywhere app handles this seamlessly:
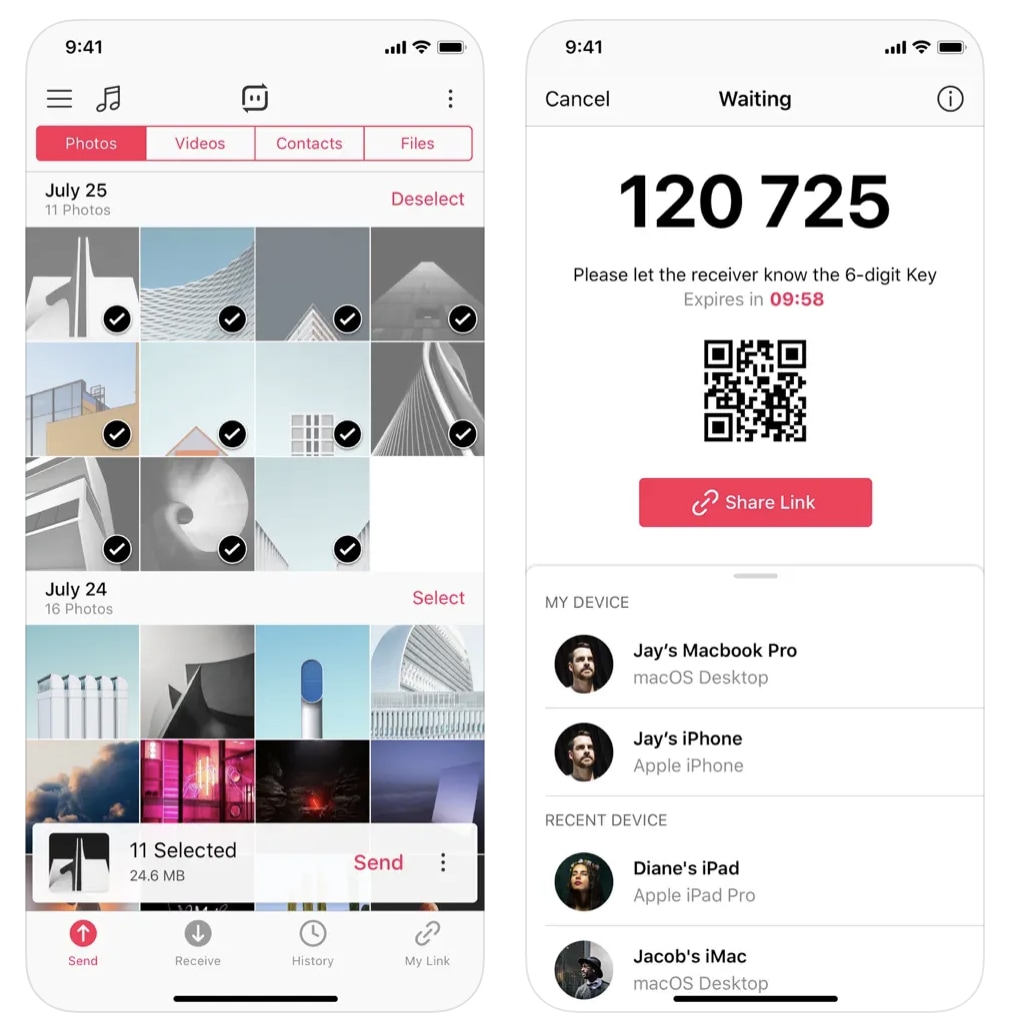
Step 1: Download SendAnywhere on both your Android and iPhone.
Step 2: Choose your Android as the Sender and, iPhone as the Receiver.
Step 3: Select "Messages" when prompted for what data to move.
Step 4: Enter the OTP code displayed on Android into your iPhone.
Step 5: Hit upload on Android and watch your messages move!
Transferring from Android to the new iPhone 13 doesn’t have to be painful. With SIM contacts, Google Photos, SendAnywhere, and other clever tricks, you can make the switch smoothly and focus on enjoying your new phone!
Part V: Transfer Data From Android To iPhone 13 in One Click Using Dr.Fone

If you’re shifting from an Android phone to an Apple device, then this is for you! As you get your brand new iPhone 13, you may wonder how you can transfer all your data in one go to your new phone. This includes all your contacts, photos, apps, and other vital data from your Android device. But don’t worry, for a hassle-free and easy way to transfer your data you can use the incredible Dr.Fone Phone Transfer! You can quickly and seamlessly transfer all that important stuff to your slick new iPhone 13 in no time. So, let’s get right into it and see how you can transfer data from Android to iphone 13!
First thing first, get your Android device and new iPhone 13 ready them sufficiently charged during the transfer process.
Dr.Fone's phone transfer feature makes switching data from Android to iPhone easier than you can imagine. Just follow these simple steps:
Dr.Fone - Phone Transfer
1 Click to Transfer Data From Android To iPhone
- Move data between devices with different OSs, i.e. iOS to Android.
- Transfer contacts, SMS, photos, videos, music, and more types.
- Simple, click-through process
- Compatible with the newest Android and iOS system.


Step 1: Download and install the Dr.Fone software on your Windows PC or Mac computer. Head to the official website drfone.wondershare.com and get the version compatible with your computer's operating system. Installation takes just minutes.
Step 2: Use the USB cables provided with your Android device and iPhone to connect both phones to your computer. Dr.Fone will automatically recognize the two connected devices. Make sure to enable USB debugging on the Android device first.

Step 3: Launch the Dr.Fone app on the computer and click on the "Phone Transfer" module. The user-friendly phone switch interface opens up, ready to shift your data.
Step 4: Select your Android device as the "Source" and your iPhone as the "Destination". Click "Flip" anytime to change direction. Also, choose what data types to transfer - contacts, messages, photos, videos, music, etc.

Step 5: Finally, hit the "Start Transfer" button and Dr.Fone will seamlessly shift the selected data from Android to iOS. The progress is displayed on screen.

And that's all it takes! In minutes, Dr.Fone securely transfers your essential data making your switch to the iPhone a breeze. Quick, hassle-free, safe - phone transfer doesn't get easier than this!

So go ahead – move your life to your terrific new iPhone 13 in minutes with the exceptional data transfer powers of Dr. Fone's Phone Transfer tool! Bid goodbye to manual processes or slow wireless transfers. For swift, simple, and safe Android to iOS transfer, Dr Fone is your go-to digital companion!
Conclusion
Transferring your precious data to a new iPhone 13 doesn't have to be a headache. With smart use of your SIM card, cloud storage apps like Google Photos, file transfer apps like SendAnywhere, or sophisticated switchers like Dr.Fone, you can seamlessly move your contacts, photos, media files, chats, and more from Android to iPhone. Whether you want to transfer a few vital files or the whole data - music, movies, documents and all - you now have several failure-proof methods to choose from.
So go ahead and make the switch to that new iPhone 13 without compromising any precious data. Use these time-tested techniques to swiftly move key files like WhatsApp data, photos, contacts, and different types of files from Samsung or any Android to your Apple device. Give your new iPhone a rousing welcome by easily transferring all that Android data!


iPhone 13 Series
- iPhone 13 News
- 1. Change Default iPhone 13 Ringtone
- 2. Use Siri on iPhone 13
- 3. iPhone 13 Tips and Tricks
- 4. Turn iPhone 13 Off
- 5. iPhone 13 Wallpaper
- 6. iPhone 13 Camera Tricks
- 7. iPhone 13 Problems
- 8. iPhone 13 Pro Max Introduction
- iPhone 13 Alternatives
- iPhone 13 Backup
- 1. Back up iPhone/iPad to Computer
- 2. iPhone Backup Software
- 3. iPhone Backup Extractor
- 4. Back up iPhone/iPad in DFU Mode
- 5. Back up iPhone in Recovery Mode
- 6. Back up Messages on iPhone
- iPhone 13 Erase
- iPhone 13 Issues
- 1. iPhone 13 Apps Keep Crashing
- 2. iPhone 13 Battery Draining Fast
- 3. iPhone 11/12/13 that Won't Turn On
- 4. iPhone 13 Stuck on White Screen
- 5. iPhone 13 Camera Not Working
- iPhone 13 Recover
- 1. Recover iPhone 13 Photos
- 2. Recover iPhone Contacts
- 3. Recover Data without iTunes
- 4. Recover iPhone 13 Data
- 5. Recover iPhone 13 Messages
- iPhone 13 Transfer
- 1. Contacts from Android to iPhone 13
- 2. Files from Android to iPhone 13
- 3. Data from iPhone to iPhone 13
- 4. Manage iPhone 13 on PC
- iPhone 13 Unlock
Daisy Raines
staff Editor