
• Filed to: Android Transfer • Proven solutions
Having an Android device is no less than a boon these days. Using it, how many times have you thought of making a video when you are traveling or when you find the place where you are standing so beautiful to be recorded and shared? We know almost every time you have given preference to this.
Whether a birthday party or a close friend's wedding or maybe a favorite picnic spot and the time begin spent there, we all love recording these intimate moments on our Androids. Well! This can seriously call for exporting videos from Android to PC for Android device
- Part 1: Transfer videos from Android to PC with iSkysoft [Easiest Way]
- Part 2: Sync Videos from Android to PC via AutoPlay
- Part 3: Move videos from Android to PC via Explorer
- Part 4: Copy Video from Android to PC by Google Photos
- Part 5: Transfer Videos from Android to Laptop with Dropbox
- Part 6: Transfer videos from Android to PC by Whatsapp web page
- Part 7: Move Videos from Android to PC through Email
- Part 8: Comparison These Methods
Part 1: Transfer videos from Android to PC with iSkysoft [Easiest Way]
Before you think what could be the easiest and the best way to transfer videos from Android to PC, let us introduce you dr.fone – Transfer (Android). This tool is the most convenient and reliable so as to provide users the best experience of transferring.
With the help of this tool, you can smoothly transfer your videos. It gives the power to transfer the videos selectively. Here is why you should surely go with this tool.
dr.fone - Phone Manager(iOS)
Features of dr.fone – Transfer (Android)
- It is easy to transfer data from Android to the computer and vice-versa with this tool.
- Not just videos, the tool is completely capable of transferring a wide range of data types like music, contacts, photos and whatnot.
- Moreover, there is a provision of converting the to-be-transferred file into the compatible format sans compromising on quality.
- Also, it can be believed as the safest option when it comes to transferring files.
- It also offers the facility of managing Android contacts and SMS easily.
Step 1 Launch the Program
To move your videos from Android to PC in just a click, firstly download dr.fone – Transfer (Android). After it is downloaded successfully, install the program and run it over your PC. Now, when you open it, you will get to see some tabs on the main interface. You got to choose "Transfer" from the options.

Step 2 Connect the Device
With the help of an original USB cable, you are supposed to plug your Android device as the next step. Once done, choose the "Videos" tab from the navigation bar of the next screen. Subsequently, you can select the videos that you want to transfer to the PC.
Step 3 Start Exporting Android Videos to PC
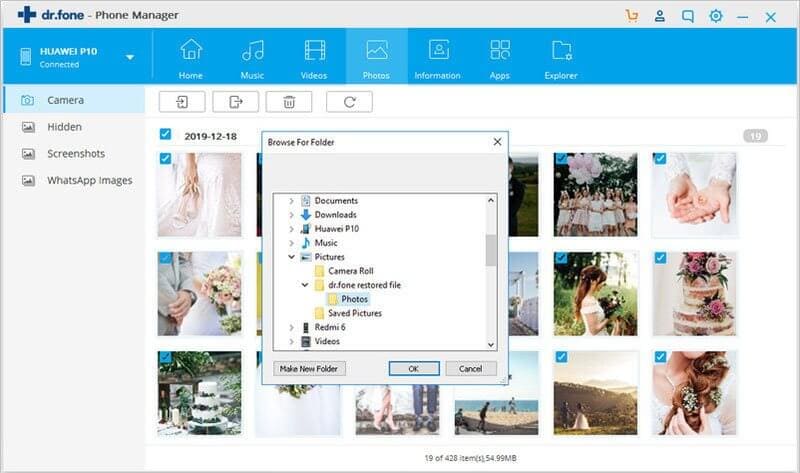
Hit on the Export button which is given below the navigation menu. After this, you need to click on the "Export to PC". Thereafter, browse the folder in which you want to save these videos and click "OK".
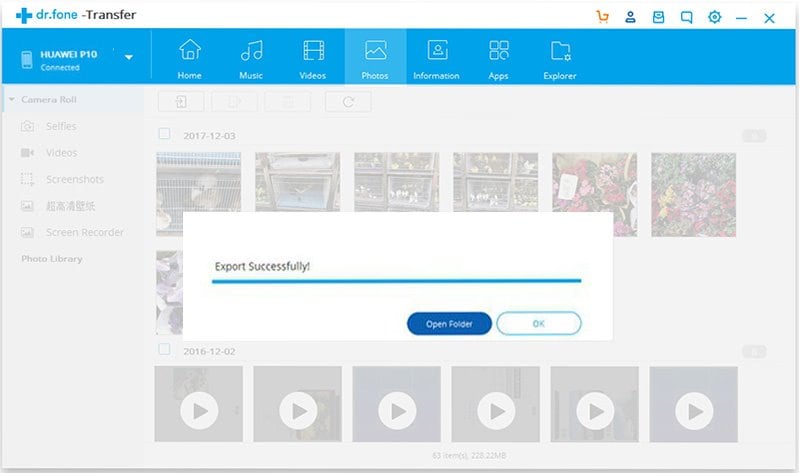
Step 4 Finish the Process
You will notice the transferring progress on your screen. When you see the process getting over, you can click on "Open Folder" or "OK" as you want.
Part 2: Sync Videos from Android to PC via AutoPlay
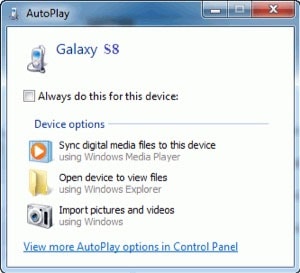
AutoPlay is the next option that can also be considered when you want to safely export Android videos to PC. This works by connecting your device to the computer using a USB cable. And the AutoPlay pop-up will appear on your PC screen. Let us elaborately introduce the step by step tutorial for the process. Have a look below to sync videos from Android to PC using AutoPlay.
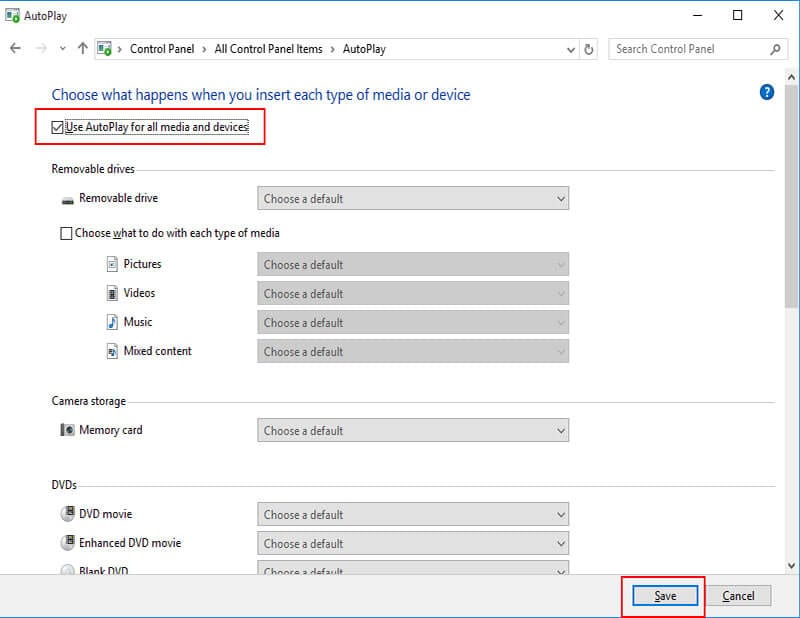
- Initiate the process by enabling AutoPlay on your PC. Simply open the Start menu and pick out "Control Panel". Look for the "AutoPlay" option from the Control Panel and click it. Later tick the tiny box given next to "Use AutoPlay for all media and devices" followed by "Save" button.
- Now, using the genuine USB cord, make a connection between the computer and Android device. The AutoPlay window will be easily visible once you connect the device.
- You simply need to choose the "Import Pictures and Videos" and click "Import" to transfer the videos.
Part 3: Move Videos from Android to PC via Explorer
When you are a Windows user, you are not new to File Explorer. Well, this is also another good option to let you move your videos from Android to PC. to know how it works, follow the instructions given below.
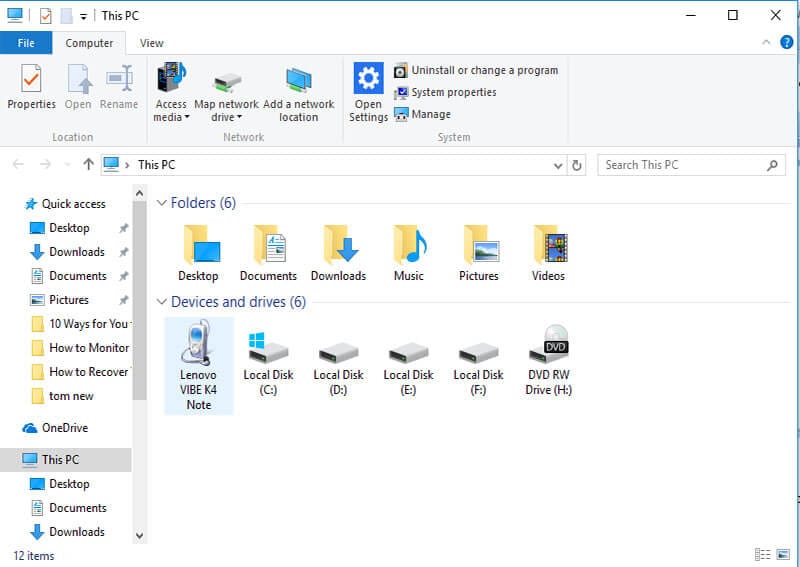
- To work with Explorer, you have to start with a similar step i.e. connect your Android with the PC via USB cord.
- Double click on "This PC"/"My Computer" to open it. You can see your device's name appearing in the explorer. Double click on it now.
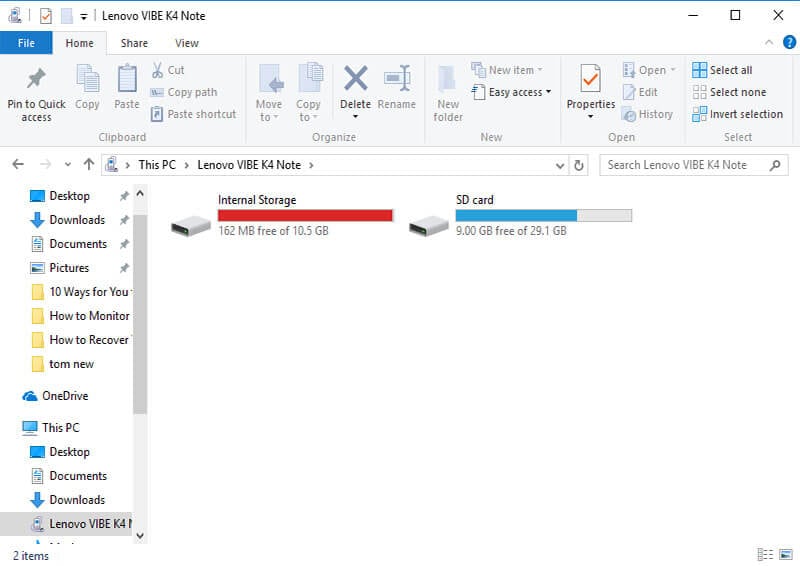
- Pick out the one option from which you want the videos between "Internal Storage" and "SD Card" and proceed to the next step.
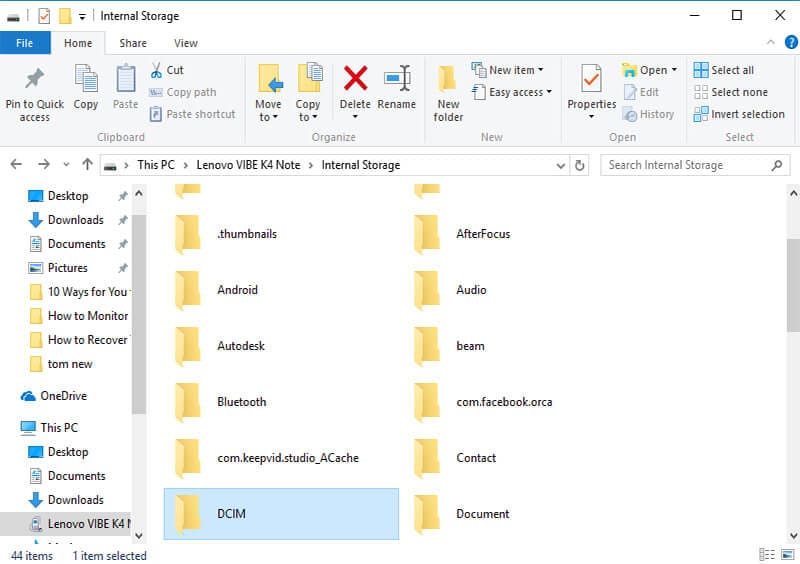
- You can now browse the folders that are containing the videos. Choose "DCIM" followed by "Camera" for the recorded videos or any other folder you desire.
- On selecting the videos, you just have to copy those followed by pasting in the target folder.
Part 4: Copy Video from Android to PC by Google Photos
Google Photos is one of the greatest platforms to store media files like photos and videos. There are lots of Android users using this.
And if you are also one of those who has Google Photos installed or pre-installed on your phone, this could be a convenient option for you. Make sure the videos are uploaded in the Google Photos and then follow the steps below to copy video from Android to PC.
- In the first place, open the browser and visit https://www.google.com/photos/about/. The Homepage will be in front of you now. Click on "GO TO GOOGLE PHOTOS".
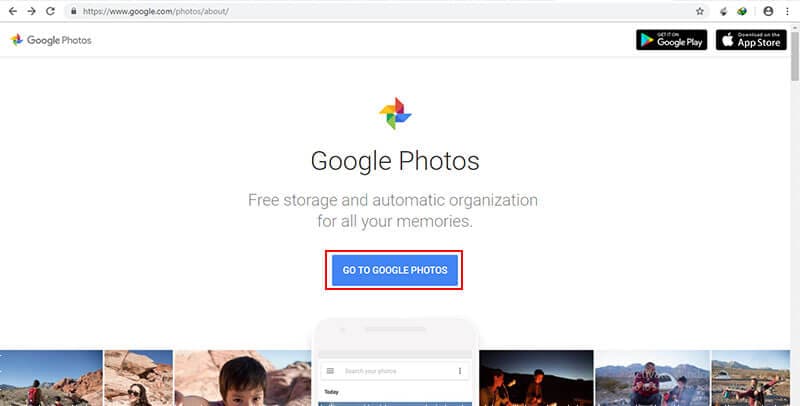
- Further, with signing in using the same Gmail account, you have in your Android.
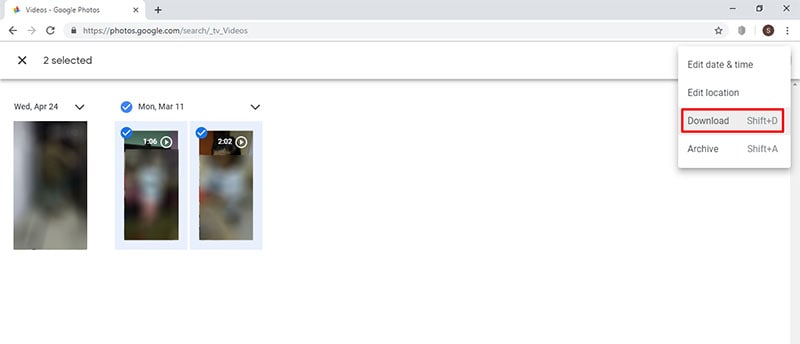
- When the Google Photos opened fruitfully, you could see the videos tab on your screen.

- Click on the tab and select the videos you want to transfer. tap on the three dots given vertically at the top right. Hit on "Download" button from the menu and get the videos on your PC effortlessly.
Part 5: Transfer Videos from Android to Laptop with Dropbox
Yet another service which we would like to offer you is Dropbox. It is a cloud service that makes sure to keep your data types saved and backed up. And when you want them remotely, you can access the data. Follow the step by step guide below to transfer videos from Android to the laptop using Dropbox.
- Get the Dropbox app on your Android phone. Carry on the setting up like entering the valid email address and other details.
- Upload videos on it by clicking on the "+" icon placed at the bottom. Select "Upload photos or videos".
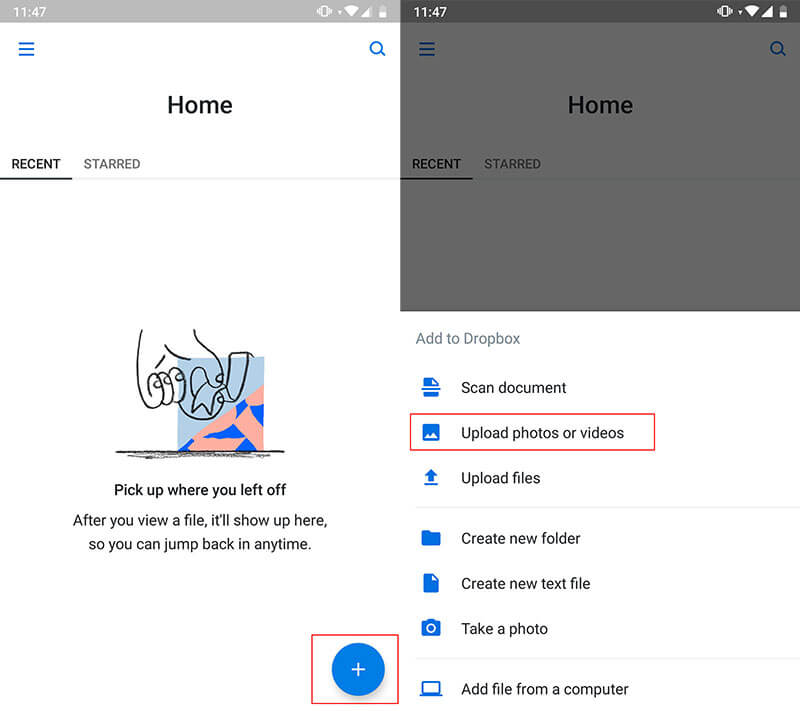
- Now, determine what videos you want to transfer and pick the out. Hit on "UPLOAD" and wait until the uploading gets over.
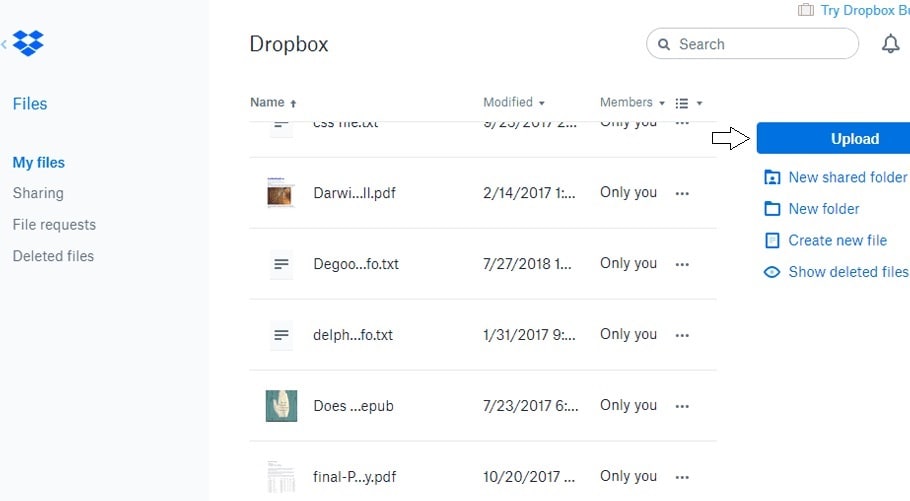
- Next up, over your computer, visit the browser and enter dropbox.com to open the website. Sign in by means of the same credentials as you used in your device.
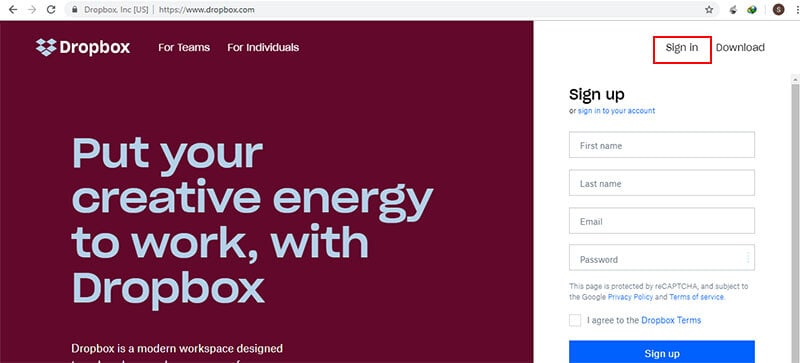
- Now, you can easily take a look at the videos being shown on the computer screen. At the corner of each video, you will observe three dots. Clicking on it will let you opt for the "Download" button. Do the same and get video from Android to PC.
Part 6: Transfer videos from Android to PC by Whatsapp Web Page
This is not known to many people out there. You can take help of WhatsApp web page to get your videos transferred from Android to PC. There is no need to connect your Android to the PC for this method. All you will need is to scan the QR code from the device. Go through the guide below for a detailed explanation on how to move videos with it.
- Make use of an alternative contact number before you proceed with this method. For instance, take help from your friend's or spouse's number or anyone you are comfortable with. Send the videos on this contact.
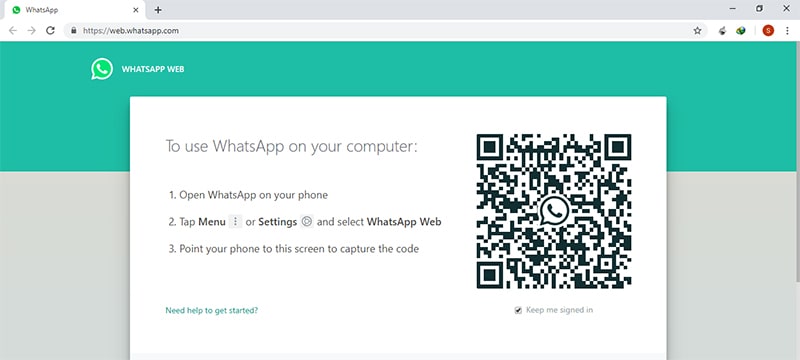
- Open your computer, visit the browser and head to the web.whatsapp.com.
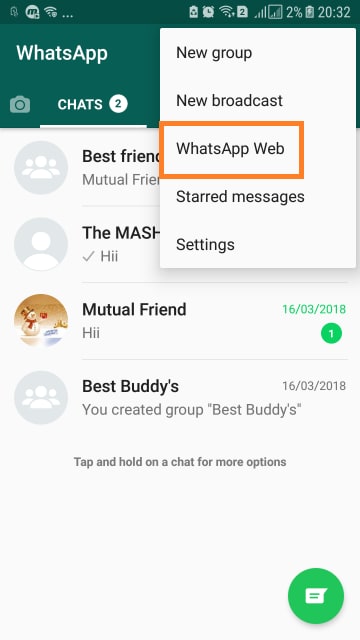
- In your Android device now, launch WhatsApp and head to the menu on the top right. Click on "WhatsApp Web" option.
- A scanner will appear on your device. Use it to scan the QR code on your computer's screen.
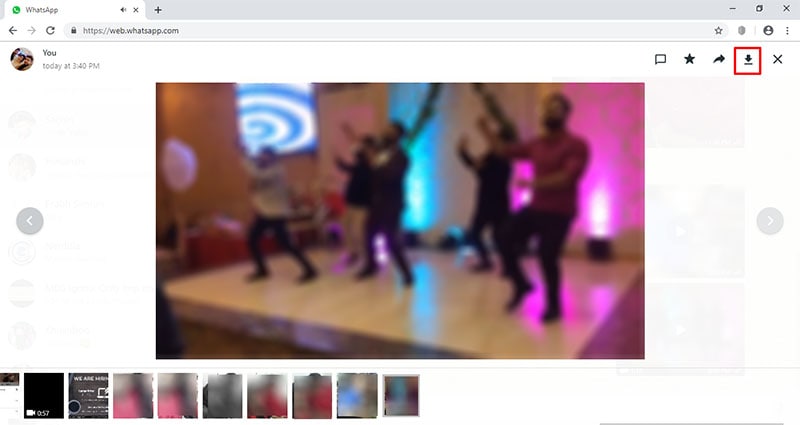
- WhatsApp will now open in your PC. Open the chat where videos were sent. Tap on the video and download it on your computer. This way you will easily copy videos from Android to PC.
Part 7: Move Videos from Android to PC through Email
Last but definitely not least, we would like to suggest your Email method for moving videos from Android to PC. Although it is helpful, it can be a time-consuming process. The steps involved in this process are as follows.
- Launch the Gmail app on your phone and sign in if not already signed in.
- Hit on the pencil-like icon and get into the "Compose" mail screen. Here, firstly enter the email address that you can access, like enter another email of yours.
- On the top, you will find an attachment icon. You need to click on it followed by "Attach File".
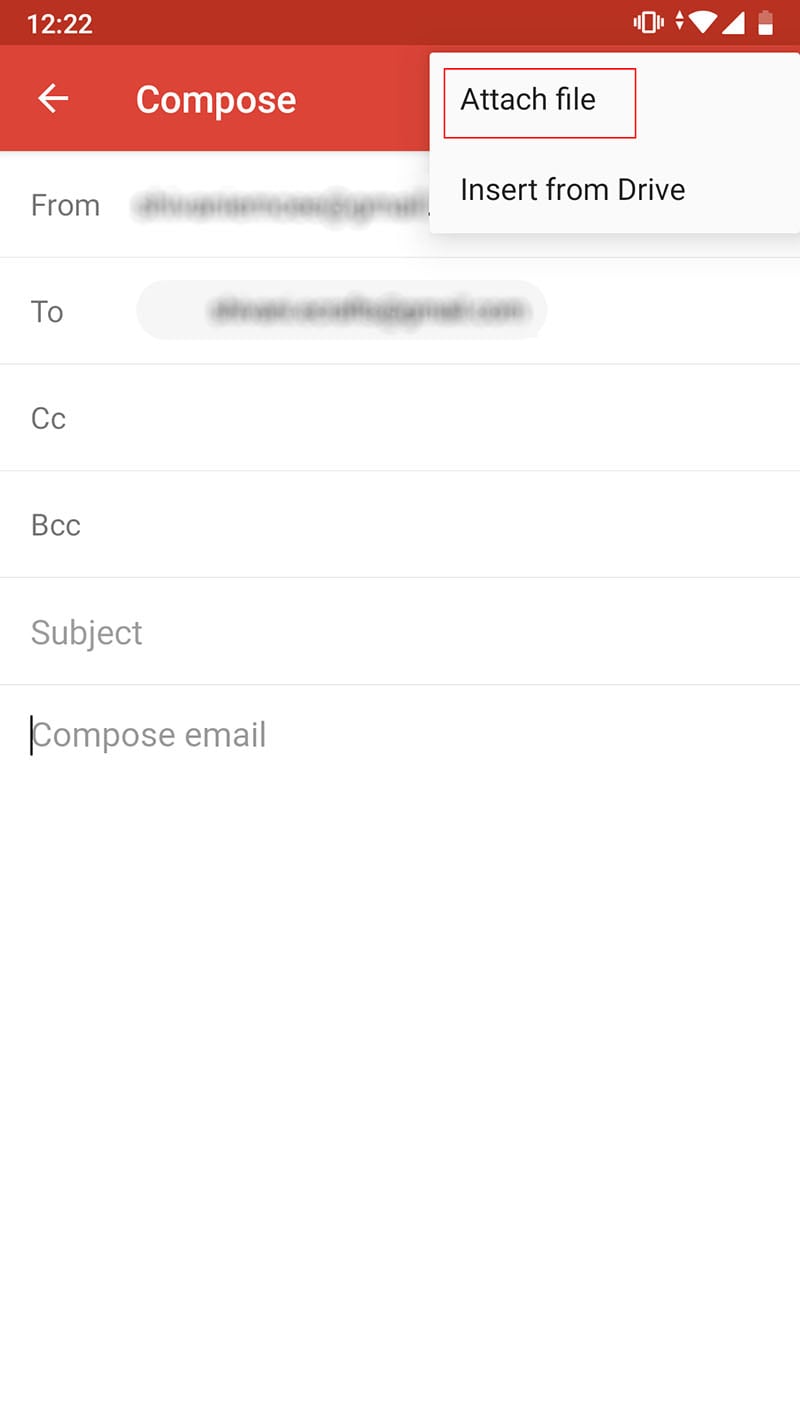
- Look or the videos to be transferred into PC and get these attached in the composed mail.
- On your PC now, open Gmail and login with the email address you entered in the recipient's place to receive the mail. Open the inbox and download the videos. Save them to the desired folder and you are done.
Part 8: Comparison
On a final note, we would like to share a comparison chart with you so that you get the full analyses on each of the methods. This way, you will be easily able to uncover a suitable method for you. Check out the following table.
| Features | Time-Convenience | One-Click to Transfer All | High-Speed Internet Required | Supports Transfer of All Data Types (Music, Messages, Contacts, Documents, Videos, Photos, etc.) |
| dr.fone – Transfer (Android) | Extremely Fast | Yes | No | Yes |
| AutoPlay | Slow | No | No | Only photos, videos, and music |
| Explorer | Fast | No | No | Yes |
| Google Photos | Medium (Depends on Internet Speed) | No | Yes | Only photos and videos |
| Dropbox | Medium (Depends on Internet Speed) | No | Yes | Yes |
| WhatsApp Web | Medium (Depends on Internet Speed) | No | Yes | Yes |
| Slow | No | Yes | Yes |
Conclusion
This is not necessarily important that everyone knows much about technicalities. And for the people who have little idea over how to copy video from Android to PC, we have elaborated each way in a comprehensible way along with the step by step tutorials.
However, in case you have any query or still have any confusion, simply get in touch with us and jot down in the comments sections given below. Thanks for carefully reading the post and please do let us know your perspective on it.
Basil Rathbone
Editor