Wondershare Dr.Fone 
Back Up & Restore iOS Data Turns Flexible
· Back up iPhone/iPad/iPod touch automatically and wirelessly.
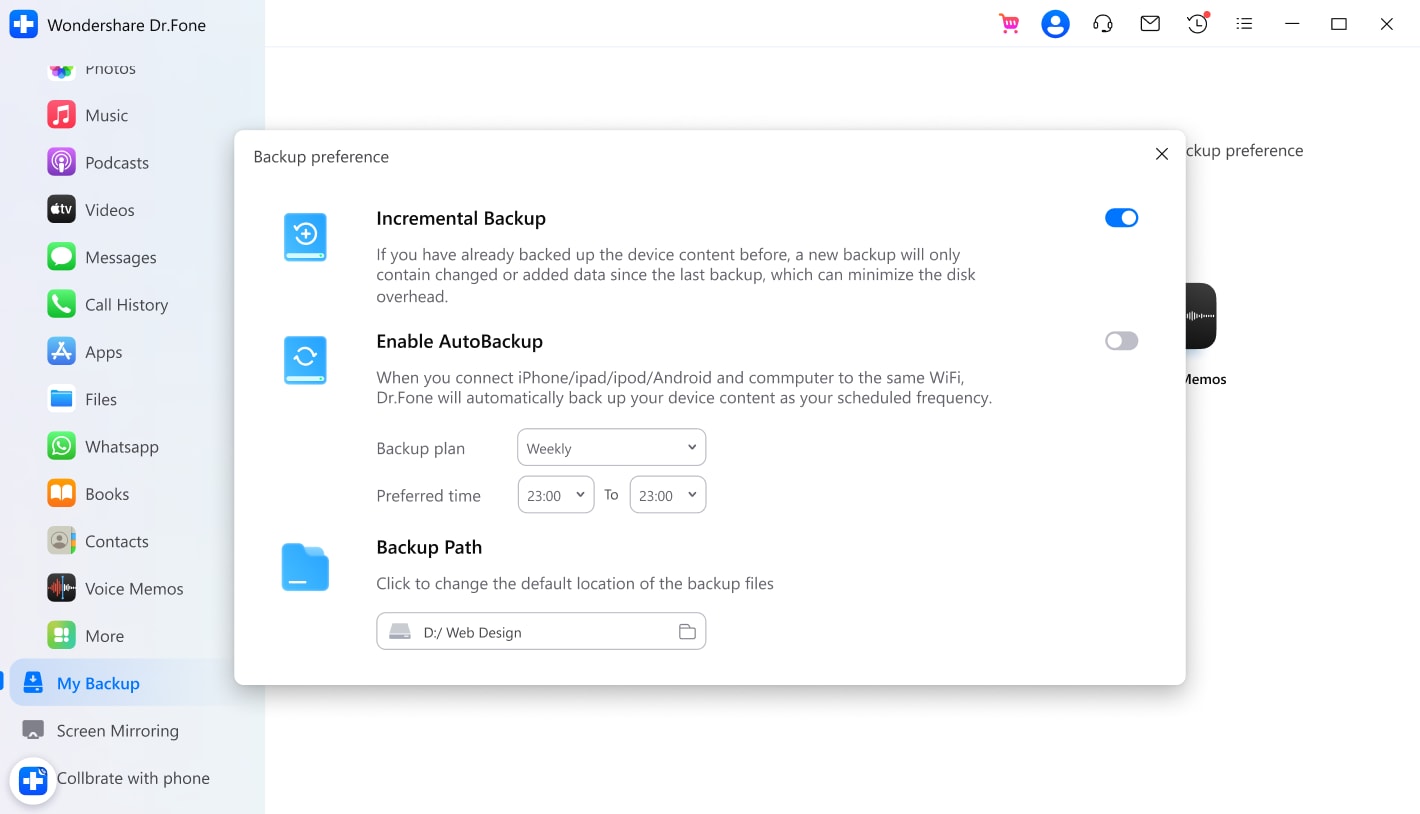
· Each backup is an increment for a previous backup to save space.
· Preview and restore any item from the backup to iOS/Android devices.
· Restore iCloud/iTunes backups to any device selectively.
· No data loss during transfer, backup, and restore.
Watch how to back up and restore data on iPhone
Back Up & Restore Made More Intuitive and Easier
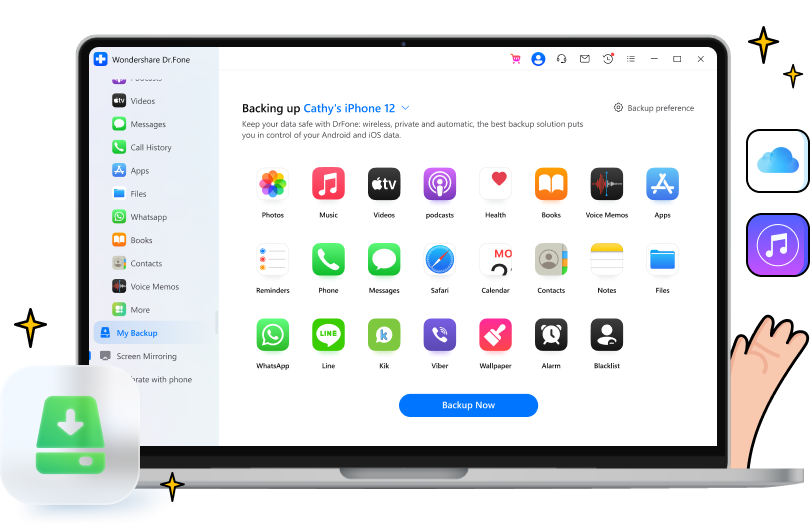
Compared to backing up iPhones with iTunes or iCloud, Dr.Fone can help back up 24 data types, such as photos, videos, music, podcast, books, contacts, blacklist, safari data, reminders, notes, app data, etc., and restore data more flexibly and selectively without overwriting existing data.

Incremental
Save time and disk space by only backing up changed files.

Preview
Access and view the contents of an iPhone or iPad's backup.

Selective
Restore data selectively according to your needs.
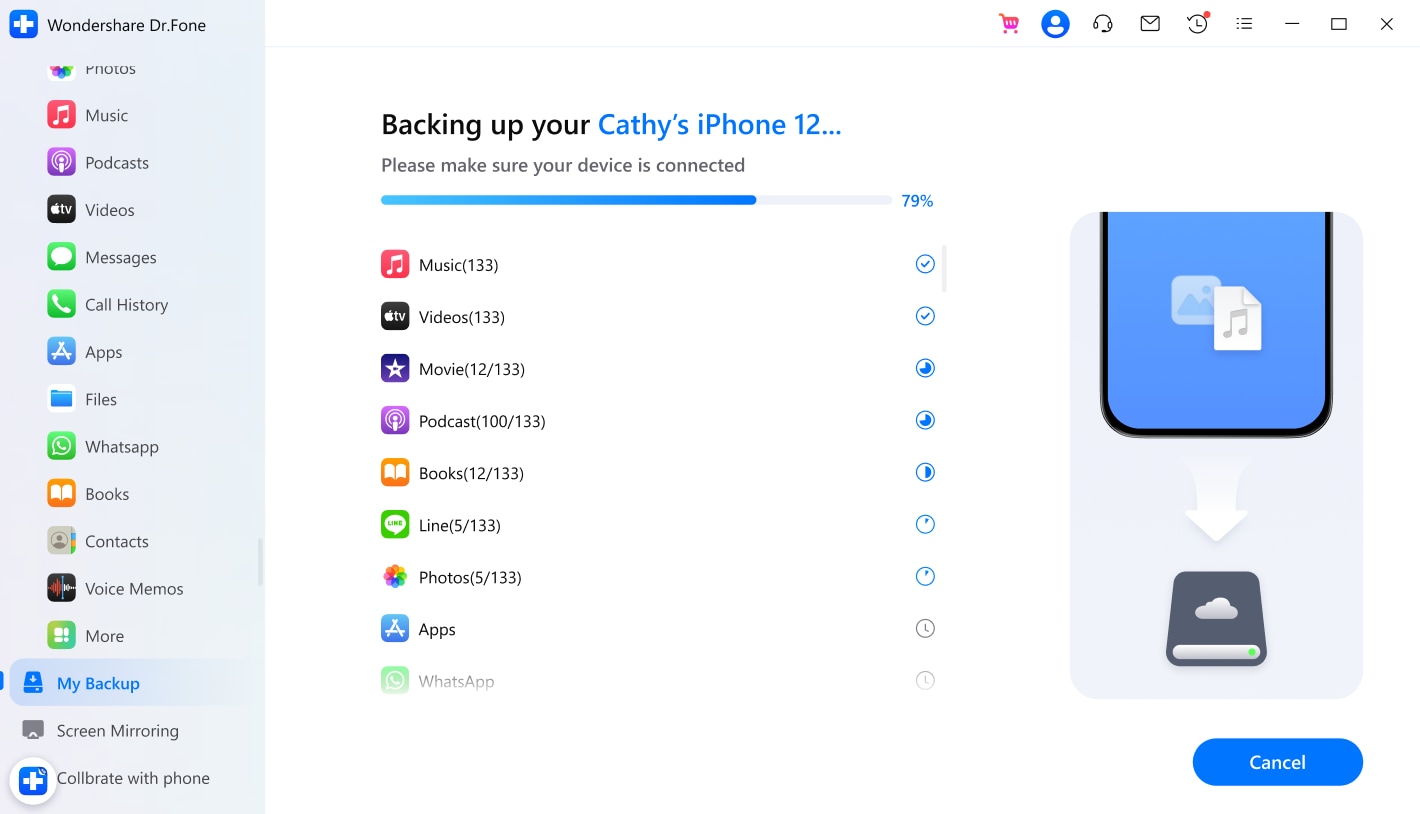
Back Up Files Wirelessly and Automatically
The automatic, always-on Dr.Fone backup saves you from accidental deletion and dramatically eases the backup task. Once you connect your iPhone, iPad, or iPod touch and computer via a lightning cable or the same Wi-Fi, the program will automatically back up data on your iOS device to keep it safe. The new backup file won't overwrite the old one. You can do a backup whenever you want.
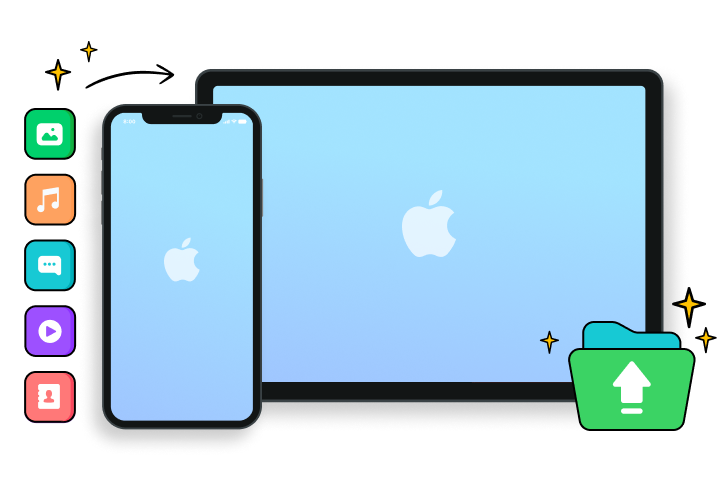

Restore Backups to Any Device Selectively
Just as you'd expect from Dr.Fone, you can easily access your backed-up files anytime from your computer. iTunes and iCloud are the official way to back up iOS devices. But with these methods, you can only restore the entire backup to your iPhone, iPad, or iPod touch. Now, you can use Dr.Fone to preview the complete iTunes/iCloud/Dr.Fone backup and restore only the files you need to your device.
Tech Specs
Processor
1 GHz or faster processor (Intel or AMD)
RAM
2 GB or more of RAM
Hard Disk Space
200 MB of available hard disk space
Apple OS
Requires iOS 9.0 or later
Computer OS
Requires Windows 7 or newer
Requires Mac OS X 10.8 & higher
Requires Mac OS X 10.8 & higher
FAQs - You May Still Be Wondering
-
How to back up your iPhone with iTunes?To back up your iPhone/iPad using iTunes, just:
Step 1. Make sure you have the latest version of iTunes on your computer.
Step 2. Connect your iPhone to the computer. Tap Trust on your iPhone.
Step 3. Hit the iPhone icon in the top left corner.
Step 4. Go to the Summary tab. Select This Computer and hit Back Up Now to back up iOS devices using iTunes. -
What does iCloud backup include?iCloud only backs up the data on your iOS device. It doesn't back up the data already synced to iCloud, such as contacts, calendars, bookmarks, mail, voice memos, iCloud photos, etc. If you've enabled Messages in iCloud, they are not included in your iCloud backup. So iCloud backup includes information like app data, device settings, home screen, app organization, iMessage, photos, videos, purchase history, ringtones, etc.
To enable iCloud backup:
Step 1. Connect your iOS device to a stable Wi-Fi network.
Step 2. Go to Settings, and tap iCloud > Backup.
Step 3. Turn on iCloud backup, and tap "Back Up Now". -
How to extract and restore only photos from iTunes backup?Apple allows us to restore the whole backup to the iPhone, iPad, or iPod touch, and most unfriendly, it erases all data we stored on the device after the previous backup. So, to restore only photos from iTunes backup, we need the help of a third-party tool, like Wondershare Dr.Fone.
To restore only photos from iTunes backup,
Step 1. Launch Dr.Fone on your computer.
Step 2. Click on "My Backup" and then on "Other Backups".
Step 3. Go to Restore from iTunes backup and select the backup file that stores your Photos.
Step 4. Connect your iPhone to the computer. Preview the photos in the iTunes backup and restore them to your iPhone in 1 click. -
Can you restore from iCloud without resetting?The answer is YES. To restore from iCloud backup without resetting, just follow the steps below.
Step 1. Launch Dr.Fone on your computer.
Step 2. Connect your iPhone to your computer using a lightning cable.
Step 3. Select "iCloud Manager", and sign in with your iCloud account.
Step 4. Select the iCloud backup file you'd like to restore and hit "Export to Device".
Step 5. Preview your iCloud backup file and start to restore iCloud to your iPhone without resetting.
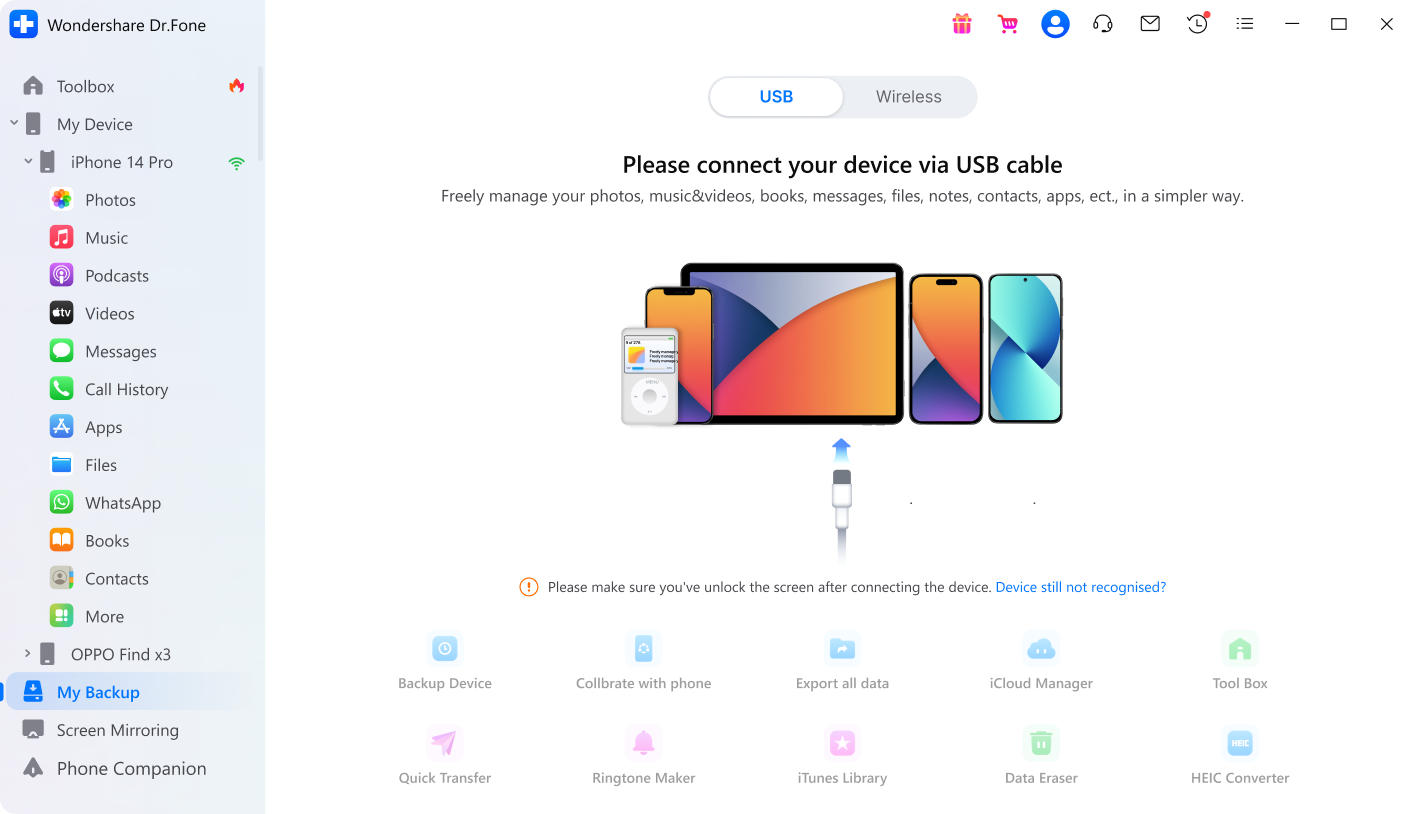
All-in-One Data Manager Tool for Your Mobile Devices
When you need to transfer, manage, back up, restore data across devices, or mirror your screen to a PC, Dr.Fone helps you get it done—all in one place.
Phone Manager
Easily manage iOS/Android data and export to computer/iTunes/iCloud.
Phone Backup
Back up iOS/Android data to a PC and restore backups selectively.
Screen Mirror
Mirror, control, and record your mobile device screen on a Windows PC.