
"Is there a safe, stable application for reading from and writing to ext4 file systems on Mac OS X? If not, what's the best way to access the contents of an ext4 file system on Mac OS X?" -- A Question from Stack Exchange
Although the Ext4 is native to the Linux operating system, there are a few ways you can read and write to them on your macOS. In the table below, you can see the solutions provided in this article and the situations you can use them in.
Methods |
Scenarios |
| Method 1: Using a virtual machine host (VM) | When you need to access the files quickly and don’t need to access this filesystem format later. |
| Method 2: Using a free third-party tool (macFUSE) | You work with Ext4-formatted disks often and/or need to move files from them to your Mac. |
| Method 3: Using a paid third-party tool (ExTFS for mac by Paragon) | You work with Ext4-formatted disks often and are willing to pay for premium services for it. |
Method 1: Using a Virtual Machine Host to Access Ext4 files on macOS
You can use virtual machine hosts such as VirtualBox if you need a temporary fix for accessing Ext4 files.
Step 1: Install VirtualBox.
Step 2: Install the Linux distributor of your choosing on the VM.
Step 3: Access the files you need.
Note: Remember that this method is best suited for users who often don’t work with Ext4 files and requires installing different software, which is time-consuming. The next two methods are your best options if you work with this filesystem more often.
Method 2: Mount Ext4 on MacOS Using a Free Third-Party Tool (macFUSE)
This method will help you read and write to Ext4 drives and is completely free. Let’s see how it works.
Step 1: Download and Install macFUSE from its official website.
Step 2: The installer window will open. Click on the install macFUSE and start the installation process.

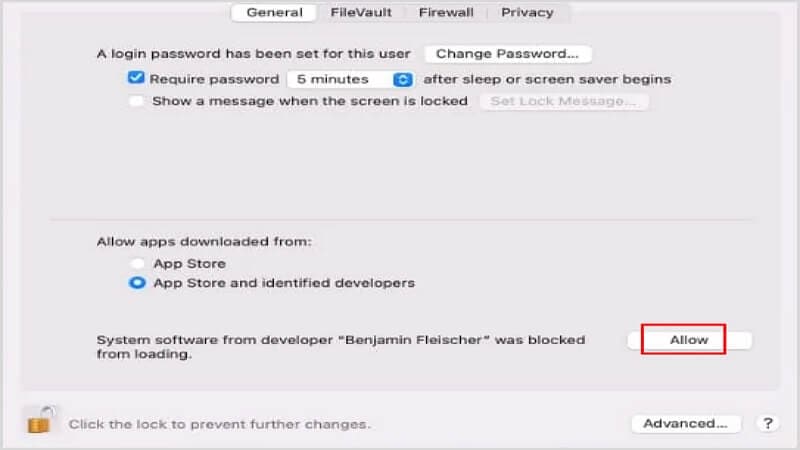
Step 3: Before the installation is completed, you will get a message saying the software was blocked from loading. In the new window, click on the Allow button.
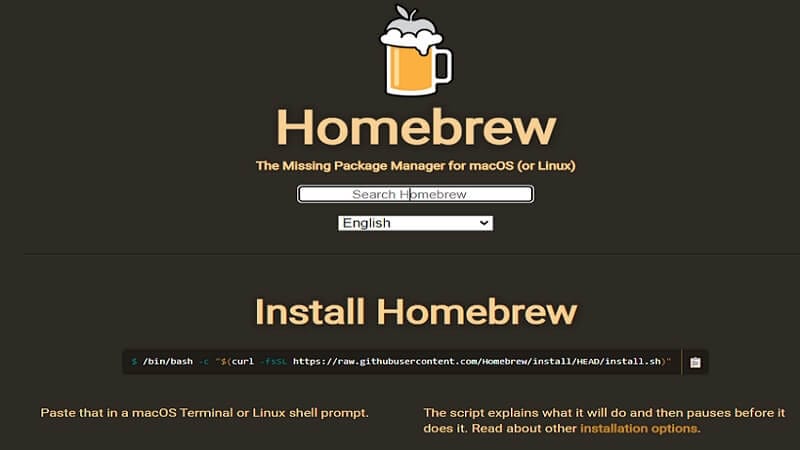
Step 4: Now, you can install ext4fuse. A convenient way to do so is by installing Homebrew. After installing Homebrew, run the following command line: brew install ext4fuse
Step 5: Next, you must identify which drive you wish to mount the Ext4 disk on. Plug in the hard disk drive and run this command line: diskutil list
Step 6: Write down your partition ID. Let’s imagine the ID is /dev/disk2r3. Now, run the following command line: sudo ext4fuse /dev/disk2r3 ~/tmp/MY_DISK_PARTITION -o allow_other
Step 7: In the /tmp/ directory, you can find the contents of the installed partition. To mount each partition, you can follow the steps above but keep in mind that you must use different directory names.

Note: The tools in this method will help you with any Ext4-related task you have that is not stable, which means you shouldn’t try to write data on your Ext4 drives, or you will likely lose data. In case you have lost your data, you can read this tutorial to recover data from the Ext4 drive.
Method 3: Mount Ext4 on MacOS Using a Paid Tool (ExtFS for macOS by Paragon)
The extFS software by paragon grants users read-write access to Ext4 drives and has the following features:
- Supports both intel-based and M1-based Macs.
- Compatibility with 3rd-party software such as TrueCrypt, Parallels Desktop, and VMware Fusion.
- Supports all alphabets supported by your operating system, including non-roman and non-Latin characters.
- Automatically mounts volumes at startup. This feature can also be disabled at any time.
- Compatible with macOS Sierra or later.
Let’s see how you can use it to access Ext4 drives.
Step 1: Download and install the exTFS software via the official website.
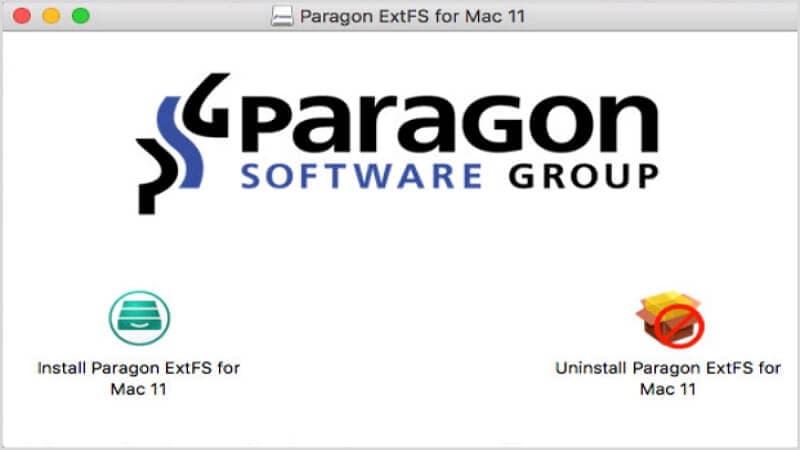
Step 2: After installation, you will be asked to restart your Mac.
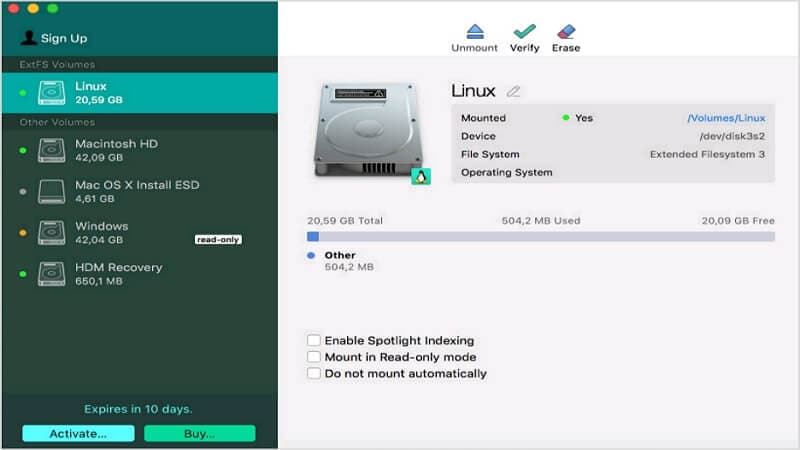
Step 3: Launch the Paragon ExtFS on your Mac by navigating to Applications > Paragon ExtFS for Mac. The extFS volumes are now in the interface of Paragon ExtFS. You can read, write, modify, and transfer data in it.
The price for this software is currently 39.9$, but you can get up to a 25% discount if your purchase five or more licenses. Besides, you have ten days of the free trial before purchasing, and the software will be blocked until you purchase a license after ten days.
Video Tutorial-How To Create A Partition For A Drive on macOS
Conclusion
The Ext4 filesystem format is native to Linux, but there are a variety of ways to access them on macOS. Some of the methods are free, but they are also unstable, temporary, and don’t have all the features that paid software has. The exTFS software by Paragon is stable and has premium features that you will find helpful.
For Windows XP/Vista/7/8/10/11
For macOS X 10.10 or later

