iPhone Problems
- iPhone Apple Logo+
- iPhone Update Problem+
- iPhone Sound Problem+
- iPhone Common Problems+
- iPhone syncing Problems+

• Filed to: Fix iPhone System • Proven solutions
Where upgrading your iOS 13 is a fairly simple and straightforward process, downgrading iOS 13 it to an earlier built is a bit tricky. And to add insult to the injury, many times the downgrading process cannot be completed without some or almost all data loss.
Although your data can be restored to your iPhone if you have already backed it up, the process demands overhead and additional efforts.
That said, Apple strongly suggests its end-users to only upgrade to a stable and officially released version of iOS to avoid such hassles. However, if you’re curious and understand the technical hazards that you may stumble upon after upgrading iOS 13, rest assured that no problem is too big to become unsolvable.
Even though this article primarily focuses on downgrading iOS 13 on iPhone to iOS 12, the process is identical in almost every scenario.
Part One: Back Up Your iPhone Before Downgrade
Because upgrading to an upper version of iOS doesn’t change or remove your personal data or settings but downgrading does, it is important to back up your iPhone before you begin with the process.
Even though most people rely on iTunes to perform most of their iPhone’s maintenance and troubleshooting tasks, there are several third-party programs that have been developed precisely for such jobs.
Since these apps’ sole purpose is to resolve all kinds of issues related to iDevices, they are pretty good at it.
Once such a tool developed by a team of geniuses is dr.fone and is easily available for download. You can follow the steps given below to use dr.fone to back up your iPhone before downgrading your current iOS 13 to an earlier built:
- Depending on your computer’s platform (Windows or Mac), download and install a compatible version of dr.fone from its official website. (A Windows 10 PC is used here for example.)
- Use the lightning cable to connect your iPhone to your computer. Close iTunes if it launches automatically.
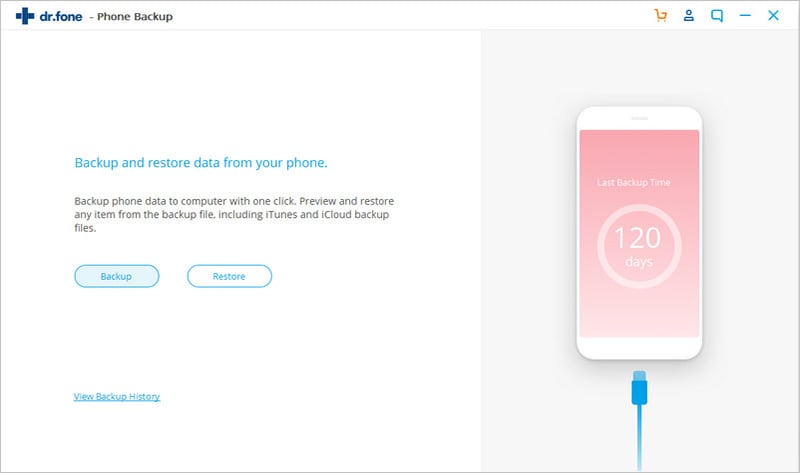
- Manually launch dr.fone from the Desktop shortcut icon or the Start. Click Backup&Restore from the program’s main interface.
- Click Backup on the next window.
- When the next window opens up, leave the boxes for the items you want to back up checked, and uncheck those you don’t need.
- Click the Folder icon next to the Backup Path field and choose your preferred location to save the backup file.
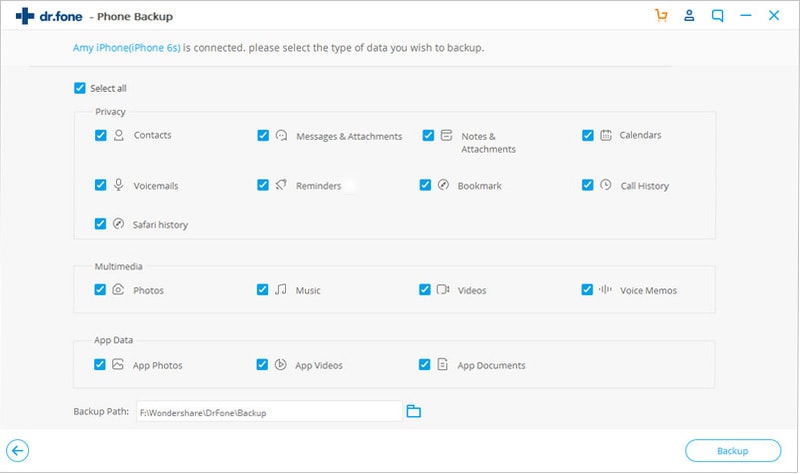
- Click Backup .
- Wait while dr.fone backs up your iPhone to your local computer.
Part Two: Downgrade iOS 13 with iTunes
As mentioned earlier, downgrading an iOS to a previous built is not as simple as upgrading it. Rather, in addition backing up your iPhone as explained in Part One , the process also involves a couple of preliminary steps to be performed on your phone, a compatible iOS file (.IPSW file) to be downloaded to your Windows or Mac computer, and then performing the downgrade process (that may take a while to complete).
The method explained below describes all the steps that need to be performed in order to downgrade your iPhone to an earlier iOS version:
Step 1: Download Correct iOS .IPSW File
Because every iPhone model uses a different iOS variant that Apple developed precisely for its hardware, you must identify and download a compatible one, failing to which you may end up bricking your iPhone and making it unresponsive.
If you are unsure about your iPhone model, you can check the details by going to Settings > General > About , and looking at the Model Number on the About window. You can tap the Model Number field to toggle between the two types of numbers, note down both of them at a safe place, and use these details to identify and download a correct .IPSW file for your iPhone.
You can follow the steps below to identify, locate, and then download a compatible iOS variant for your phone:
- Go to the https://ipsw.me/#platform
- Select your iPhone model.
- Select the .IPSW file for the most recent official release of the iOS.
- Download the .IPSW file to your local computer.
Step 2: Disable Find My iPhone
This step is important, and without it, iTunes won’t allow you to downgrade your iPhone to an earlier iOS. Although this feature gets enabled automatically as soon as the downgrade process completes and a fresh iOS is installed on your iPhone, you must double-check this as soon as your device starts working after downgrading.
To disable Find My iPhone , you must:
- Tap Settings from the Home
- Tap Apple ID, iCloud, iTunes & App Store .
- Tap cloud on the next screen.
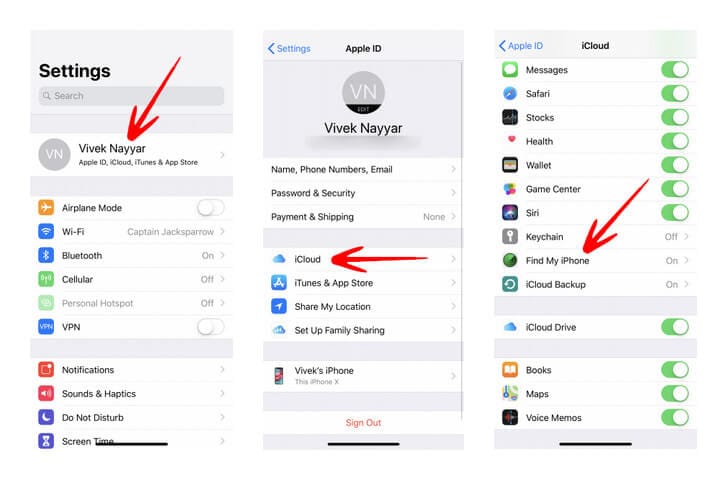
- Tap Find My iPhone from the APPS USING ICLOUD.
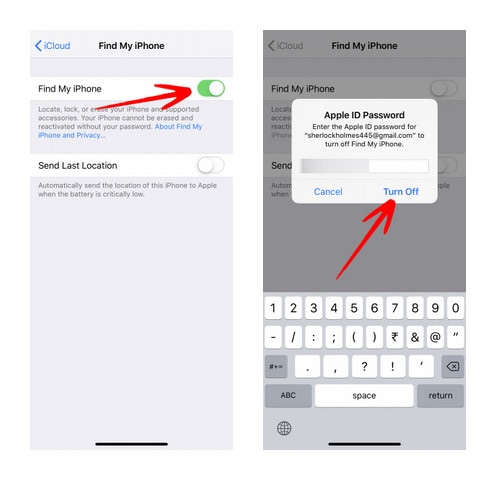
- Tap the Find My iPhone toggle switch on the next window.
- Enter your Apple ID password in the box when prompted.
- Tap Turn off to disable Find My iPhone .
Step 3: Perform Custom Restore
Usually iTunes downloads and installs the most recent version of iOS that is available for your iPhone when your click Restore iPhone on the iTunes’ Summary window. However, if you want to go back to an earlier built, you must do something more than that.
This is what needs to be done to perform a custom restore:
- Connect your iPhone to a Windows or Mac computer.
- Launch iTunes if it doesn’t start automatically.
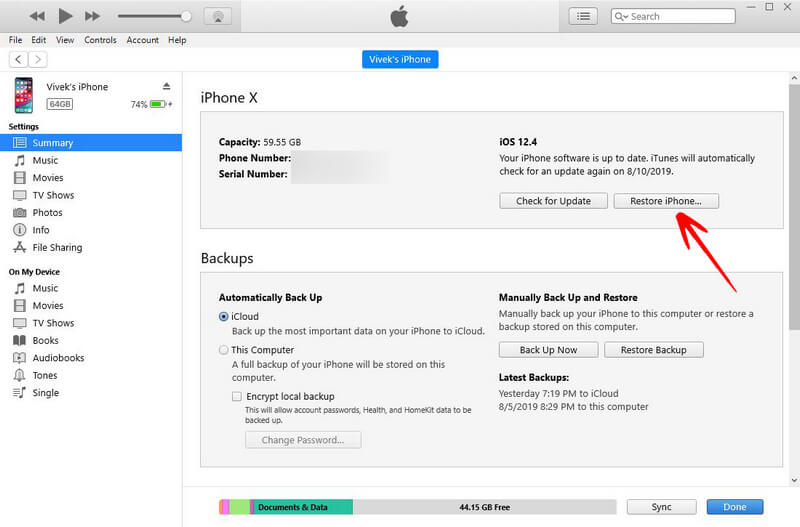
- Click the Phone icon from the top of the iTunes’ interface.
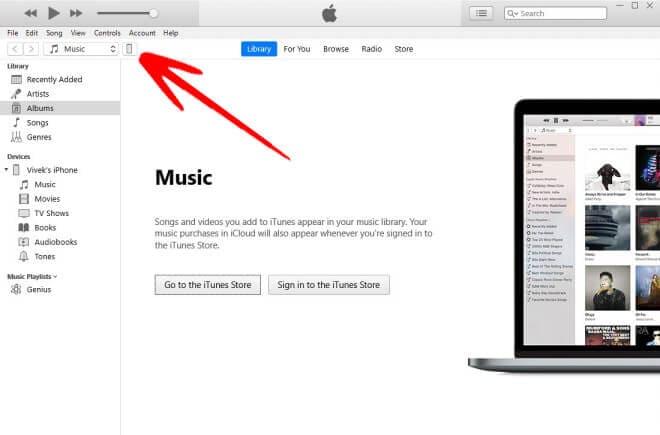
- When on the Summary window, press and hold down the SHIFT key and click Restore iPhone from the top section of the right pane.
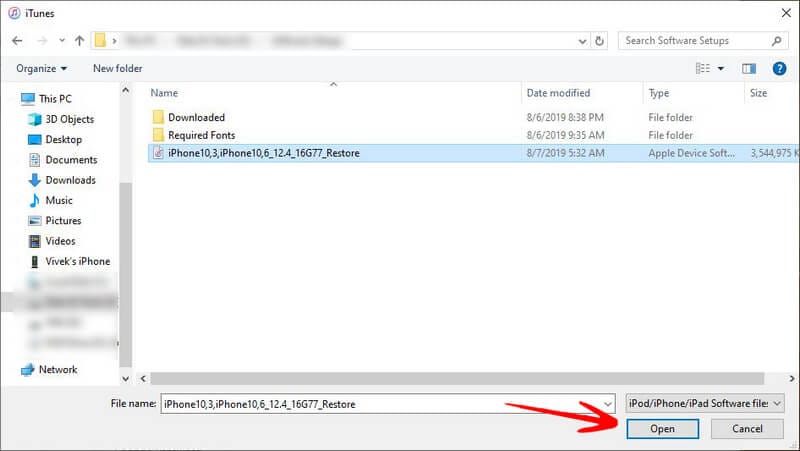
- Use the iTunes box that opens up next to locate and select the.IPSW file you downloaded in Step 1 .
- Click Open and follow the on-screen instructions to downgrade iOS 13 back to an official iOS release.
Step 4: Restore Your Archived iOS Backup to Your iPhone
Once you have downgraded your iPhone to a previous version of iOS, it’s time to restore your personal data back to it. If you backed up your phone earlier, the process should be straightforward. This is what you need to do to restore your data back to your iPhone:
- Connect your iPhone to your Windows or Mac computer.
- Launch iTunes manually if it fails to initialize automatically.
- Click the Phone icon from the top to get to the Summary
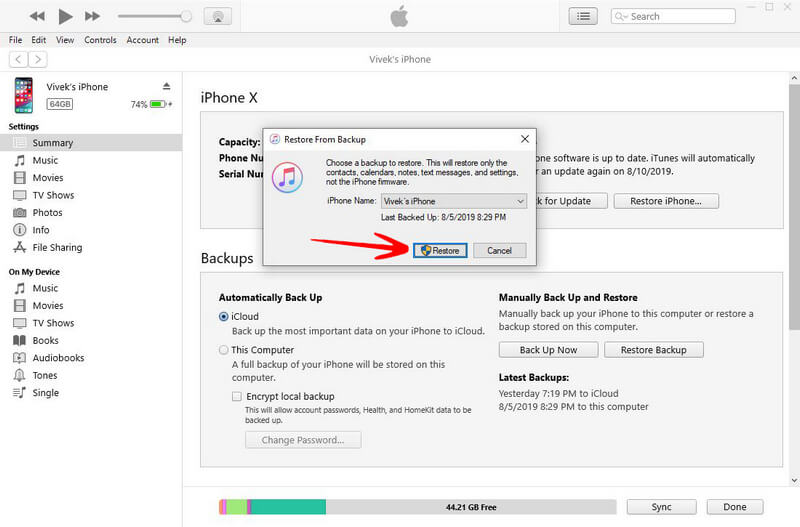
- Click Restore Backup from the Backups section in the right pane.

- On the Restore From Backup box, ensure that the correct iPhone is selected in the iPhone Name drop-down list. (This is important in case you have backed other iPhones of your family members or friends on this computer).
- Click Restore .
- Follow the on-screen instructions from there to restore your iPhone from the archived backup.
Part Three: Downgrade Your iOS 13 without Using iTunes
Although many people use iTunes when it comes to downgrading iOS on an iDevice, a third-party tool dr.fone does the job more efficiently, reliably, and with the least efforts.
The steps below explain how you can use dr.fone to downgrade iOS 13, and that too without using iTunes:
- If not already done so, download and install dr.fone explained in Part One and complete the registration process..
- Connect your iPhone to your Windows or Mac computer.
- Close iTunes if it launches automatically.
- Start dr.fone from the Start menu or its shortcut icon on the Desktop .
- Click Repair from the app’s main interface.

- Choose any error from the list on the next window. ( iPhone/iPad won’t update is selected here.)
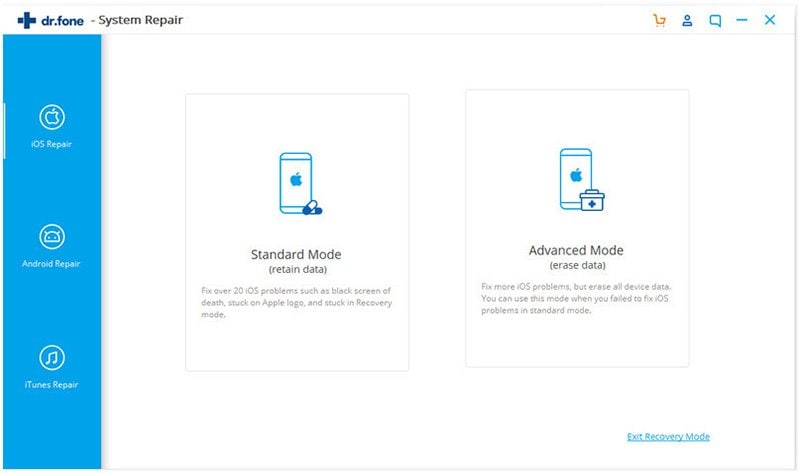
Note: You can select any option regardless of its nature. The only motive to select an issue here is to make dr.fone believe that the connected iPhone needs to be restored to the most stable iOS that’s available online.
- Click Start to activate DFU mode.
Note: If see a message "your device is connected but not recognized", that is depended on the issue you selected. The message on this screen may vary, or the screen may not appear at all. The issue selected for this demonstration is the surest way to downgrade iOS 13 to an earlier built.
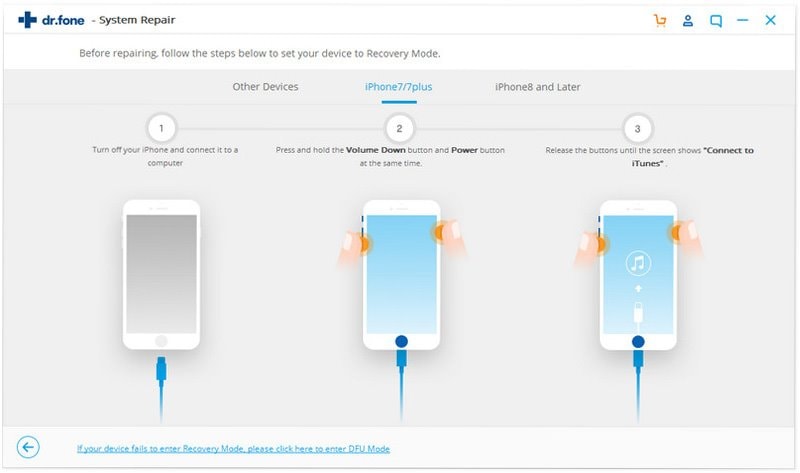
- Follow the steps shown on the next window to put your iPhone in Recovery Mode .
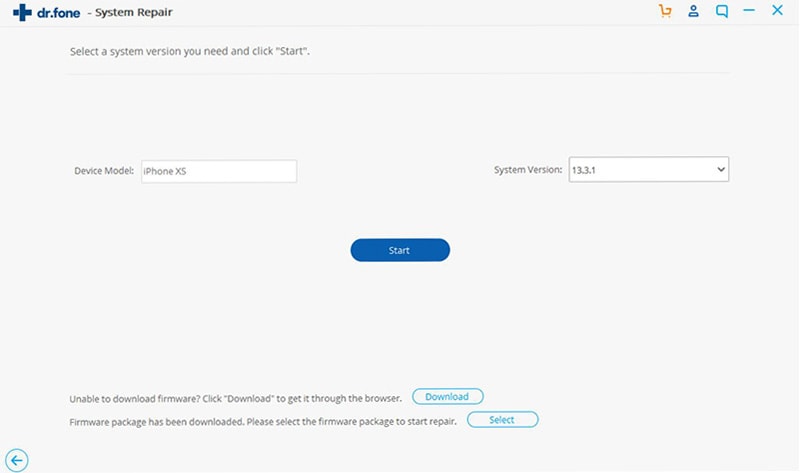
- On the next window, ensure that all the details in the pre-populated boxes are correct and up-to-date.
- Most importantly ensure that the most recent version of iOS is selected in the list box.
- Click Start and follow the on-screen instructions to continue with the downgrade process.
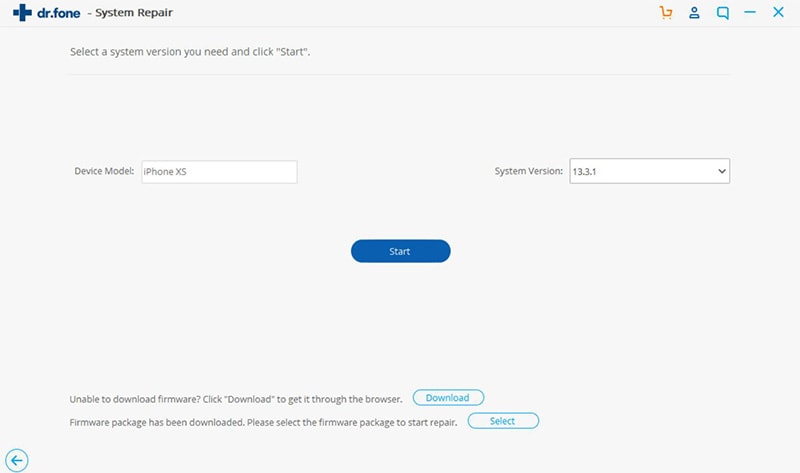
Note: If the last box doesn’t show the latest version of iOS, you must download the.IPSW file of the correct one manually as explained in Step 1 of the Part Two section, click Select instead of Start, locate and select the downloaded.IPSW file, and follow the on-screen instructions from there to downgrade iOS 13 to a more stable iOS version.
Restore Data Without iTunes After Downgrading
- Connect your iPhone to your Windows or Mac computer.
- Launch dr.fone and click Backup&Restore .
- Click Restore on the next window.
- Select a backup from the list that comes up on the next window.
- On the next window, from the left pane, review all the contents that will be restored. (Deselect those you don’t want.)
- Click Restore to Device from the bottom-right corner of the right pane.
Note: You can also click Export to PC if you want to extract the backup file to your local computer, and pick the files you want to work on.
Conclusion
At the time of this writing, iOS 13 is still in the beta phase and has a lot of bugs and instabilities in it. This is not only the case with this particular iOS but with any version that is under development, and has been rolled out for developers and curious users to test its efficiencies.
If you are a simple, non-technical user who uses iPhone for daily personal and business important tasks, you are suggested NOT to upgrade to any pre-release version of iOS as it may jeopardize the entire device, and you may end up with:
- A completely bricked iPhone
- Unstable or unresponsive iPhone
- Permanent data loss
- Exposure to intrusions and/or external attacks
- Data theft
- Theft of personal and sensitive information such as your bank details, ID, password, etc.
- Hardware damage, etc.
Considering the above risks, you should upgrade to a beta iOS only if:
- You know how to deal with security breaches
- Your iPhone doesn’t have any personal information
- You use your iPhone for less important tasks
You should also take utmost care while selecting the.IPSW file to downgrade your iPhone to. As mentioned earlier, a wrongly installed iOS may make your iPhone non-responsive or keep it from booting altogether.
Basil Rathbone
Editor