How to Get Out of iPhone Recovery Mode: Fix with 4 Ways (No Data Loss)

This article shows you how to restore iPhone from Recovery Mode and get data back to your iPhone in different ways.

• Filed to: Fix iPhone System • Proven solutions

For iPhone users, iPhone stuck in recovery mode may be caused by various reasons, such as system errors, firmware update failure, etc. How to get out of iPhone recovery mode? Don't worry, here will provide a comprehensive guide for you to restore iPhone recovery mode, even no worry about data loss!

Part 1. What Is Recovery Mode?

Now that you've probably gone through the process of booting in recovery mode to fix your iPhone, you might wonder how booting in it allows you to fix a lot of issues you encounter with your phone. The answer is pretty simple. The iPhone's recovery mode grants you access to restore and upgrade your phone's software that booting in normal mode cannot really do. Having your phone boot in recovery mode, though only allows you to upgrade and recover, gives you a higher level of accessing your phone in such ways that you wouldn't normally do. It allows you to do such things so you can fix more software errors in your phone. Take note that since you are granted a different level of access, you must be careful or you'll make things worse with your iPhone.

Part 2. Restore iPhone from Recovery Mode with iTunes/iCloud.

Booting an iPhone in recovery mode is considered a risky step by many iPhone fans and should be done carefully if it really needs to be done. One reason for such a warning is that putting your iPhone in recovery mode and restoring it afterward will have all your phone's data wiped out. Upon restoration, only the software that was originally in your phone after purchase will be present. You'll have to use an iTunes or iCloud backup file if you want to restore the data back to your phone. Though doing it may sound a bit scary, fear not as being careful while working to fix your phone in recovery mode will guarantee successful restoration of your phone. Simply read carefully, follow the steps, and do things exactly as stated and you should have your phone up and running in no time.

Step 1. Get the latest iTunes and connect your iPhone

Before proceeding, get the latest version of iTunes if you haven't yet. Having the latest version will give less room for errors. Get a USB cable that can connect your iPhone to your PC. Faulty cables may cause the restoration in recovery mode to fail, so make sure that the cable you're using is working perfectly fine, or better yet, use the USB cable that came with your iPhone's original packaging to guarantee full functionality. Connect the USB cable to your PC while leaving your iPhone disconnected.

Step 2. Power off your iPhone.

Ensure that your iPhone is turned off. If it isn't press the power button and hold it for a few seconds. Release when you see the red slider appear on your screen. Slide it and wait for your phone to switch off. If your phone fails to turn off, you may try holding the power and home buttons at the same time. Only release when your phone is already turned off.

iphone recovery mode restore

Step 3. Import MKV video to the software

Once your phone is turned off, hold its home button while connecting the USB cable to it. Be careful not to release the home button while connecting your phone to the PC or you might need to do it again. Your phone should turn on once connected. Do not release your iPhone's home button unless the "Connect to iTunes screen" appears.

If instead of the "Connect to iTunes screen" you see a battery logo, this means that your phone's battery level is low. Charge it for about ten minutes before trying to boot into recovery mode again. After charging, start the whole process again by beginning at the very first step in this tutorial.

iphone recovery mode restore

Step 4. Restore your iPhone from recovery mode

To notify you that your phone has booted in recovery mode and is already connected to your PC, iTunes will automatically launch and you will see a pop-up message. The message should inform you that you need to restore your iPhone before further use, specifically with iTunes.

Upon getting the pop-up message, just click OK and your iPhone is now ready for restoration. Click Restore afterward to restore your phone to factory settings. At this point, all that your phone is missing is its data. To restore data to your iPhone, you have two options provided by Apple. You may opt to use iTunes if you make backups using it or iCloud if your backups are stored in Apple's cloud system. Note that neither of these two apps will help you restore your phone if you haven't created backups using any of them.

Take note that in some cases, iTunes will not launch automatically. Just in case it doesn't, launch it yourself and it shall display a similar pop-up message.

Using iTunes to Restore Data on Your iPhone

While your iPhone is still connected to your PC, click on "File" on the menu bar, then on "Devices", followed by "Restore from Backup".

iTunes will confirm and ask you which backup you want to use. It will list all iOS devices connected to your computer. Select your iPhone from the list and if you're ready to restore data to your phone, click on "Restore" to proceed. From this point, all you have to do is wait for iTunes to restore the data to your phone.

iphone recovery mode restore 

Using iCloud to Restore Data to Your iPhone

The restoration process for this method will be done wirelessly so it would be wise to ensure first that your phone's network and internet connection is strong and reliable before proceeding with any of the following steps.

Upon restoration to factory settings, you shall see a slider in your iPhone. Slide it to get to the iOS Setup Assistant. Proceed through the setup assistant by choosing a language and setting configurations for your phone.

Once you've finished that stage, the setup assistant will ask you how you would want to set up your iPhone. You will see three different options. In this case, select "Restore from iCloud Backup".

iphone recovery mode restore 

The iOS Setup Assistant will then ask you which backup to use. You'll see a list of all the backups you've created using iCloud. If you've made multiple backups, all of these backups, along with their date and time of creation, will be displayed. Choose the backup you want to use for restoration by tapping on it.

Wait until your phone's data is restored. When you're done restoring, your phone will most likely function the way it was before it ran into a problem.

Part 3. Exit iPhone Recovery Mode Without Data Loss (No Backup)

When you want to exit iPhone recovery mode without iTunes/iCloud backup, to avoid data loss when you get iPhone out of recovery mode, Dr.Fone - System Repair (iOS) will be your ideal choice. Dr.Fone - System Repair is different from other system repair tools, it has a standard mode to help iPhone exit recovery mode without losing data. The following are its main features:

  iphone recovery mode restore

toolkit-for-ios

Dr.Fone - The Best Tool to Fix iPhone System

Why Choose This iOS System Software:

  • Fix almost all iOS system problems, such as stuck in recovery mode, DFU mode, white Apple logo, black screen of death, frozen status, etc.
  • Full iOS compatibility - It does not matter which iOS device (iPhone/iPad/iPod) you are using or what version of the operating system is running on your device.
  • Ease of Use - You do not have to be a computer geek in order to use this tool. It comes with an intuitive user interface that simply guides you through the steps that you have to follow.
  • 100% data protection - The reason why people panic when they see errors on their devices is because they do not want to lose their data.
4,290,481 people have downloaded it
Step 1: Download Dr.Fone on your PC/Mac and choose System Repair, then connect your iPhone.
system repair
Step 2: Select Standard Mode to exit iPhone recovery mode and retain your data.
standard mode
Step 3: Activate DFU mode and download the Firmware.

Following the instructions on the below screen before repairing.

DFU mode

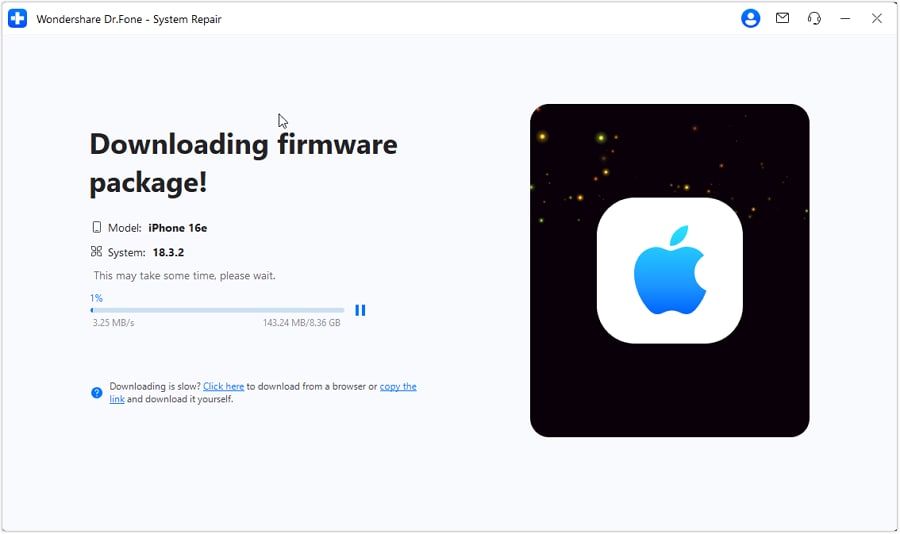
Then download the firmware to start to system repair process.

download firmware
Step 4: Click Fix Now after the firmware is downloaded.
fix now

After your iPhone is fixed successfully, you will see a hint on the below screen.

iphone repaired

Elva

staff Editor

Hot Articles

The Right Technique to Edit and Unsend Messages on iOS 16
Do you want to know how to unsend and edit text messages on your iPhone? Read this article to learn about iOS 16 new Messages features.
What To Do If iOS 16 Battery Life Drains Faster?
Have you ever thought about why is my iPhone battery draining so fast? Read this article to fix this issue with efficient solutions.
All Upcoming News and Expectations for the All-New iOS 16
Are you an iPhone user who gets excited about new software updates? This article will reveal the iOS 16 release date and the iOS 16 features.
Fix iPhone Not Connecting to WiFi Problems in 10 Ways
iPhone not connecting to WiFi is a common problem for iPhone users. Here we collect the top 10 ways to fix iPhone WiFi connection problems.
How To Fix If iPhone X/XR/XS Stuck On Apple Logo?
Is your iPhone X stuck on the Apple logo? Whether you have iPhone X/XR/XS, here are reasons for this issue and ways in easy steps to fix this issue.
How To Fix If Your Phone Is Stuck On Apple Logo Storage Full?
You will quickly learn how to fix if your iPhone is stuck on Apple logo with storage full logo in this article.
Why Is Your iPhone Black And White? Easy Ways To Fix This Issue
Is your iPhone’s colors black and white? Here are common reasons for this issue and four ways in easy steps to fix this issue.
How to Fix iPhone 12/13 Stuck on Apple Logo? 5 Easy Methods
Is your iPhone 12 or 13 stuck on the Apple logo? Here are common reasons for this issue and five easy steps to fix this issue.
Home > > Resource > Fix iPhone System > How to Get Out of iPhone Recovery Mode: Fix with 4 Ways (No Data Loss)