
Have you encountered the iTunes 1100 problem while upgrading or restoring your iPhone 12, 11, iPhone X, iPhone XR, or iPad running iOS 12? If you try to restore your iPhone using iTunes, you'll get the error 1100. Apple's iTunes is an extremely useful application for iPhone. It can be used for various iPhone-related tasks, including media management, data sync, backup, restoration, and more.
But the iTunes error 1100 plagues certain iPhone owners trying to restore or update iOS 16 on their iPhone 14 or earlier models. The worst part is that iTunes does not indicate what to do next beyond saying, "The iPhone could not be updated." If you're having trouble updating or restoring your iPhone, we hope this article can provide useful suggestions.
Part 1. About iPhone (iTunes) Error 1100
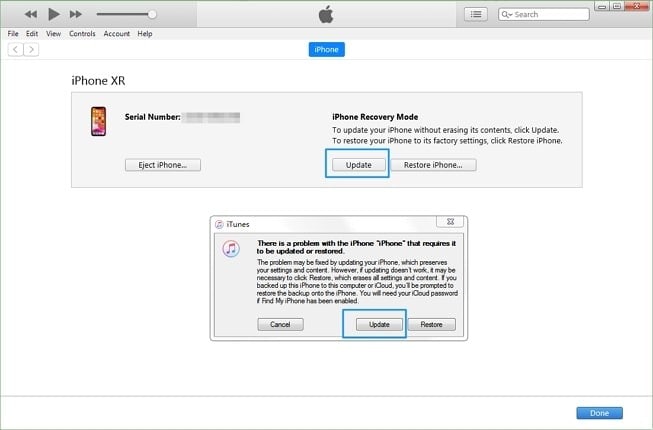
You can get the iTunes error 1100 when you try to restore your device. Like other iTunes errors, this one will result in a warning message from iTunes claiming that the iPhone or iPad could not be restored due to an unknown problem.
There might be a problem with the USB cord, an issue with your version of iTunes, or a problem with the firmware you downloaded. There can be an issue with the firmware you downloaded if you encounter any more problems.
Part 2. 5 Ways to Fix iPhone Error 1100
How to resolve the iTunes 1100 error message while upgrading or restoring iPad and other iPhone devices is shown below. iTunes errors are usually caused by problems with the computer's operating system and have nothing to do with the device itself (iPhone or iPad).
Our suggested troubleshooting procedures are detailed below.
- Connect your device to your computer using the USB cord provided. Just use any other Apple cable if you don't have one.
- Your iOS device's connection can have been broken; please rejoin it. Some devices need you to enter a passcode before they can be used.
- If iTunes is currently active, shut it and launch it again.
- Verify your additional layers of protection. Turning it off altogether is preferable.
- Get a reliable iOS System Recovery Tool and use it.
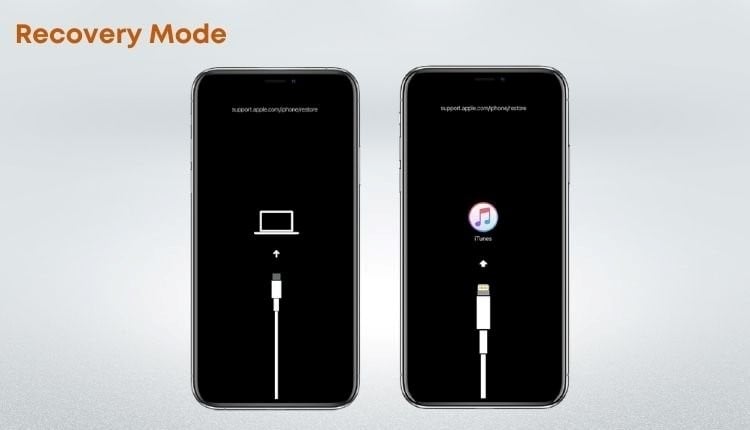
Method 1. Put the iPhone into the Recovery Mode
If your iPhone is malfunctioning and you cannot access the home screen, you need to update it using iTunes while in recovery mode. In recovery mode, you can sync your iPhone with iTunes without rebooting the operating system.
Step 1. Use a USB connection to link your iPhone to your computer so it can charge.
Step 2. Launch a Finder window using Mac OS Catalina or later.
Launch iTunes if you're using a macOS version before Mojave or Windows.
Step 3. If you want to enter recovery mode on your iPhone, you'll need to press and hold a few keys.
- To enter recovery mode on an iPhone 6s or earlier, tap and press the Side and Home switches.
- Press the Side and Volume Down keys on an iPhone 7 or 7 Plus to enter recovery mode.
- When using an iPhone 8 or later, push and immediately release the Volume Up button, then repeat the same with the Volume Down button. After that, keep holding the Side button until the recovery mode screen displays.
Method 2. Try the OTA Update
We provide services tailor-made for the current condition of your iPhone. You can attempt the Over-the-Air (OTA) update, which uses the iPhone's built-in software upgrade mechanism, if your iPhone is functioning correctly, but the iTunes update fails. If this approach has already been attempted, go on to the next.
Learn over-the-air updating below:
Step 1. Select "Settings" and "General" from the drop-down menu. Tap the button.
Step 2. Finally, click on Software Update.
When you tap it, your iPhone will immediately begin looking for updates.
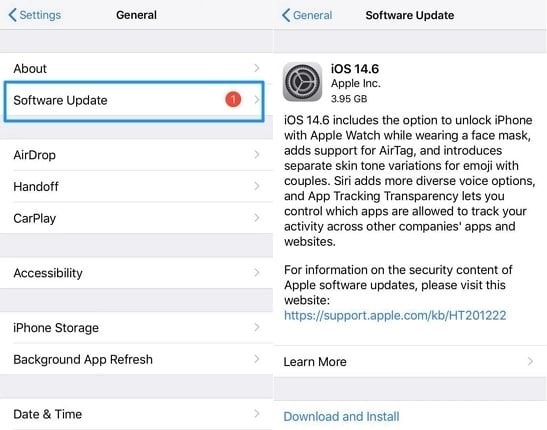
Step 3. Then, when a new version appears, like iOS 16, you can try downloading it by clicking Download and Install.
Step 4. Following the on-screen prompts, please proceed with the software upgrade.
Method 3. Update your iTunes to the Latest One
Another common cause of error 1100 is that your copy of iTunes is not the latest version available for download and installation on your computer. This is because older versions of iTunes can include bugs that prohibit the software on an iPhone from being upgraded or restored, regardless of the version of iOS that the iPhone is currently running. This is the case even if you have the most recent update.
To update iTunes on a Windows PC, you need to adhere to the three simple methods that are provided below:
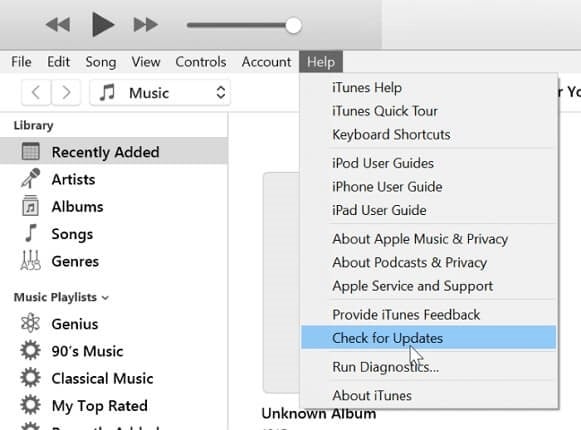
Step 1. Start iTunes on your computer, whether a laptop or a desktop.
Step 2. From the menu bar at the top of the iTunes window, choose the "Help" option and then select "Check for Updates."
Step 3. If an update is available, choose it by clicking the Update button and then following the instructions on the screen.
Note: You can also have iTunes automatically update itself whenever a new version is released.
Method 4. Use Dr.Fone System Repair (iOS)
By streamlining the process of fixing common iOS issues, including the white Apple logo, Recovery Mode, a blank screen, and more, Dr.Fone - System Repair has become a must-have tool for anybody with an iOS device. It is guaranteed that no data will be lost while iOS is being repaired.
Using this function will update your iOS device to the most current version of iOS. Additionally, the update will return your iOS device to a condition where it cannot be jailbroken if it is currently jailbroken. No matter how often you open your iOS device, it will eventually lock again.
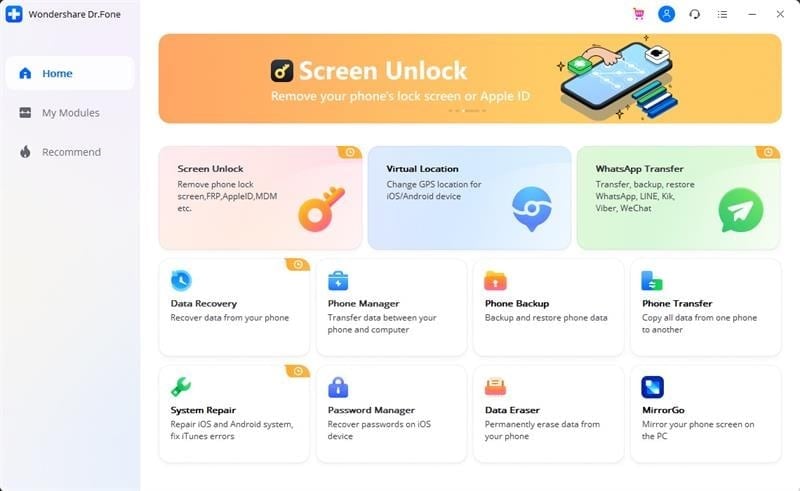
Dr.Fone - System Repair (iOS)
Fix iPhone frozen/stuck on Apple logo with 3 simple steps
2,985,172 people have downloaded it
All it takes to repair the phone system is a mouse click.
Delete all records of your personal information and identity so they can never be recovered.
Recover lost or erased data from your mobile device.
Removal of mobile device lock-bypass tools.
It allows you to copy, save, and restore your WhatsApp chats.
Communicate with other mobile devices by sending and receiving text messages.
Step 1. Dr.Fone should be launched immediately after a successful installation.
To fix the system, click "System Repair" in the main menu.
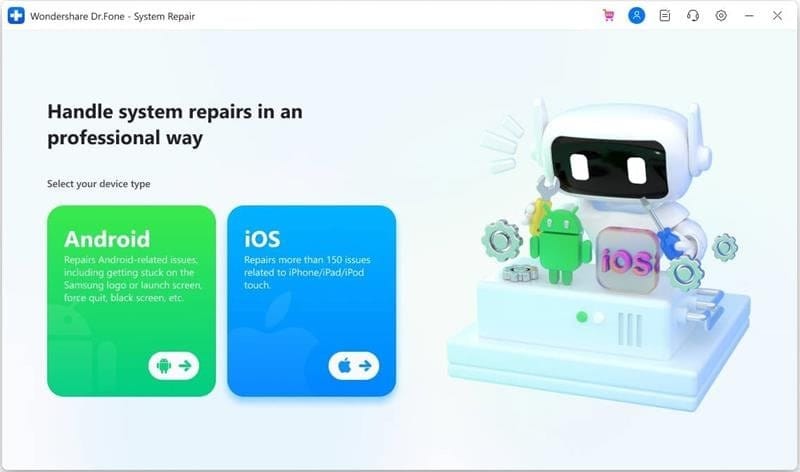
Step 2. iOS is the correct option since it applies to iPhones.
Next, choose "iOS Repair" to fix your iPhone's software issues.
Step 3. Select "Repair Now" as the next action.
Even if the issue you're encountering isn't mentioned here, you can still choose "Repair Now" to get started addressing the issue with your iOS device.
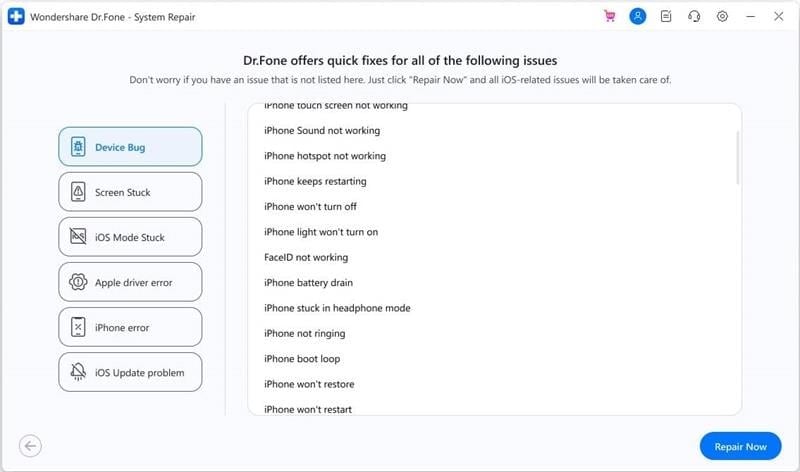
Tip: Select "Standard Repair" from the drop-down menu if you wish to proceed with the iOS fix.
Step 4. The next step is to boot your iOS device into Recovery Mode.
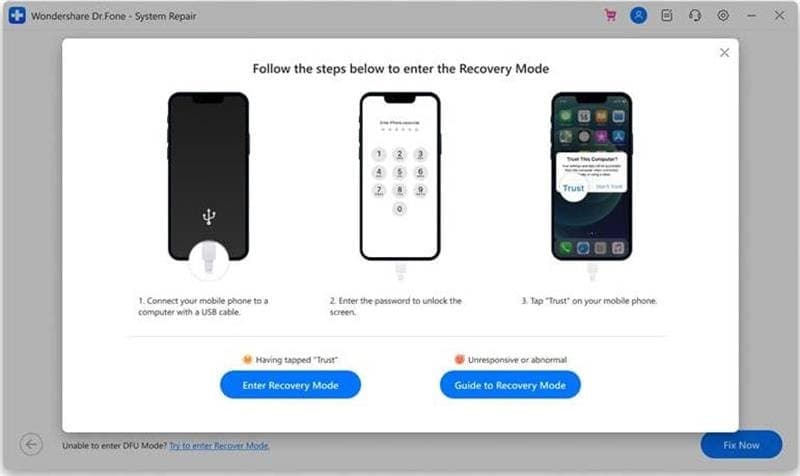
Step 5. Hit the "Trust" button when prompted.
After security has been set up, selecting "Enter Recovery Mode" is the next step.
Step 6. When a device stops responding or begins acting erratically, you can force it into recovery mode by selecting the "Guide to Recovery Mode" option.
Step 7. If your device requires you to enter Recovery Mode, it will provide on-screen instructions.
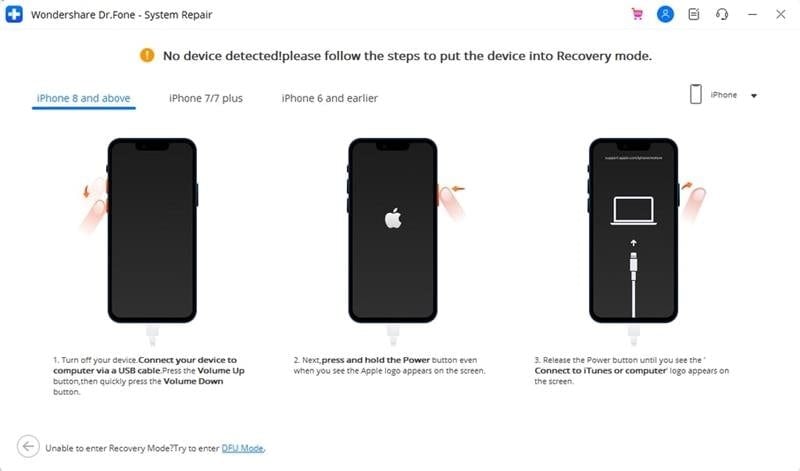
Step 8. Put the device into Recovery Mode, and the computer will identify it.
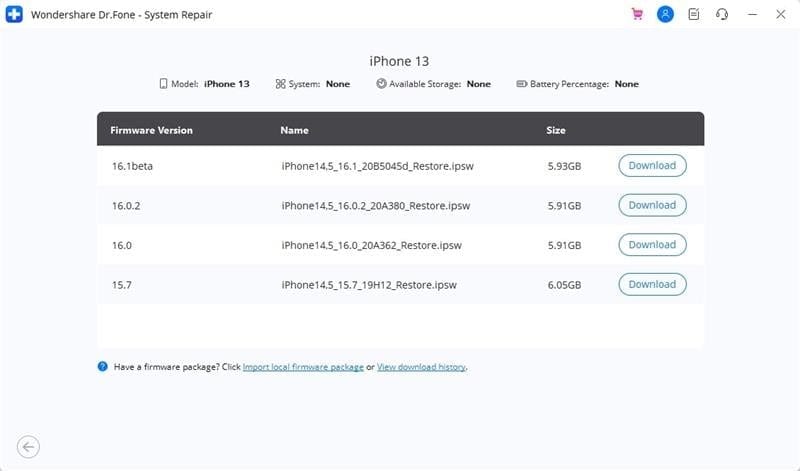
Step 9. A list of available iOS firmware upgrades for your iOS device will appear in the next window.
They can be downloaded and installed using the "Download" button.
Step 10. When the iOS firmware starts downloading, a download progress meter will show up on the screen.
Step 11. To guarantee a successful installation of firmware on an iOS device, the platform runs a series of checks when the download is complete.
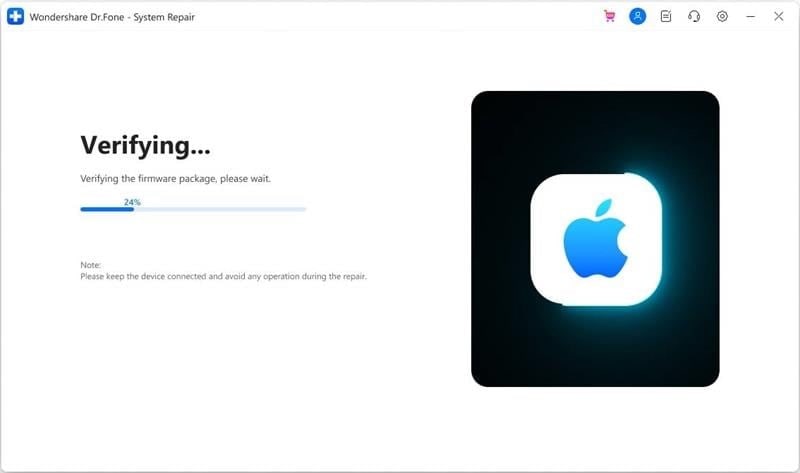
Step 12. As soon as the iOS firmware is established, it is uncorrupted.
Selecting "Repair Now," you can initiate Apple's iOS system recovery steps.
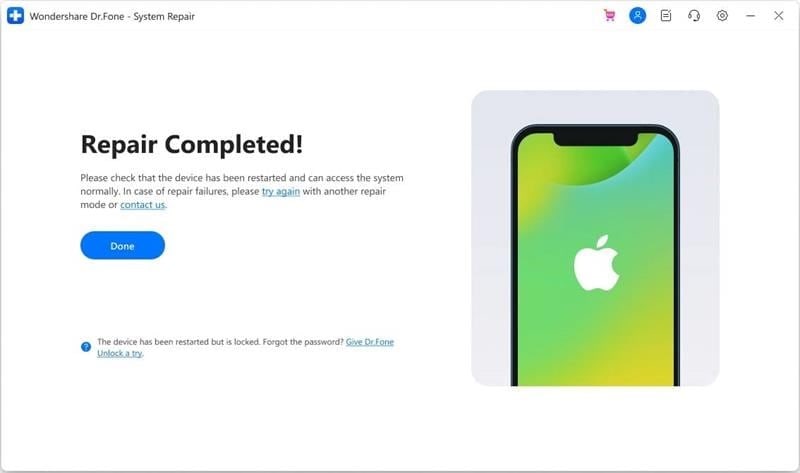
Step 13. A completion message will appear in the prompt box after you are done.
Click the "Done" button to finish the process.
Method 5. Contact Apple Support
We recommend contacting Apple Support if you continue to have problems. That's all there is to fix the iTunes 1100 problem. Contacting Apple Support is now the only option available to determine the outcome of this situation. If the issue persists after trying these solutions, please get in touch with Apple Support for more assistance.
Conclusion
If you were having trouble updating to iOS 16 or resetting your iPhone to factory settings due to iTunes error 1100, this post helped. Any further ideas or suggestions from the audience are welcome in the discussion below.
This demonstrates that Dr.Fone is a one-stop shop. If you're experiencing an iTunes issue 1100, Dr.Fone can fix it no matter what the cause is: iTunes, your iPhone, or the updating/restoring procedure.