How to Use Recoverit (IS) for Windows
This guideline takes you through a 3-part walkthrough, which shows you how to use Recoverit (IS) to recover deleted or lost data on Windows. The tool helps you recover data that is lost or deleted accidentally or by malicious programs and viruses.
Part 1: Downloading and installing Recoverit (IS)
Recoverit (IS) comes in both Windows and Mac versions. For Windows users, click on the Windows icon below, and wait for a few seconds as the tool is downloaded to your computer.
Installing Recoverit (IS)
Note: For Recoverit (IS) to work properly, you must install it in a separate partition from that where your lost or deleted data used to be.
1. Double click on the file that you just downloaded to install the tool.
2. Complete installation by clicking on “Install” followed by “Start Now”. Wait a few seconds and the tool will be successfully installed.
Registering Recoverit (IS)
You will receive a registration key via email once you complete purchasing Recoverit (IS). Simply fill in your email address, and the registration key, before clicking on the “register” button.
You are now ready to start using Recoverit (IS) to recover your lost or deleted data.
Part 2: How to recover data on Windows using Recoverit (IS)
Nothing is as devastating as losing important data on our computer. Some of the data may have taken a long while to create, and having to start all over is something that most users dread. Thankfully, you can recover the data using Recoverit (IS) by following the three simple steps listed below.
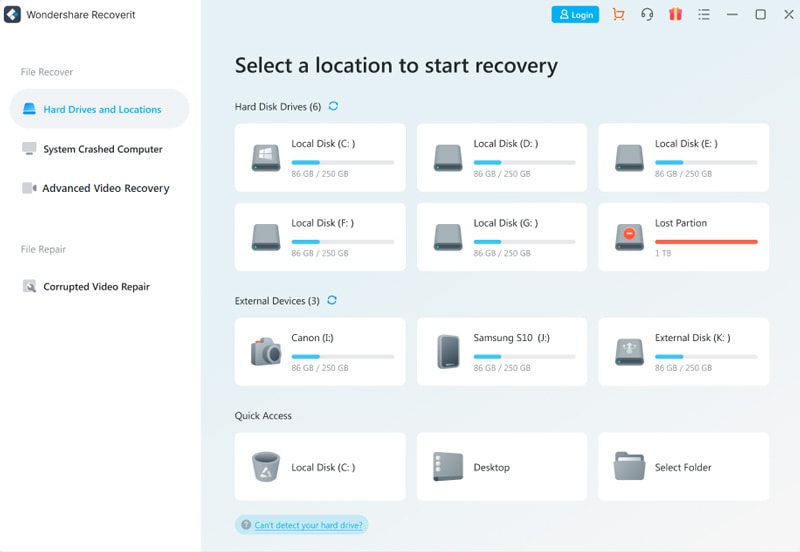
Step 1: Select the partition or location where your lost data resided.
Start Recoverit (IS) and go to the home screen. Select the partition or hard disk where you lost your data and then click on “Start”. Wait for a while as Recoverit (IS) scans the disk.
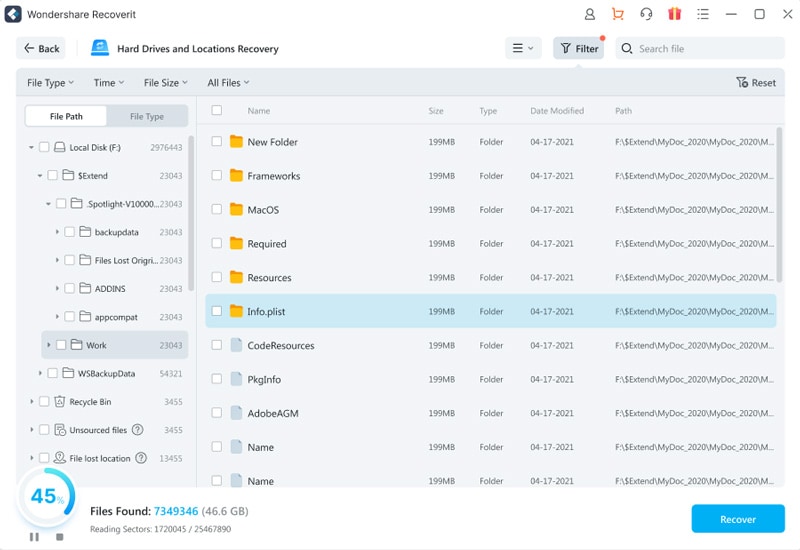
Step 2: Scan the location for lost files
Recoverit (IS) will scan your partition or hard disk and then present you with a preview of the files it has located. However, you may refine the scanning process by defining selections and choosing filters. For example, you may opt to scan a particular file type or file path. You may also pause or stop the scanning process, at any time, once the lost data has been located.
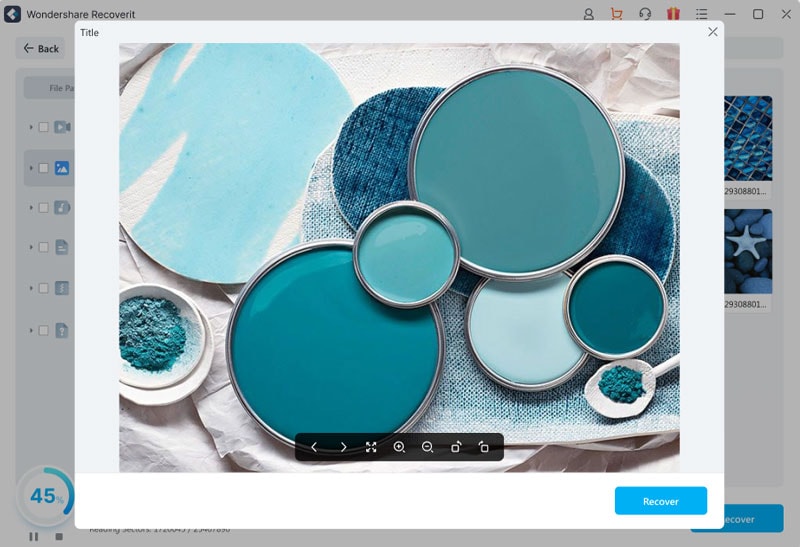
Step 3: Preview and recover files
One handy feature of Recoverit (IS) is that you may preview the lost data before recovering it. In case you cannot preview some files, there are useful inbuilt tips that you can follow to get the problems fixed. Follow the on-screen prompts and recover the files with ease.
To recover a file, simply click on it and then click on the “Recover” button. Your file will be recovered and launched.
Note: Do not save the file on the partition or hard disk where it was lost in the first place. Choose another location or save to an external hard disk.