Dr.Fone User Guide for Dr.Fone Basic
Learn how to use Dr.Fone to manage, backup, and mirror your mobile devices on the computer. Download the latest version of Dr.Fone and get started now.
Back Up iOS Device and Restore Backup
If you are looking for a dependable tool to back up your mobile devices to your computer in case of unexpected data loss, Wondershare Dr. Fone is highly recommended. This software can assist in backing up various file types from mobile devices to computers, and once your device is backed up, you can easily restore backed-up data whenever required. In this guide, we will focus on the process of creating and restoring iOS backup using Wondershare Dr.Fone.
Manage Your Phone Wherever You Go
Index
Part 1: Back Up Your iPhone/iPad/iPod Touch With Dr.Fone
Solution 1: Manually Back Up the Data
To start with the manual backup, launch Dr.Fone to find the My Backup section from the left panel and click the Back Up Now button to initiate backing up your iDevice.

* Dr.Fone Mac version still has the old interface, but it does not affect the use of Dr.Fone function.We will update it as soon as possible.
Dr.Fone will detect and back up the file types on your device automatically. Wait until the entire data is backed up to the platform. If you wish to cancel the process, click Cancel.

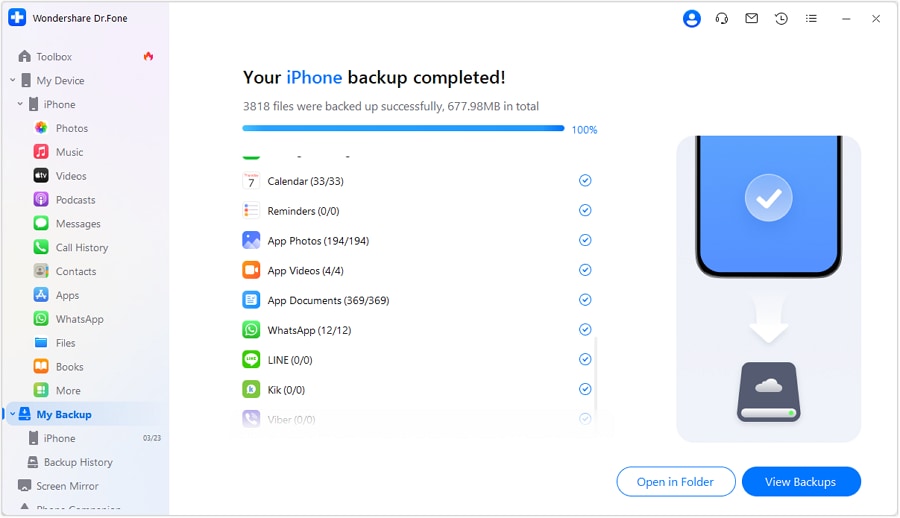
Once the backup concludes, the prompt window displays the entire backup details. Continue to click the View Backups button to view the backups made through Dr.Fone. You can also try Open in Folder to redirect to the folder containing the backup.
Solution 2: Automatically Back Up the Data
For those who seek to back up their iDevices automatically, it can be done at Wondershare Dr.Fone. Launch the tool and navigate to My Devices > Backup preferences to open a new window containing some options for backing up data.
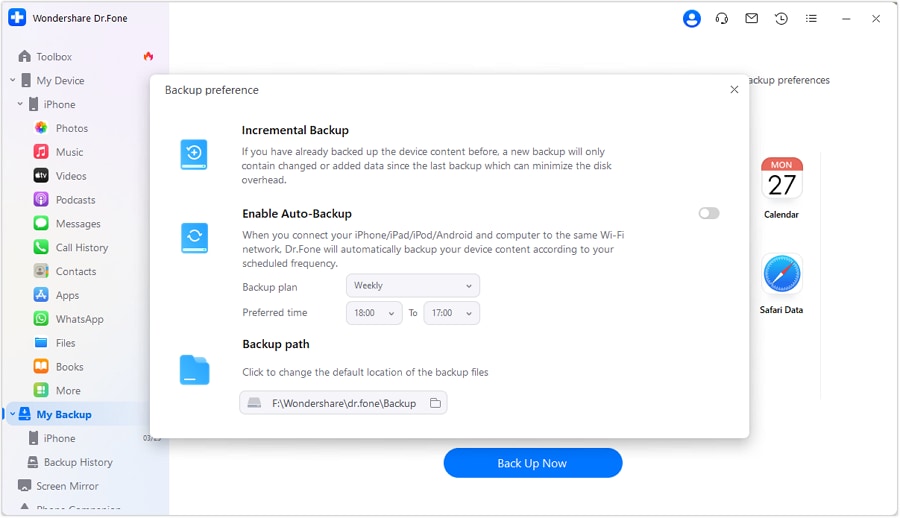
While you enable the toggle adjacent to the Enable Auto-Backup option, ensure that the iDevice and computer are connected to the same network. If they are, the device will automatically back up under the defined Backup Plan and Preferred Time.

You can click Backup History to view all iOS device backup history. Click on the View button to check the contents of the backup file in the categories.

Part 2: Restore iOS Backup to iOS/Android
Once you back up your data across Dr.Fone, you can restore the backup to an Android or iOS device. The platform provides a comprehensive restoration model, which has been presented and discussed below:
Once you complete the backup process, the program will display all file types. Or you can access the Backup History section on the left panel. This will open the list of backups that can be restored. Select any backup and click View to proceed with the restoration of this iOS backup file.

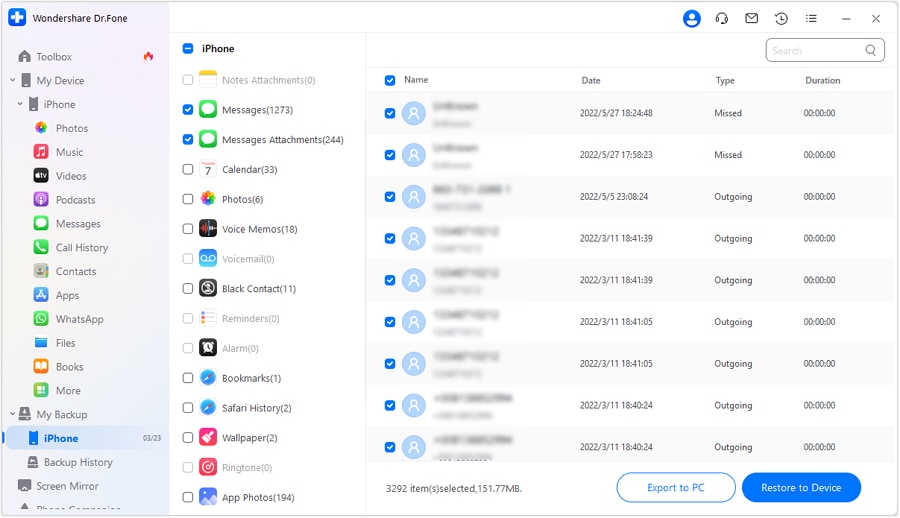
As you click any file type, such as "call history", you can view all file data and mark the specific data that you wish to restore. Once done, continue to select the Restore to Device button.
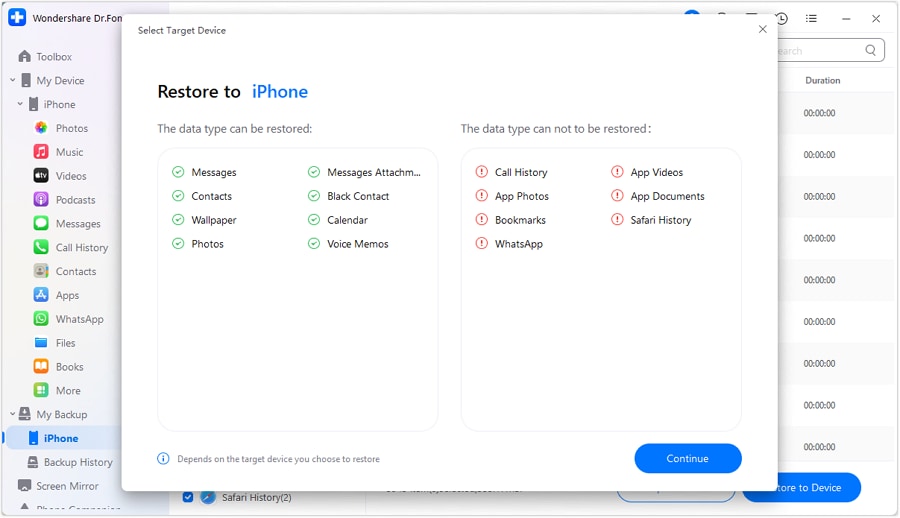
A new window opens containing the list of file types that will restore and cannot be restored to the device. View the details and tap Continue to proceed with the restoration.
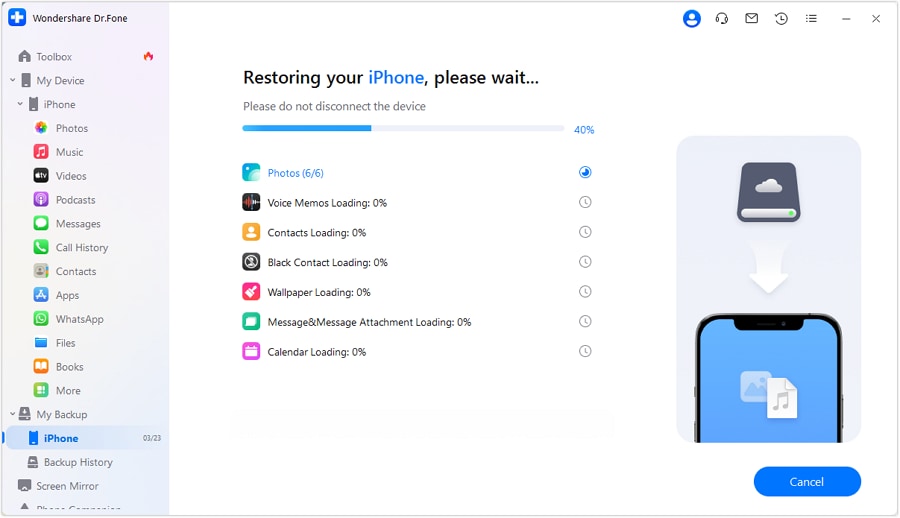
The restoration process starts, displayed using a progress bar to complete the process. You can try canceling the restoration of the backup with the Cancel button at the bottom of the screen.
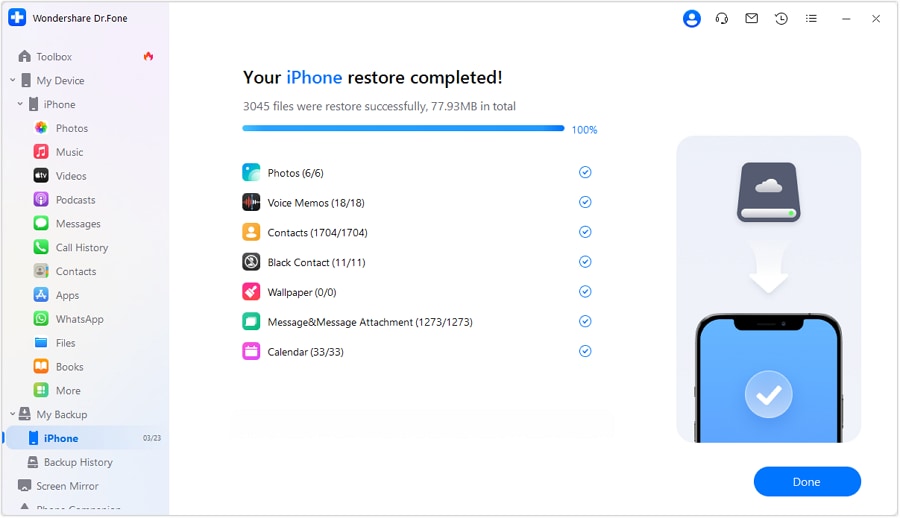
The following window indicates the completion of the restoration process. It will display the entire list of restored data and its details. Click Done to conclude the process.
Part 3: Export iOS Backup File to PC
You can also try exporting the backed-up file on Dr.Fone to the computer. To execute this operation, follow the steps described next:
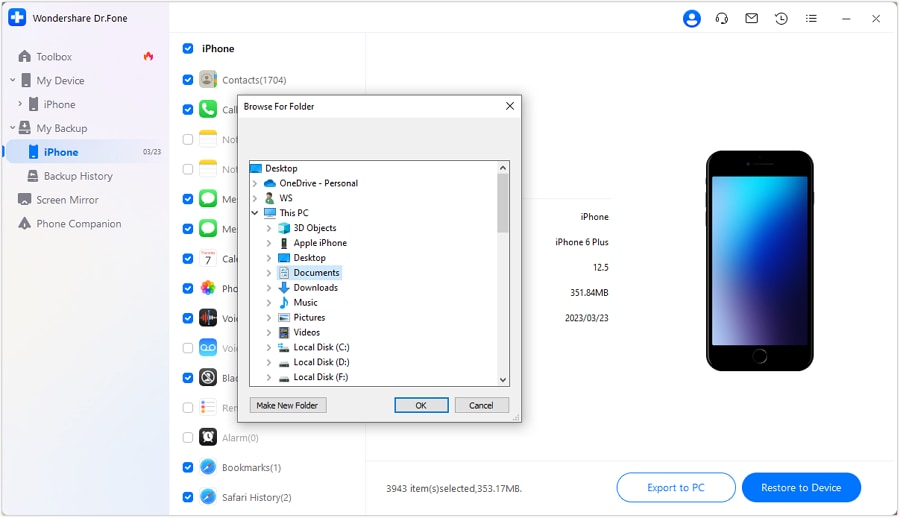
Select the file types you wish to export and click Export to PC to continue.
Browse through the path to select the location where you wish to export the backup file to the PC.
Observe the progress bar and let the file exporting conclude. Click Cancel if you do not want to save the backup file to your computer.

WHAT YOU'LL NEED

Dr.Fone provides a complete set of tools for solving all iOS/Android phone problems.
Need help?
You might find the answer to your question in the FAQ or additional information below: