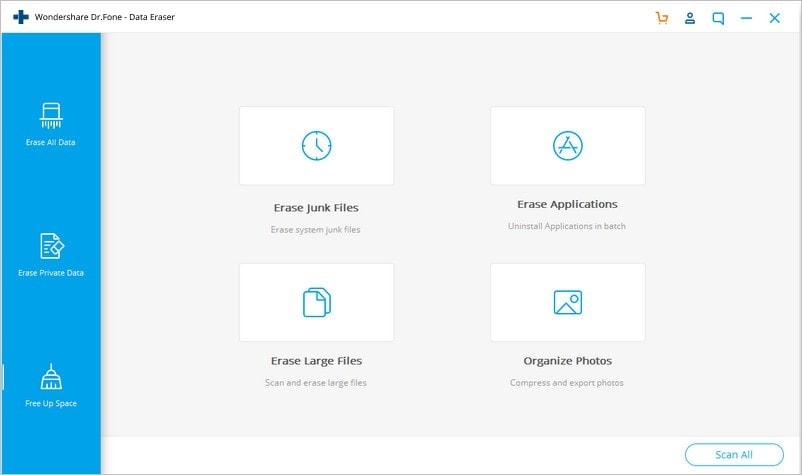
dr.fone - Free Up Space on iOS Device
When your iPhone or other iOS device runs slower, you may consider to free up the space for improving its performance. The dr.fone- data erase (iOS) provides you an efficient option to save space on iPhone/iPad or iPod without deleting any files or important data on your device.
Let’s follow some simple steps to manage and optimize your iOS device to retain some more storage space now.
- Part 1. How to Erase Junk Files?
- Part 2. How to Erase Useless Apps in Batch?
- Part 3. How to Erase Large Files?
- Part 4. How to Compress or Export Photos?
Part 1. How to Erase Junk Files?
Step 1: Choose "Free Up Space" and select "Erase Junk Files".
Step 2: Then dr.fone will start to scan and display all the junk files hidden in your iOS system.
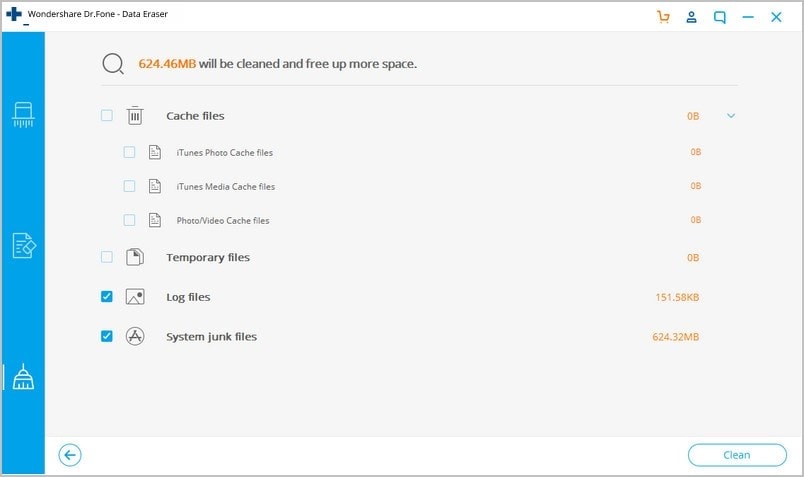
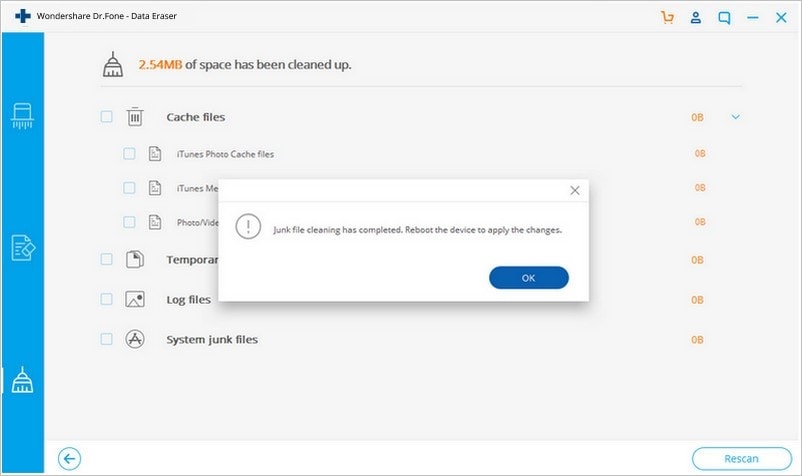
Step 3: Select the junk files you want to delete, click "Clean", then the selected iOS junk files will be wiped cleanly.
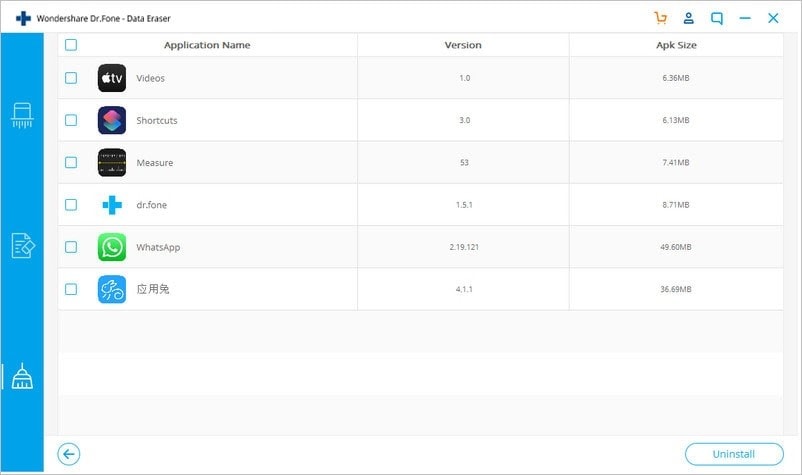
Part 2. How to Erase Useless Apps in Batch?
You may wonder how to delete too many apps in batch or how to delete stubborn undeleted apps permanently, this feature will help you uninstall all useless apps at a time.Step 1: Choose "Free Up Space" and select "Erase Application".
Step 2: Select all useless iOS apps and click "Uninstall". Then all these apps will be deleted cleanly together with the app data.
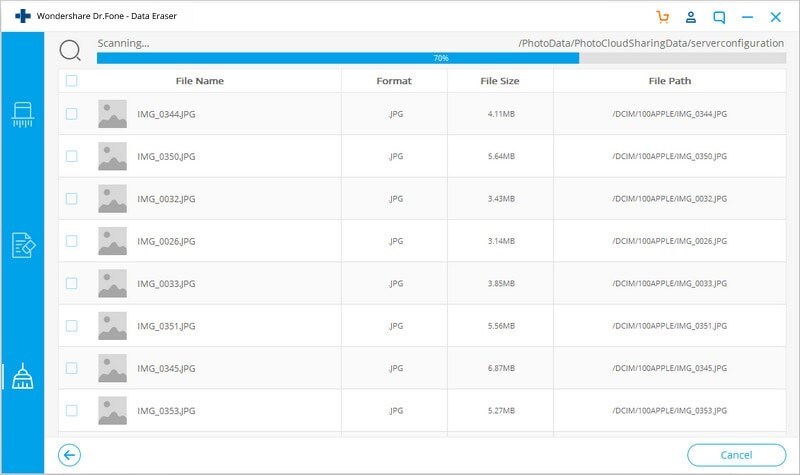
Part 3. How to Erase Large Files?
If you have too many large files need to wipe, dr.fone will help you to do it.
Step 1: Choose "Free Up Space" and select "Erase LargeFiles".
Step 2: dr.fone will start to scan all the large files that slows down your iOS system and all there files will appear.
Step 3: After there files show, you can select the target files that are useless or select all files, then click "Delete" to wipe them cleanly.
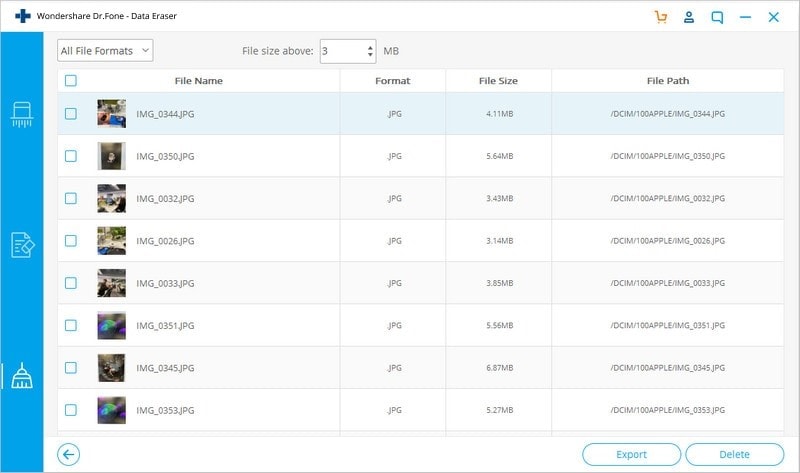
Here you can also select the file format to filter the files you want to delete, and if you do not clean them permanently, you can also click "Export" to export the files to your computer.
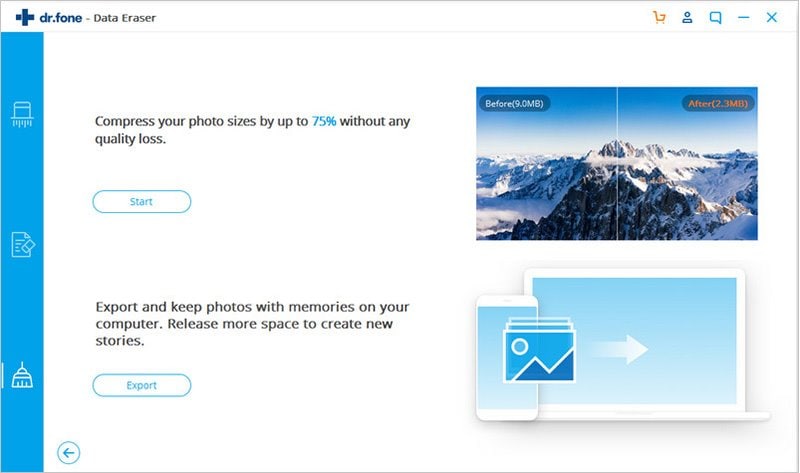
Part 4. How to Compress or Export Photos?
When you have many photos with a large size, in order to save the space of your iPhone, you can compress or export these photos with dr.fone.
Step 1: Choose "Organize Photos" afetr clicking "Free Up Space" and click "Scan All".
Step 2: Compress photos on iPhone/iPad without losing quality.
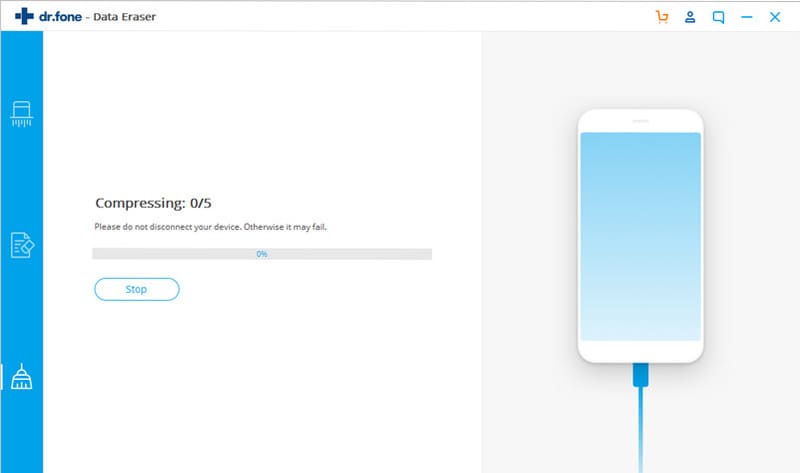
To compress the photos on iOS for more space, we choose the first option on the screen below. The program is able to help you compress the photos for saving up to 75% storage space without compromising the photo quality. To start with compressing, please click on "Start" button.
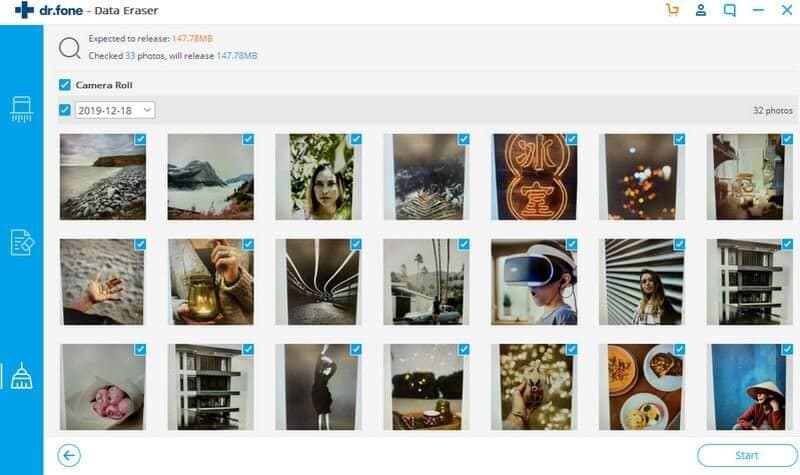
The application will begin to scan all of photos stored on your iOS device. After the scanning, you are able to check and select the photos that need to be compressed and then tap on “Start” as shown below.
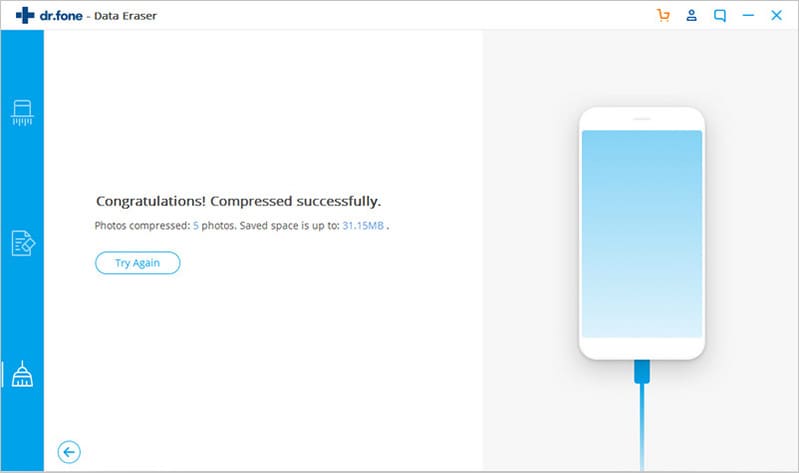
After the compressing is done, the interface will show how many photos have been optimized along with the total of saved space on device.
Note: Following the steps above, if you think there is enough space saved on device, you do not need to proceed with the step 3 below.
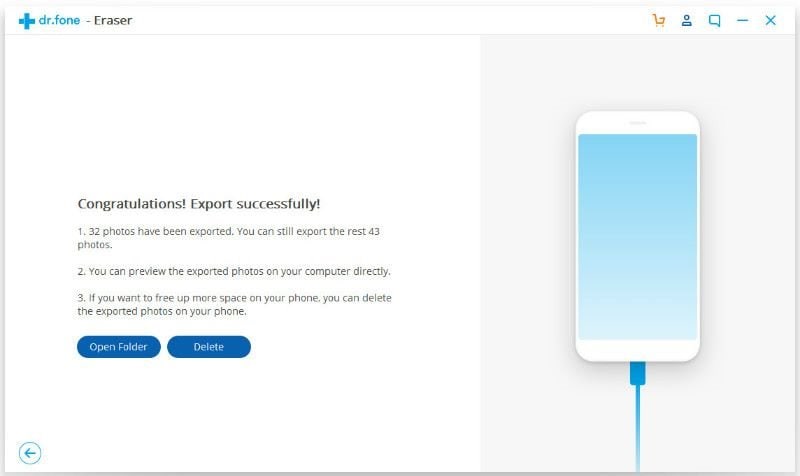
Step 3: Export the photos to computer to free up more space
If you still want to free up space on iPhone/iPad or iPod further, please find the “Space Saver” by running the dr.fone and then tap on “Erase” and “Space Saver” respectively as mentioned above. After that, we choose the second option on the screen below and then tap on “Export”.
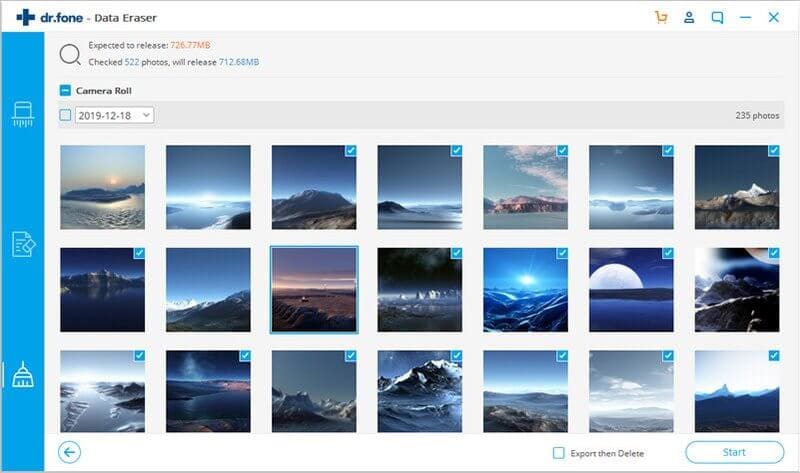
Then all of your photos stored on iOS will be listed by different dates. Please select the photos you want to save and then tap on “Start” for exporting these photos to your computer.
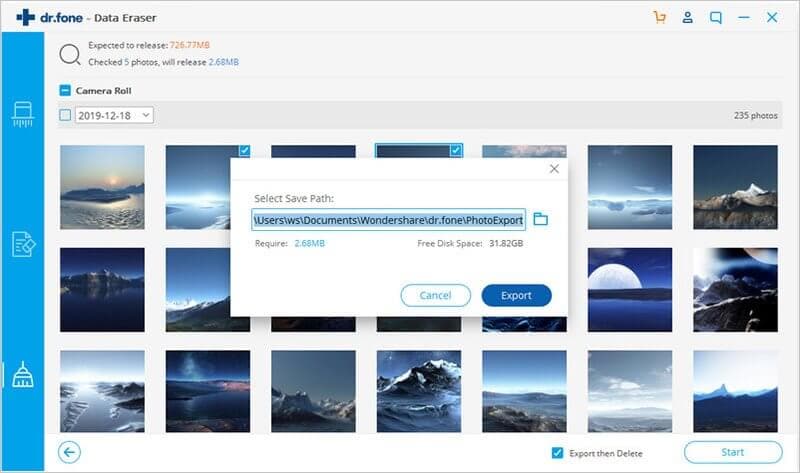
Note: Before you tap on “Start”, if you want to free up space further, please make sure you tick “Export then Delete” which means the photos will be deleted on device after they are exported to computer. Otherwise, it makes no sense to free up space on iOS if you do not tick “Export to Delete”.
Next, please choose a storage location for saving photos on your computer and then tap on “Export”.
The dr.fone will begin to export your photos on iPhone/iPad or iPod to your computer.
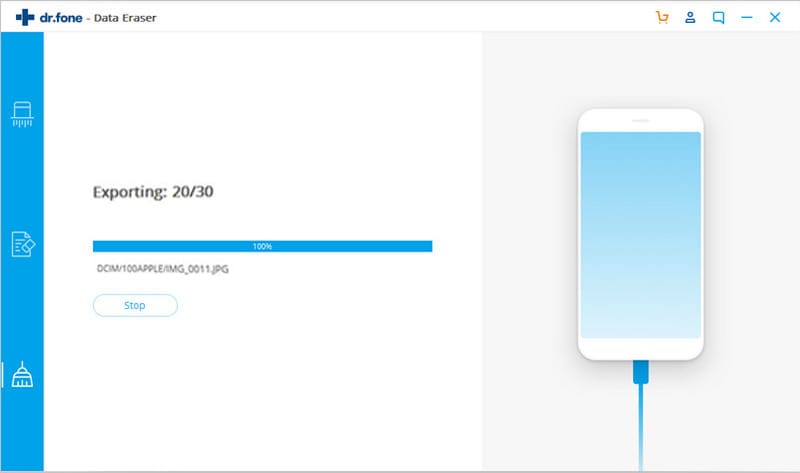
After exporting photos ends, you are able to view and check the exported photos on your computer directly.