Hard Drive Recovery
- Format Hard Drive+
-
- How to Clone Hard Drive
- How to Format Hard Drive from Bios
- Format Hard Drive for Xbox One
- How to Format C Drive in Windows 10/7/XP
- How to Perform PS4 External Hard Drive Format
- How to Format Hard Drive from Bios
- Format Hard Drive for Xbox One
- How to Format C Drive in Windows 10/7/XP
- How to Perform PS4 External Hard Drive Format
- How to Format Drive in Linux
- How to Format Hard Drive to NTFS
- How to Format WD My Passport
- How to Format Your Drive to FAT32 System
- Format HDD Low Level
- Format a BitLocker Encrypted Drive
- How to Unformat Hard Disk
- How to Format a RAW Drive
- Fix Your Hard Drive’s Formatting Issues
- How to Format SSD
- How to Format your Hard Drive to exFAT File System
- How to Format a Hard Drive to FAT32
- Hard Drive Recovery+
-
- Top 10 Hard Drive Recovery Tools
- How to Recover Lost Data from Maxtor External Hard Drive
- How to Recover Data from Hitachi External Hard Drive
- How to Recover Data from Dead Hard Drive
- How to Recover Data from SimpleTech External Hard Drive
- How to Recover A Formatted Hard Drive in 3 Simple Clicks
- How to Recover Lost Data from Iomega External Hard Drive
- How to Recover Data from Toshiba External Hard Drive
- How to Recover Data from Transcend External Hard Drive
- Lacie External Hard Drive Data Recovery and Repair
- Best Way to Recover Data from a Floppy Disk
- How to Recover Data from HP External Hard Drive
- Best Method to Recover Data from Crashed Hard Drive
- How to Repair Toshiba Hard Disk
- Recover Files from WD My Book External Hard Drive
- Ways to Repair Seagate Hard Disk
- Fix Hard Drive Error+
- Hard Drive Tips+
- Mac Hard Drive Recovery+
-
- Recover Lost Data from Seagate External Hard Drive on Mac
- How to Recover Data from Formatted Hard Disk Drive on Mac
- How to Recover Data from Seagate Backup
- How to Recover Lost Data from Western Digital External Hard Drive
- Top 5 Tools for Mac Disk Recovery on Mac
- How to Format Toshiba Hard Drive for Mac
- Format a Hard Drive for Mac: Ultimate Guide 2021

• Filed to: Hard Drive Recovery • Proven solutions
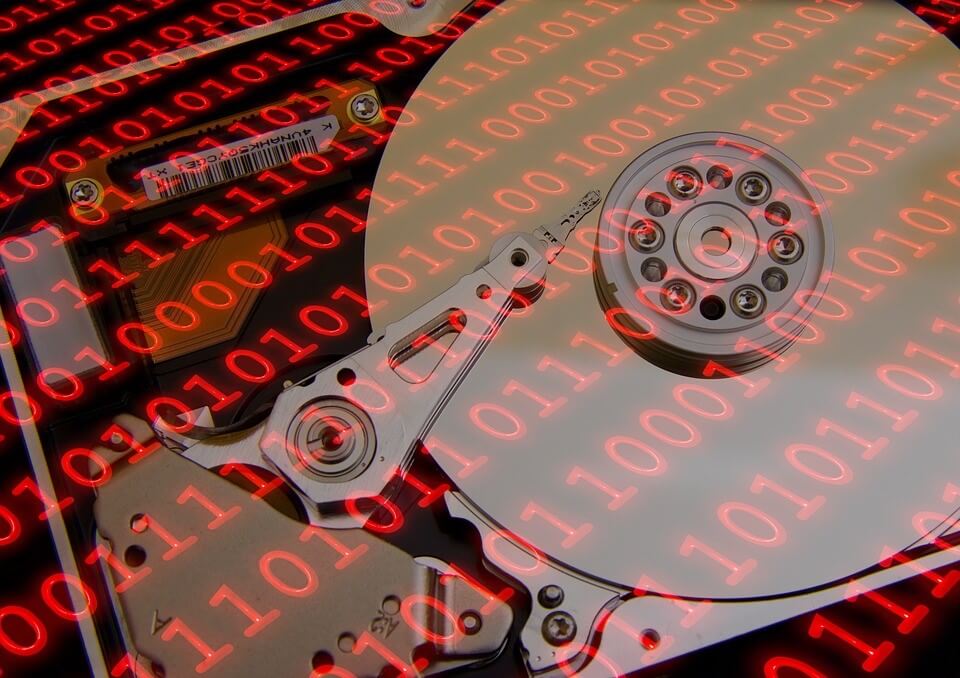
Data is a valuation entity and your private data should be your own. All the news that we keep on hearing about hacks and malware attacks are for one thing – Data. The need for a security system for your devices warrants no explanation in 2019. Your phone has locks, your computers have passwords, but did you know that your hard drive has also such a feature?
Write protection is a feature in windows that enables a security lock for storage devices. Once write-protection is applied on a storage drive, you will not be able to store anything new to it, nor be able to change the data on it. However, you will be still able to read the information on the device.
Part 1: What You Need To Know About Write Protection

Write protection helps to secure storage devices by not letting any unauthorized personnel access the data within it. When write protecting a storage drive, a user will not be able to alter or copy the information within the hard drive. In essence, data within the hard drive or storage drive cannot be tampered with.
In this guide, we will be relating write protection with only storage drives. The software can also be write-protected. For example, almost all the software that you use on your devices is write-protected. This is why you cannot edit the code on most software.
Write protection is mainly used for USB drives where users want to show the data or information to someone but don’t want anyone to edit or change it anyway. Also, users must note that enabling write protection is not a straightforward setup. To write-protect a device, you will need to change its registry values on windows.
Part 2: Hard Drive Will Not Format! Hard Drive Is Write Protected!
This a common error that users experience when they try to format a write-protected drive. The write protection feature does not allow the computer to be formatted.
When you try to format the hard drive, an error message pops up saying Hard Drive Will Not Format! Hard Drive Is Write Protected! However, with some effort, you can lift the protection.
To format a write-protected storage device, you need to reverse the write protection for the HDD.
Part 3: How To Format A Write Protected Hard Drive
Formatting a write-protected hard drive requires you to lift the write protection rule that is applied to the hard drive. The process is as follows.
Step 1 Right-click on the Start Menu and click on Run.
Step 2 Type in Regedit and press enter key.
Step 3 Navigate to path - HKEY_LOCAL_MACHINE\SYSTEM\CurrentControlSet\Control\StorageDevicePolicies
Step 4 Double click on the file WriteProtect.
Step 5 Change the value data from 1 to 0.
Step 6 Click on OK.
Step 7 Restart your computer and plug the USB to the computer.
You will now see that the storage drive responds positively to read and write commands. Now you can move ahead to formatting the drive like any other ordinary storage drive.
Part 4: How To Recover Data From Write Protected Hard Drive?
We do understand that write protection is not an easy task to set-up or remove and you could easily mess up if you don’t follow the steps correctly. In such cases, data loss may happen or you would need to recover data from the storage drive that is write-protected.
A data recovery software like Recoverit (IS) is our recommendation for the task. This is a lost data recovery software that is used by beginners and professionals alike when it comes to recovering data from storage devices. Some of the features that make it all possible are:
Recoverit (IS)
A Life Saver to Solve Your Data Loss Problems!
- Dual scan modes: The software comes equipped with a normal scan mode and an advanced mode
- 1000+ file formats supported: No matter what you are looking for, iSkysoft can recover
- Windows and Mac ready: Use Recoverit (IS) on your favorite operating systems
- HDD, SSD & USB Recovery: You can use any storage medium with Recoverit (IS)
- Secure and fast: The data that your recovery will stay with you and will not be used by the software
The feature set is impressive, however, that is not the only mark of good recovery software. It should also be easy to use. We can confidently say that iSkysoft lives up to those standards. With iSkysoft, even a beginner can recover files on their devices with ease. If you are having any trouble, the following guide will help you through the whole thing.
User Guide For Recoverit (IS)
The following guide is a testament to the ease of use that iSkysoft brings to its users. The three-step procedure is hassle-free and does not reduce a bit in terms of usability. Before going forward with the steps, download the latest version of Recoverit (IS) from the official website. Install the software on your computer and refer to the guide below.
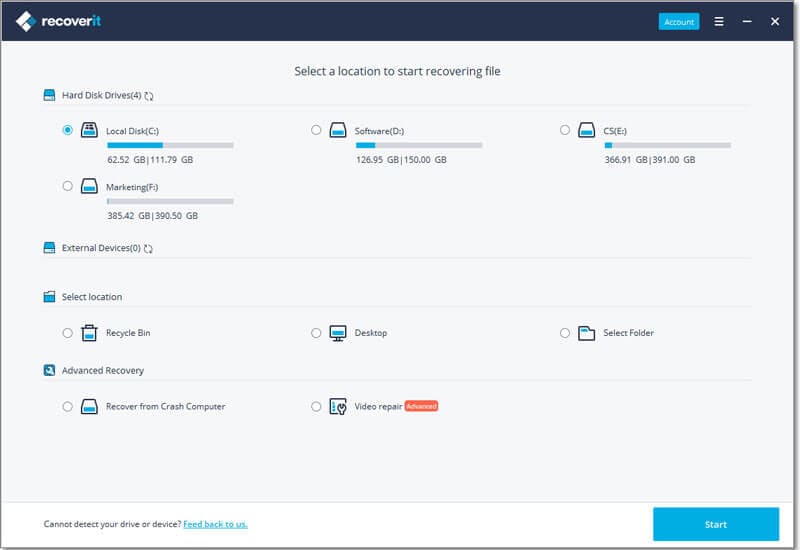
Step 1 Choose the drive
Once you launch the Recoverit (IS) Tool, you will be able to see the different storage drives connected to the computer. Choose the drive that you want to scan.
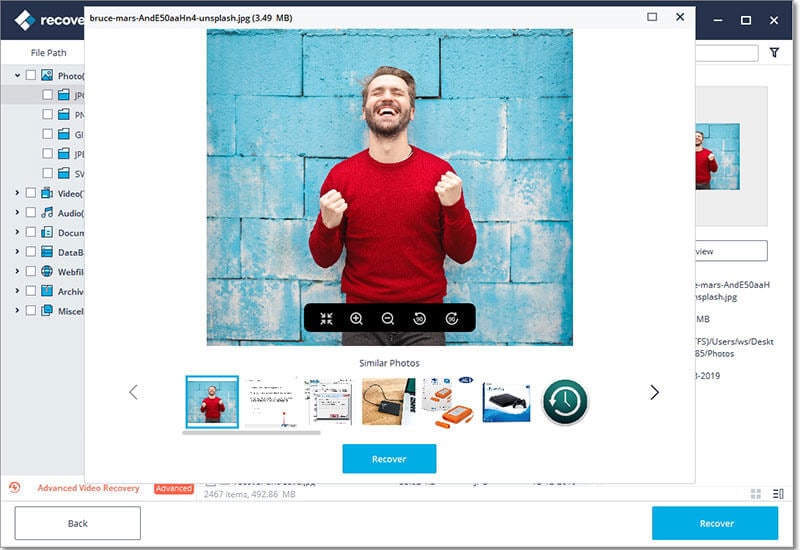
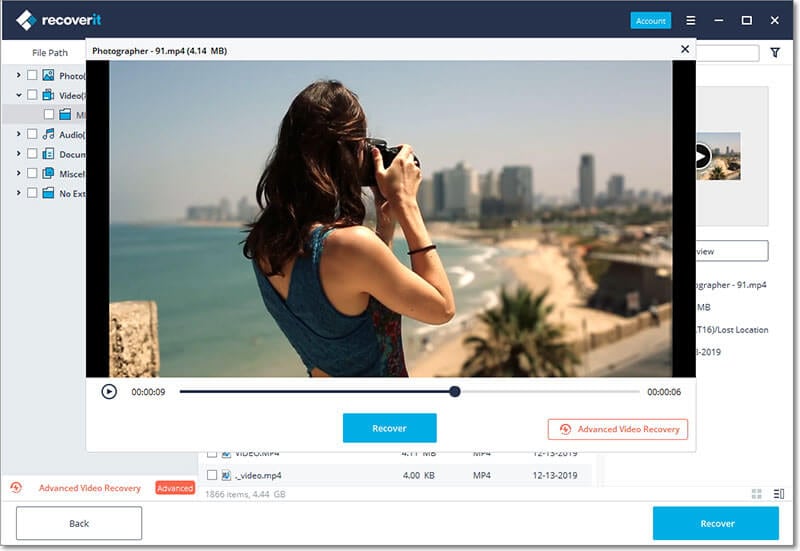
Step 2 Preview files
After the scan, the software will list out all the files that it has found. Double click the files to view them so that you know which files to recover and which files to discard.
Step 3 Recover the files
After you have selected the files, click on recover to begin the recovery process. The time taken for the recovery process will depend on the size of the files.
Conclusion
Write protection of a storage drive is both a good thing and a bad thing. It is good considering the fact that your files will not be tampered by anyone else. However, if you are not able to reverse the write protection, then you will not be able to change the information within your own drive. If things turn out the opposite of what you want, then use iSkysoft to get your data back in one piece.
Elva
staff Editor