How to Effectively Sync iPhone Contacts to Outlook

Mar 08, 2024 • Filed to: Manage Device Data • Proven solutions
Microsoft Outlook is a great tool to have access to your mails offline. In addition to emails, Outlook also has an option to save complete contacts information. If you are using iPhone, you can transfer contacts from iPhone to Outlook so that all your contacts details along with mail IDs are handy on your PC. The article will deal with the best and easy ways to sync iPhone contacts with Outlook.
Part 1. Easiest Way to Sync iPhone Contacts to Outlook
Having all your iPhone contacts to Outlook will be a great way to get access to contact details while working offline with your mails. Dr.Fone - Phone Manager is an answer to all your queries when you want to import contacts from iPhone to outlook. This wonderful software allows to transfer all or needed contacts to Microsoft Outlook with just a few steps. Dr.Fone - Phone Manager is a complete phone manager that works perfectly well with Android and iPhone devices. The software allows managing iPhone photos, videos, contacts and other data without any need for iTunes.
Dr.Fone - Phone Manager (iOS)
Tried-and-True Solution to Sync iPhone Contacts to Outlook
- Transfer, manage, export/import your music, photos, videos, contacts, SMS, Apps etc.
- Backup your music, photos, videos, contacts, SMS, Apps etc. to computer and restore them easily.
- Transfer music, photos, videos, contacts, messages, etc from one smartphone to another.
- Transfer media files between iOS devices and iTunes.
- Fully compatible with iOS 7, iOS 8, iOS 9, iOS 10, iOS 11 and iPod.


Steps to sync iPhone contacts to Outlook with Dr.Fone - Phone Manager:
Step 1: Launch Dr.Fone - Phone Manager on your PC and connect iPhone with your PC using a USB cable. On the main interface, click "Phone Manager".

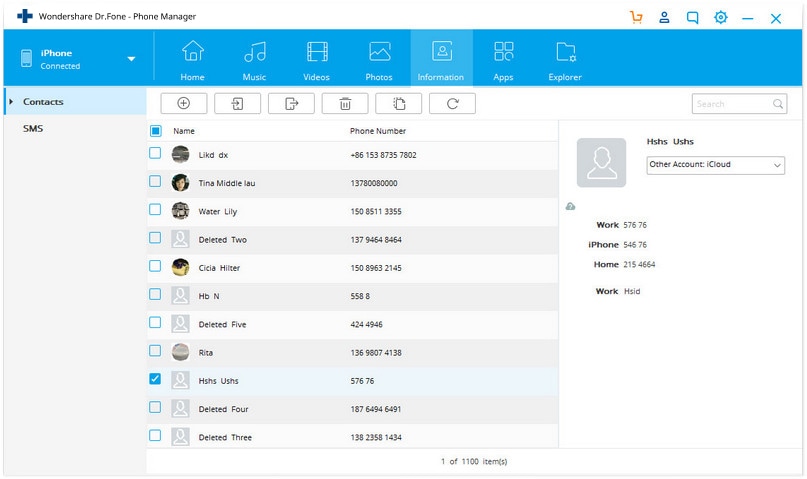
Step 2: Select the desired contacts and export them.
On the main interface, click "Information" tab and the list of contacts on iPhone will open. Select the desired contacts, click the “Export” icon and select “to Outlook 2010/2013/2016” from the drop down menu.
The selected contacts will be successfully exported to Outlook.
Now the above is the complete solution to sync iPhone contacts to Outlook.
You may wondering:
"How to sync contacts from Outlook to iPhone exactly?"
Do not worry. Read on.
Dr.Fone - Phone Manager works the other way round as well – transferring contacts from Outlook to iPhone. If you have lost your iPhone or lost all your phone contacts due to some reason, importing them through Outlook using Dr.Fone - Phone Manager is a great way. Thus, it can be said that Dr.Fone - Phone Manager allows complete syncing of Outlook contacts to iPhone.
Steps to sync Outlook contacts to iPhone
Step 1: Launch Dr.Fone - Phone Manager on your PC and connect iPhone with your PC using a USB cable.

Step 2: Click “Information” tab from the main software interface. The list of contacts present on iPhone will be shown. Click the “Import” icon and select “from Outlook 2010/2013/2016” from the drop down menu.
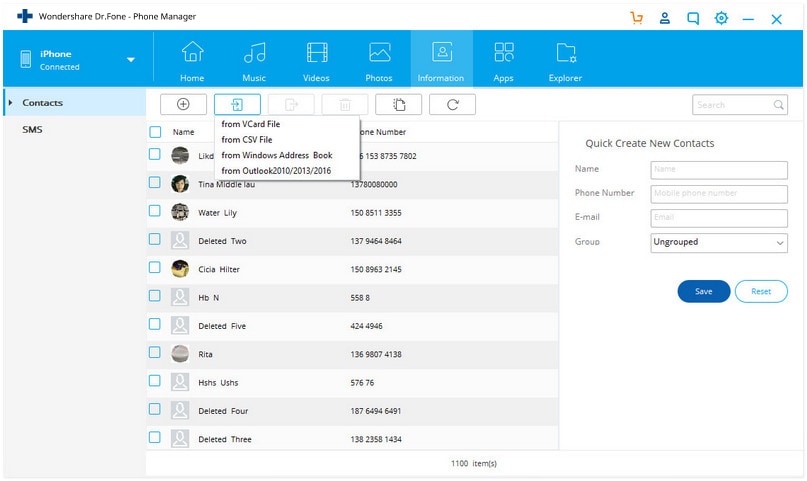
Step 3: The number of contacts detected on Outlook will be shown. Click “Import” to start the syncing process.
Thus, Dr.Fone - Phone Manager proves to be a great way to completely sync iPhone contacts with Outlook bidirectionally which iTunes can't do. So you'd better download Dr.Fone and have a try firstly, I am sure you will love it.
Features of this method:
- Allows to export selective or all contacts from iPhone to Outlook, and vice versa.
- The method does not affect original contacts on your iPhone.
Part 2. Common Way to Sync iPhone Contacts to Outlook
When it comes to iPhone or iOS devices, iTunes is a solution to all issues, and the same holds true when you are looking for the options to export iPhone contacts to Outlook. The selected contacts or the complete contacts list on your iPhone can be exported to Outlook using iTunes through a quick, free and easy process.
Steps to sync iPhone contacts with outlook with iTunes
Step 1: Connect iPhone to your PC using a USB cable. Launch iTunes and the connected iPhone will be displayed as icon.
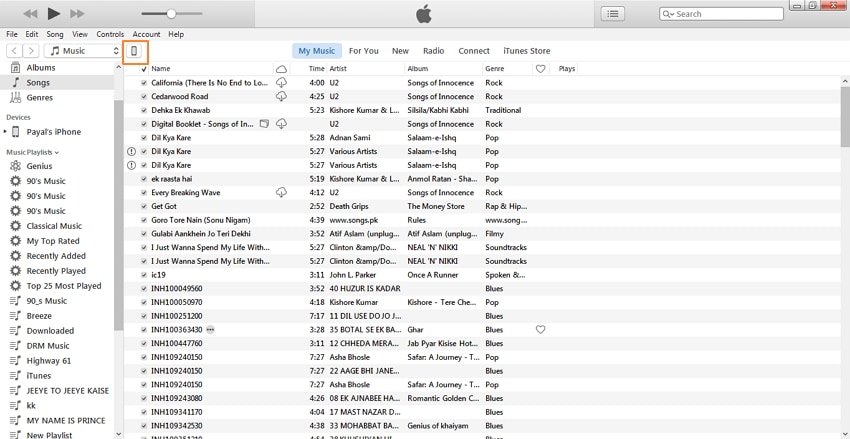
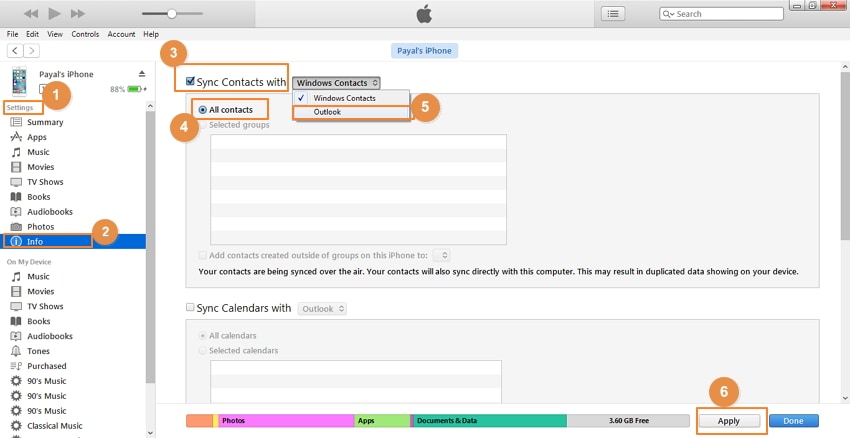
Step 2: On iTunes interface, click "iPhone" icon. Under "Settings" on the left panel, click “Info” tab.
On the right panel, click “Sync Contacts with” and select “Outlook” from the drop down menu. Click “All contacts” if you want to sync all the contacts of iPhone or click “Selected groups” if you wish to sync only selected contacts from a group. Click “Apply” to initiate the process.
Pros and cons of the method:
Pros:
- No need of any third party software installation.
- The method is free to use.
Cons:
- All the contacts including the previous ones are synced all time.
- The original contacts are covered with new exported ones.


iPhone Contacts
- Back up iPhone Contacts
- Manage iPhone Contacts
- 1. Export Contacts from iPhone
- 2. Manage iPhone Contacts
- 3. Find and Merge Contacts on iPhone
- 4. Share Contacts on iPhone
- 5. Get iPhone Contacts from iTunes
- 6. Export iPhone Contacts to CSV
- 7. How to Export iPhone Contacts to a VCF|vCards
- 8. Delete Contacts from iPhone
- 9. Full Guide on Managing iPhone Contacts
- 10. Print Contacts from iPhone
- 11. View iPhone Contacts on Computer
- 12. Edit/Delete/Merge Contact on PC
- Recover iPhone Contacts
- 1. Recover Deleted Contacts on iPhone
- 2. Recover iPhone Deleted Text Message
- 3. Recover iPhone Deleted iMessages
- 4. Recover iPhone Deleted Photos
- 5. Recover Permanently Deleted Data
- 6. FonePaw VS Dr.Fone
- 7. See Blocked Messages on iPhone
- 8. Recover Data from Dead iPhone
- 10. Recover iPhone Deleted Text Message
- 11. Recover Contacts Without Backup
- Transfer Contacts from iPhone
- 1. Sync iPhone Contacts to Outlook
- 2. Transfer Contact without iCloud
- 3. Transfer from iPhone to iPhone
- 4. Transfer Contact With/Without iTunes
- 5. Transfer Contact from iPhone to Android
- 6. Sync Contacts from iPhone to iPad
- 7. Export from iPhone to Excel
- 8. Transfer Contact from iPhone to PC
- 9. Copy Contacts from iPhone to SIM
- Transfer Contacts to iPhone
- 1. Android to iPhone Transfer Apps
- 2. Transfer from Android to iPhone
- 3. Transfer from Android to iPhone XS
- 4. Transfer from Huawei to iPhone
- 5. Transfer from Sony Xperia to iPhone
- 6. Transfer from Samsung to iPhone
- 7. Import Contact from Excel to iPhone
- 8. Import Contact from Gmail to iPhone
- 9. Import Contacts to iPhone
- 10. Sync Outlook Contacts to iPhone
- 11. Transfer Contact from PC to iPhone
- iPhone Contacts TiPs
Daisy Raines
staff Editor