Want to learn how to transfer data from iPhone to PC? Read this article to discover multiple ways to export data from iPhone to PC with the use of USB cable or wirelessly.
May 12,2020 • Filed to: iPhone Transfer • Proven solutions
Want to learn how to transfer data from iPhone to PC? Or, are you willing to download your iPhone data to your Computer? Don’t worry, today we will tell you multiple ways to export data from iPhone to PC. So, stick with us.
Nowadays, everyone prefers to carry their data on multiple devices, and if it’s important data, you might want it to be on all of your devices, especially on your iPhone and as well on your PC. But how can you do that? It’s simple, by copying data from your iPhone to PC, or by transferring it, but it’s not that easy. You might need some reliable and efficient way to move data from iPhone to PC, that too with the wired connection or wirelessly, because it’s not necessary that you have your USB cable with you all the time.
Thus, we bring you multiple ways to transfer data from iPhone to PC, and that too, with the USB cable or wirelessly.
Although we are moving towards wireless connection and might achieve it fully in the near future, most of the people still use a USB cable to transfer their data between devices. We have mentioned below few ways through which you can transfer data from iPhone to PC using a wired connection or USB cable.
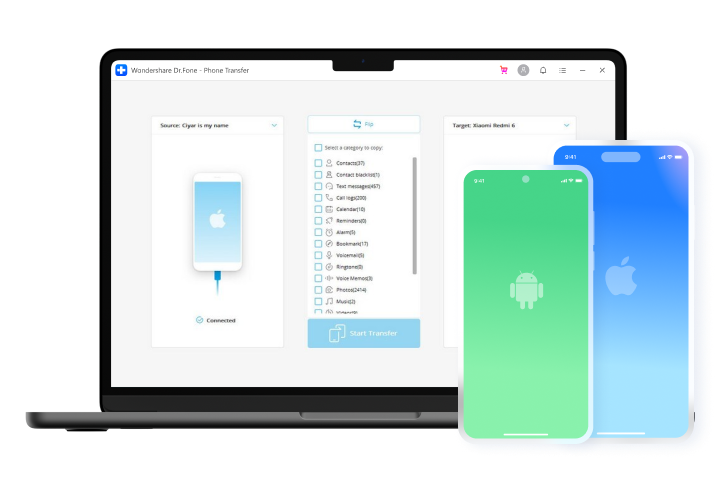
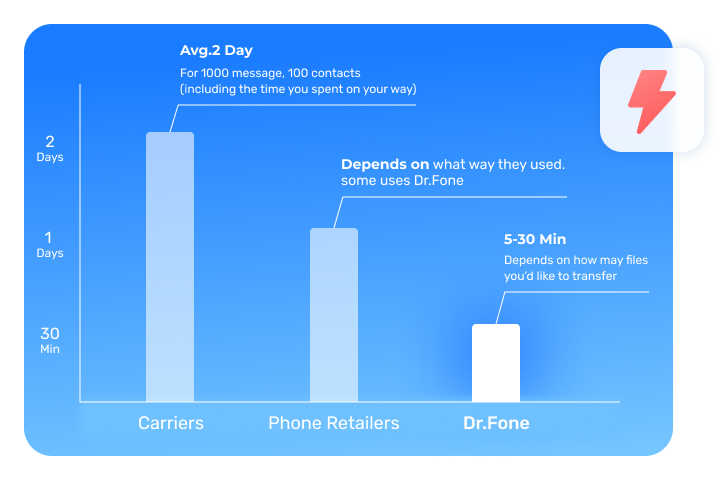
The very first option that you should consider for the data transfer is the dr. fone - Phone Manager (iOS). This toolbox is one of the best ways in the market to move data from iPhone to PC. It may be a third-party app, but still, it is more reliable and more efficient than any of the inbuilt software of high-end software. Even if you are a first-time user or a professional, all you need to do is to click on a couple of options to transfer your data.
Why dr. fone - Phone Manager (iOS)? Know the features:
Start with installing thedr. fone - Phone Manager (iOS), launch it and connect your iPhone to the PC. Agree to “Trust this PC” popup on your device while you connect it to the PC. On the welcome window, select “Transfer”.
On the new window, you will see various options on the menu bar i.e. Music, Videos, SMS, Contact, etc. Choose the type of data you want to transfer from iPhone to PC.
You will see a list of Music files, Videos, SMS, etc. as per your last command. Select all the files you wish to transfer, and then click the “Export” button just under the menu bar. Choose “Export to PC” from the drop-down menu.
You are almost there, all you need to do is select the location on your PC where you wish to save all the files. Click “Ok”. The transfer will take place in a few moments, click “Ok” once it’s finished.
Congratulations! You have successfully exported data from iPhone to PC.
AutoPlay is one of the easiest integrated methods that lets you transfer your iPhone data to PC. Every time you will connect your iPhone to your PC, it will pop up and will be ready to help you out. However, there are some restrictions and limitations of it in the kinds of data it can transfer, but keeping all of them aside, it can transfer most of your data successfully.
Start with simply connecting your iPhone with your PC using the USB cable, as soon you will connect it, you will see the AutoPlay popup.
The popup will have various options, you need to select “Import Pictures & Videos”, this is a very straight forward method to move data from iPhone to PC.
You will be directed to choose or create a folder in your PC where you wish to transfer your iPhone data. Choose the folder and then select the files i.e. videos, photos, etc. that you wish to transfer.
In the end, all you need to do is to tap on the “Import” button, it will initiate the data transfer from your iPhone to PC.
Once again, Congratulations!
Windows Explorer method to transfer the data from iPhone to PC works without any thrills, it is the most basic and straight forward method. You can simply connect your iPhone and follow the steps below to transfer your data successfully.
Start with connecting your iPhone to your PC, if required, choose “Trust this PC” on your iPhone, and put your iPhone password on the PC to continue.
Look for “My PC” or “This PC”, navigate to your iPhone in it, and use the right click to select the type of files you want to transfer. For example, select “Import Pictures and Videos”.
In the next window you will spot two options i.e. “Review, Organize, and Group items to Import” and “Import all New Items”. Select as per your preference. In the new window, select all the files that you want to transfer, and click “Import” at the end.
A better way to have data on your PC, as well as your iPhone, is to sync it with the help of iTunes. You can try all the integrated methods, but in the end, they will just transfer the data, but iTunes will keep the data updated on both of your devices. iTunes is a very easy way to sync all your data including videos, photos, music, etc.
Launch the iTunes on your PC, and at the same time, connect your iPhone with your PC, use a supported USB cable.
Click on the device icon in the upper left corner of the main window. You will be redirected to a new window. In the new window, you will see options to sync all type of data i.e. Videos, Music, SMS, etc. Choose what you want to sync.
The last step is to select all the options in the right panel of the window, check all the boxes as per your preference to sync them. Click “Apply”. You are done, thank us later.
Many of us prefer to transfer our data wirelessly, that might be due to unavailability of a USB cable, or the wireless connection is simply more convenient. Thus, we have listed below few ways through which you can simply copy your data from iPhone to PC without the use of USB cable.
iCloud is the official backup service from Apple for it’s iDevices, so you can use it to copy data from your iPhone to PC as well. However, we find the process of transferring data using iCloud quite complicated and messy, but it can still be considered a great way due to its reliability. Using iCloud export data from iPhone to PC is more like uploading a backup of data from your iPhone to iClouds, and then downloading those backup files on your PC.
Step 1 You need to first reach out to the official Apple website and download iCloud. Once downloaded, launch it on your PC and log-in to your iCloud account.
Step 2 Then, go to the “Settings” of your iPhone, go to “iClouds”, and then “Photos”, you can navigate to Videos, or contacts of other data too using the same navigation. You need to select “Download & Keep Originals. Import the data to your computer.
Step 3 Then, you again need to switch to your PC, navigate to “My PC”, then to the photos or music or videos folder of iClouds. You’ll see a “Download” button there, click on it, your data will be downloaded to the PC.
Huh! It wasn’t easy.
We have used Dropbox before also for recovering files and taking backups, it has emerged as a winner every time, and the same is the case when you try to copy your data from iPhone to PC. Dropbox makes the process super easy and very efficient, you just need to connect the data of your iPhone to the PC via Dropbox, and that’s it.
At first, you need to download Dropbox on your iPhone and as well as PC, once done, either create a new account if you don’t have one, or login with an existing account.
Go to the folder or location in your files explorer where your photos, music or videos are located. Navigate to the “Upload File” through the 3-dot menu in the upper corner. Choose the files you want to upload, and then select “Upload to Dropbox.
Switch to the Dropbox in your PC. Now, go to the folder where you uploaded your files from your iPhones, and simply download and store it in your PC.
See, it’s so easy to download iPhone data to your Computer.
In the end, no matter how many ways you have to transfer data from iPhone to PC, what matters is that which one is the best. It can be easily said that it totally depends on what you prefer. But, let us briefly compare them, so that you can have a better idea.
If you choose to transfer your data through iSkysoft, what you will get is a ton of features, as very easy to use the method, best in class efficiency and trust, and at the end, you will be able to successfully transfer your data.
Choosing AutoPlay means choosing ease of use. AutoPlay will eliminate 90% of the struggle and will transfer your data in a few clicks. However, It is only for window 7/8 users.
Windows Explorer isn’t fun, but it is indeed useful. It is the most basic way to transfer your data from iPhone to PC, hence, all it does is to transfer the data, no flexibility, no added feature, and no reliability.
Here comes the best-integrated way to transfer your data from iPhone to PC. It’s simple, featureful, flexible, and reliable. iTunes is not used to transfer your data, but it is used to Sync it between the devices, which can be better or worse depending on the personal preference. However, the downside of using iTunes is that you can sync your device with only one iTunes at a time, that means if you prefer iTunes as a data transfer platform, you can only share data of one device at a time.
If you are looking to copy data from your iPhone to PC using iCloud, we would like to say only one thing, there are better and more effective methods on the list.
Dropbox is one of the best wireless methods to import your iPhone data to PC. It is easy, it is reliable, and comes with a good amount of flexibility as well.
Let us know, which according to you is the best method to transfer data from iPhone to PC, the 3rd Party Apps, the integrated methods, or the wireless ways. We hope that our comparison of all the methods at the end will help you.
Elva
staff Editor
0 Comment(s)