6 Ways to Transfer Data from Mac to iPhone

Wondering how to transfer data from MAC to iPhone? Click to read about 6 ways to make the transfer including one that lets you even transfer data from iPhone to Android smartphone.

• Filed to: iPhone Transfer • Proven solutions

One of the biggest questions among Apple device owners is how to transfer data from MAC to iPhone? Now, you may be wondering why this question crops up from iPhones users even though iPhones are premium devices that come with almost all the bells and whistles one would expect from a high-end smartphone.

However, one of the pitfalls of this range of Apple devices is that they do not support expandable storage via SD card, so you can only work with the onboard that came with the device in the box. This results in the need to frequently move data from MAC to iPhone – a task that is time-consuming and tedious, but here are 6 ways to do so.

Part 1. dr.fone

Many MAC and iPhone users believe that iTunes is the best way to import data from MAC to iPhone, but in essence, this Apple software is far from perfect. Not only is it tedious to work with, but also lacks several features that could make a lot of tasks a whole lot easier.

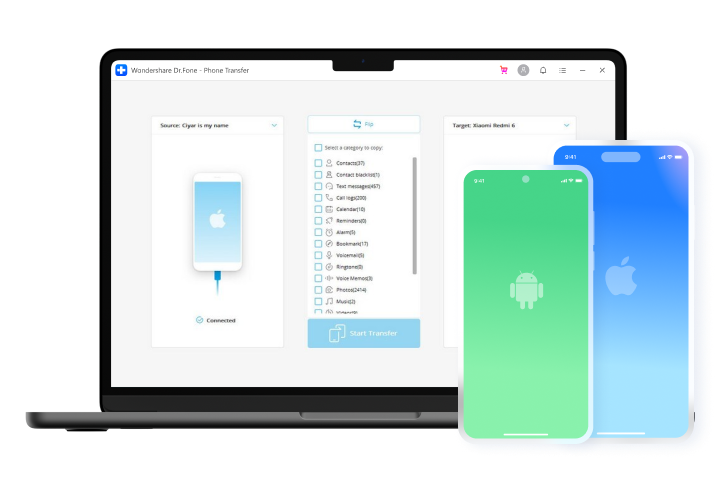
dr.fone is a smart alternative to iTunes and comes with a long list of features, one of which is to export data from MAC to iPhone. One of the noteworthy benefits of using iSkysoft is that you do not have to rely on iTunes or any third party software to get data from MAC to the iPhone. With that said, here are a few more great features of iSkysoft to help you decide whether its right for your needs.

Transfer photos from iPhone easily – in some cases, you may want to transfer photos from MAC to iPhone, while in others the other way around – transfer photos from iPhone to MAC. This is something you can do easily, efficiently and quickly with iSkysoft and without using iTunes, and the icing on the cake is that you can export and import photos with just a single click.

Here’s how easy it is to transfer photos from iPhone to Mac using iSkysoft.

Step 1 The first thing to do is download and install iSkysoft on your MAC, and then fire up the software. From the intuitive dashboard, select Transfer module, and then connect your iPhone to MAC using an appropriate USB cable.

ios-transfer-interface

Step 2 Next step is to browse the iPhone files by clicking on Photo, Music, Video, Information tabs.

ios-transfer-music-interface

Step 3 Lastly, select the files you wish to transfer and watch iSkysoft export media to your PC or MAC.

ios-transfer-export-to-pc-successfully

dr.fone - Phone Manager(iOS)

1-Click to Transfer Files between iOS and Computer

  • Manage iPhone photos – iSkysoft somewhat also serves as a MAC and iPhone manager, in that it allows you to browse the photos right on your computer and then add or delete the ones you want. To add to this, you can also use iSkysoft to manage your iPhone photos folders, so you can keep them organized around the clock.
  • Phone to phone photo transfer – if you’ve ever tried to transfer photos from an iPhone an Android smartphone, you very well know just how daunting this process can be. And it's even worse if you are trying to transfer a bunch of photos from iPhone to Android phone.
  • Supported file types – one of the other premium features of the smart iSkysoft software is that it supports several different types of files including Camera Roll, Photos, Photos Shared, Photo Stream, Albums, iCloud Photo Library, and Photo Library.
  • iPhone file explorer – with iSkysoft, you can use your iPhone as a flash drive, allowing you to browse and manage all the files and photos on your device.
  • Rebuild iTunes library – in the event, you lose your data due to a virus attack, computer crash, or even when you switch to another computer, you can rebuild your entire iTunes library with iSkysoft.
2,965,271 people have downloaded it

In terms of compatibility, iSkysoft lead the pack with support for all models of iPad, iPhone, iPod Touch including the latest iPhone XS (Max), iPhone X, iPhone 8 (Plus). It is also compatible with Windows 10/8.1/8/7/Vista/XP and macOS 10.14(Mojave), 10.13(High Sierra), 10.12, 10.11, 10.10, 10.9, 10.8, 10.7, or 10.6 and iOS 12, iOS 11, iOS 10.3, iOS 10, iOS 9, so regardless of the OS or device you are using, iSkysoft will work for you.

Part 2. iTunes File Sharing

Your next best option to transfer data from MAC to iPhone is with none other Apple’s proprietary software – iTunes. For this method to work, you will have to have the latest version of iTunes installed, and the latest version of macOS or an up to date version of Windows 7 or newer.

Step 1 Get started by connecting your iPhone to your MAC, and then launch the iTunes application. Next, unlock your device if it's locked and then click on the device name in the iTunes toolbar.

itunes

Step 2 Now, click on the Apps category in the left sidebar and then scroll down until you reach the File Sharing section.

itunes-file

Step 3 Click on any one of the apps in the File Sharing window and it should open its document library. Now you can drag the drop the files you wish to transfer and then copy them to your device.

Take note that if you don’t see a File Sharing section, then you will not be able to transfer files between MAC and iPhone.

Part 3. AirDrop

AirDrop allows you to transfer photos wirelessly to nearby iOS devices. To get started:

airdrop

Step 1 Launch AirDrop, and then turn on your WiFi or Bluetooth if it is turned off.

Step 2 Locate the file you wish to send, and then drag its icon over the icon of the other person’s device. Now, you will have to wait for the recipient to accept the file.

airdrop

Step 3 Once you accept the file on your iPhone, you will see a progress bar that indicates how much time is left to complete the transfer.

Part 4. iCloud

iCloud is a file management solution by Apple that you can use to transfer files between Apple and MAC devices. For this solution to work, you will have to make sure that iCloud is enabled on your iPhone.

icloud-photos-iphone

Step 1 In iOS 11, iCloud Drive is stored in the Files app so start by launching the Files app, and then tap browse at the bottom of the screen.

Step 2 Next, tap iCloud Drive in the locations section, then a folder to open it.

icloud-drive-file

Step 3 Tap Location at the top of the screen, and then choose the files you wish to move. Then tap Move, select a destination and then Move to export data from MAC to iPhone.

Part 5. Dropbox

Dropbox is basically a file hosting service that allows you to store files and access them from the cloud. For this solution to work, you will have to sign up for Dropbox and download the Dropbox app on your iPhone.

dropbox-ipad-iphone

Step 1 Open Dropbox on your MAC or login to the website online.

dropbox-download-photo

Step 2 Now, you will have to upload the files you wish to transfer to iPhone to a folder in Dropbox. This may take time depending on the number of files you are uploading and your internet upload speed.

Step 3 Lastly, once the files are uploaded, open the Dropbox app on your iPhone. Then, open the folder when where you uploaded the files from your MAC and then download them to your device.

dropbox-file

This process is a bit time consuming and may result in high data usage as you have to first upload then download the same files again.

Part 6. Email

This solution to how to copy data from MAC to iPhone is self-explanatory, but take note that files may incur a loss in quality as some email platforms tend to shrink images.

Step 1 Open up your email in your MAC computer browser.

Step 2 Click new to send a new email, and put recipient as yourself.

Step 3 Write the email if you wish or just attach the photos you wish to email.

Step 4 Send the email.

Step 5 In order to receive the email with the photos on your iPhone, you must have push email activated with that email address on your device.

Final thoughts:

When looking to transfer data from MAC to iPhone, you can try any of the options mentioned above. But since you’ve already spent a sizable amount of cash on your iPhone, and if you want to do more with it easily such as manage contacts, dr.fone is the best way to transfer data from MAC to iPhone.

Hot Articles

How to Sync Safari Bookmarks from iPhone to Windows 10 PC?
Sync safari bookmarks from iPhone to Windows 10 PC fails? Here we'll show you 3 ways to sync bookmarks from iPhone to PC with/without iTunes, look it!
How to Sync Contacts from iPhone to Another iPhone?
Sync data from iPhone to a new one is common when you buy a new iPhone, here provides best solution to sync contacts or iTunes playist to new iPhone.
Best Tips For You To Get Free Ringtones For iPhone
Do you want to download various ringtones for free on iPhone? Here introduces 12 best websites and apps for you to get free ringtones easilly.
3 Solutions | How to Transfer Photos from iPad to PC
Transferring photos from an iPad to a PC is no difficulty with the available techniques and tools. This article segregates three basic solutions to transfer photos from iPad to PC.
Home > > Resource > iPhone Transfer > 6 Ways to Transfer Data from Mac to iPhone