How to transfer photos from PC to iPhone[Ultimate Guide]

They ensure to keep backups everywhere possible. Even if they lose out on their pictures, they can manage to get it from their prime source.

• Filed to: iPhone Transfer • Proven solutions

People these days takes a good care of their stuff. They ensure to keep backups everywhere possible. Even if they lose out on their pictures, they can manage to get it from their prime source. So, if you are one of those staunch users that manages pictures on PCs and iPhone but lose out on latter, then this guide is right for. As, today we will understand a pool of ways that are helpful in exporting photos from PC to iPhone in a hassle-free manner.

Part 1: dr.fone – Phone Manager (iOS) [simplest way]

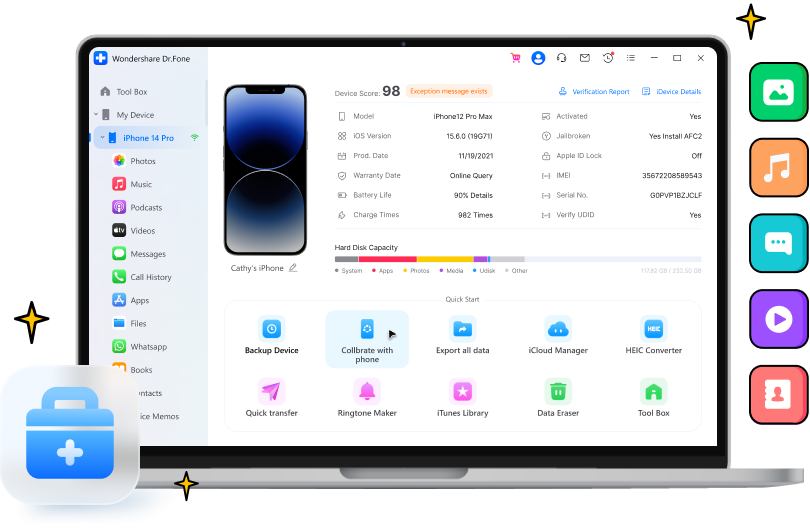
There are hundreds of methods that facilitate transferring. But, if you are in search of the easiest method of transferring photos from PC to iPhone, dr.fone-Transfer is the ultimate option for you. Imbibed with a good essence of functionalities, it manages to work with both the Android and iPhone devices and sync media files thereof. In addition to this, it is capable of moving pictures in a selective mode or otherwise.

dr.fone - Phone Manager(iOS)

1-Click to Transfer Files between iOS and Computer

  • Supports transfer of photos and videos without the need of iTunes.
  • Supervise iPhone pictures over your computer and accordingly manage, add, delete exporting photos.
  • Capable of moving pictures iPhone to Android and vice versa without any interruption.
  • iSkysoft Transfer can intelligently convert media files while processing the transfer.
  • Users can rebuild iTunes Library when they lose upon data due to crashes, virus attacks or switching to the new computer.
  • iPhone ringtone maker is incorporated which is helpful in setting favorite songs as ringtone.
2,965,271 people have downloaded it

Tutorial: How to Transfer Multiple or Selected Photos from PC to iPhone

It’s now time to unveil the step by step tutorial on how to transfer selected or multiple photos from PC to iPhone. Please follow the below-mentioned steps carefully and you’ll be all sorted.

Step 1 First, you need to get the dr.fone – Phone Manager (iOS) installed over your PC. Launch the program and then opt for the “Phone Manager” option available on the main interface. Next, connect your iPhone into your PC with the help of a USB cable.

toolbox-home-win

Step 2 Once done, your device will get detected by the tool automatically. You need to get under the “Photos” section using the top navigation panel. Now, hit the “Import” button available just below the navigation panel and then either opt for “Add File” or “Add Folder” option as per your need. Here we opt for “Add File”, for instance.

ios-transfer-transfer-device-photos-to-pc

Step 3 Now, a pop up windows will come up on your screen. You need to locate the photos on your local storage of your PC. Then, select the photos that you wish to transfer, for transferring multiple photos – hold the “CTRL” key while selecting the files. Once you’re satisfied with your selection, hit the “Open” button.

That’s about it. Within a short while, the transfer of photos from PC to iPhone will be done. You can disconnect your device now and access the files over your iPhone thereafter.

Part 2: Export photos from PC to iPhone with iTunes

ITunes is one of the media players cum libraries that is essential to upkeep music and video of your phone. While, users have the liberty of purchasing and accessing music, videos, TV games etc. iTunes also manages to maintain the data saved in iPhone’s storage. So, managing the items on your respective device gets much easier. Transferring photos from PC to iPhone gets no task for iTunes. Here is how you can export your desired photos from PC to iPhone by using the following steps in the said order.

Step 1 To begin with, simply draw the connection of your respective device to your PC by making using of a USB cable.

Step 2 You’ll notice a “Device” icon appearing over the upper-left part of your iTunes screen. Tap on it to gain access to the settings over your iDevice.

device-icon-itunes

Step 3 From here-on, locate and tap at the “Photos” option present at the left side of the bar.

Step 4 Under this, you need to locate “Sync Photos from” option is located. After that, you can proceed to sync the “All folders” or maybe the “Selected folders”. In case, you are looking to sync the videos then you can check the “Include videos” also.

sync-photos-by-itunes

Note: If the user happens to opt for “Selected folders” option, then they would get to have the option to check whether the folders they want to sync to the device or not.

Step 5 Now, the final step is to tap on the “Done” button followed by selecting “Apply” options. It will prompt iTunes to transfer your desired set of photos to the respective Apple device.

Part 3: Sync photos from PC to iPhone with iCloud Photos

Apple’s iCloud is one of the renowned cloud storage that acts as a replica of whatever data types stored in your respective Apple device. It goes without saying that this storage service also manages to keep your photos easily. So this means that without taking the pain of drawing connection by using the wires, iCloud can prove to a be viable option to move photos from PC to your iPhone.

Wondering how? Here is the comprehensive set of guide that will help you out:

Step 1 Get hold of your iPhone and go to the “Settings” option and tap on [your name]. From there, go to “iCloud” followed by the “Photos” option and ensure to enable the “iCloud Photos/iCloud Photo Library”.

icloud-photos-iphone

Step 2 Now, over your PC head, visit the folder where your photos are stashed. Then, open the web browser and surf www.icloud.com from your working web browser.

Step 3 Simply, log in with the credentials of your iCloud account that is synchronized with your iPhone and then opt for “Photos”.

icloud-launchpad-photos

Step 4 After this, select the “Upload” placed over the upper right portion of the screen. Ensure to navigate to and select photos you are willing to upload. In case of selecting several files, hold the “CTRL” key for multiple selections.

icloud-photos-upload

Step 5 Once you’ve made the desirable selections, opt for “Open” to upload all the selected photo files. And there you go, this way all your pictures will get displayed over the “Photo” app of your iPhone or iPad respectively.

Part 4: Move photos from PC to iPhone by Google Photos

Just as the Google Drive, Google Photos is one of the child of Google. In a nutshell, the Google Photos is an online photos repository that smartly manages your photo as well as the video files over a couple of devices. It automatically syncs your photos to the storage. Moreover, it has the provision of sharing albums, images and videos with other people. The Google photos works greatly in all the Android, iOS and desktops easily. With this handy tool, transfer photos from your computer to any respective device becomes really easy. Here is the complete step by step guide on how to move photos from PC to iPhone.

Step 1 First of all, start with your desktop by launching the browser you work with and surfing for photos.google.com website.

Step 2 Simply, login with the Gmail credentials (ensure to log in with the same account working in your iPhone). Also, do the same in the aforementioned steps.

Step 3 Once you view the photos library, either drag all the images that you wish to reflect on your iPhone or hit the Upload button and locate the photos files to upload them over the cloud storage.

google-photos-pc

Step 4 Now, take your iPhone and force the installation of “Google Photos” app on it. Then, sign in to the Gmail or Google account for accessing the photos which you recently uploaded from your PC.

Step 5 The task by your end is to search the pictures and download them on your iPhone. For that, you’ve to press on the desired picture which will load the preview window and tap on the 3 horizontal dots that will have “Download” option, you go to tap on.

google-photos

This way, the desired image(s) will gets stashed on your Camera roll, wherein you can gain its access.

Part 5: Save photos from PC to iPhone with Cloud storage: Dropbox

One of the renowned cloud storage available in the Internet is Dropbox that can store files, documents, photos and several types of files and folders in an easy manner. It goes without saying, Dropbox is also capable of printing, editing or sharing the photos stashed in the Dropbox. For that one has to download the pictures from the cloud that will automatically route over your device easily. To understand how, just follow down the steps mentioned right below:

Step 1 To start with, quickly load the Dropbox app on your Home screen over your respective iPhone device. In case you did not already sign in to your Dropbox account, do it promptly.

Step 2 Simply, click on the desired photos, you are wishing to import to your device.

Step 3 All you’ve to do is press on the photo until the bar of options displays over your screen.

Step 4 Now, click on “Save to Camera Roll”.

dropbox

Step 5 Allow a couple of minutes to the file to download. Once it is downloaded, the pictures will reflect on the photos app!

Step 6 Repeat the steps 2, 3 and 4 above for all other photos that need to be downloaded to the Camera Roll over your iPhone.

Part 6: Copy photos from windows to iPhone by Email

Usually, we use the mail service for managing our mailbox account. Our corporate friendly mailbox is not limited to sending or receiving emails. There is way more than that you could do. How about saving a draft from your PC and open it on your phone? Surprising, isn’t it? This smart tip that can be helpful in moving photos from PC to iPhone without having to get your phone or PC connected! All you got to do is follow the steps in the said order.

Step 1 From your PC, make a new folder by right-clicking from the main screen and opting “Folder” from “New” option.

Step 2 On this folder, add in all the images you wish to open on your mail ID.

Step 3 Now, go to your native browser, proceed with signing in to the mailbox service you use.

Step 4 Simply, send a mail to yourself with all the photos in the folder created by you as the attachment.

email-photos

Step 5 Grab your iPhone, access the mail and download the attachments. See, it’s that simple! All your desired pics will be synced.

Part 7: Visit Whatsapp Web

A yet another method to transfer photos from PC to iPhone is via the help of WhatsApp Web. For this method to work on, you need to have WhatsApp installed over your iPhone. Moreover, an active internet connection must be available over both iPhone and PC in order to make use of WhatsApp Web functionality. Here’s the detailed guide on how to transfer photos from PC to iPhone using WhatsApp Web.

Step 1 Launch the WhatsApp application over your iPhone and meanwhile, launch the browser over your PC and visit “https://web.whatsapp.com”. You’ll now be presented with the QR code which you need to scan using your WhatsApp on iPhone.

whatsapp-web-qr

Step 2 For this, grab your iPhone and hit on the “Settings” tab at the bottom and then select the “WhatsApp Web/Desktop” option. A scanner will launch on your iPhone. Now, scan the QR code over your PC with the scanner. As soon as you do it, your iPhone’s WhatsApp will then be connected over your PC.

whatsapp-web-iphone

Step 3 Next, you need to simply drag-drop the photos to any of your alternate numbers (must be registered on WhatsApp). Once the photos have been sent, sign out of the WhatsApp Web from your PC.

Step 4 Lastly, launch the chat over your iPhone to which you have sent the photos and all your photos will then be saved to your Camera Roll automatically.

Note: Automatic download works only if the “Save to Camera Roll” is enabled. To do this, get into the “Settings” menu of WhatsApp followed by “Chats” and then toggle on “Save to Camera Roll”. That’s it, you’re all sorted now.

iphone-save-to-camera-roll

Comparison and conclusion

Methods Two-way transfer (to and from iPhone) Transfer data selectively or completely One-stop solution for all data type transfer Ease of Use
dr.fone – Phone Manager (iOS) Supported Supported Yes Extremely Easy
iTunes Supported Not Supported Yes Complex
iCloud Photos Supported Supported No Easy
Google Photos Supported Supports download of photos one by one No Easy
Cloud storage: Dropbox Supported Supported No Complex
Email Supported Supported No Complex
Whatsapp Web Supported Supported Yes Easy

Part 8: Best way to transfer photos from PC to iPhone

So here was the comprehensive guide that enlightened you with several ways on how to export photos from PC to iPhone. While, there are methods that require a connection between iPhone and PC, others can do without it. But, all of these require a good set of manual work. But, in this paced life, nobody has the time to sync photos from PC to iPhone by employing complex set or procedures. Hence, dr.fone-Repair comes for your rescue. Designed with the great features, it is the best way to transfer photos from PC to iPhone. That apart, it supports transfer of several other media files as well!

Elva

staff Editor

Hot Articles

How to Sync Safari Bookmarks from iPhone to Windows 10 PC?
Sync safari bookmarks from iPhone to Windows 10 PC fails? Here we'll show you 3 ways to sync bookmarks from iPhone to PC with/without iTunes, look it!
How to Sync Contacts from iPhone to Another iPhone?
Sync data from iPhone to a new one is common when you buy a new iPhone, here provides best solution to sync contacts or iTunes playist to new iPhone.
Best Tips For You To Get Free Ringtones For iPhone
Do you want to download various ringtones for free on iPhone? Here introduces 12 best websites and apps for you to get free ringtones easilly.
3 Solutions | How to Transfer Photos from iPad to PC
Transferring photos from an iPad to a PC is no difficulty with the available techniques and tools. This article segregates three basic solutions to transfer photos from iPad to PC.
Home > > Resource > iPhone Transfer > How to transfer photos from PC to iPhone[Ultimate Guide]