
• Filed to: iPhone Transfer • Proven solutions
Images are usually accessed across file formats that are majorly recognized as JPG, PNG, and HEIC. Apple stores its images across these formats; however, it lacks the availability of third-party platforms that allow them to convert it into PDF.
Apple is known for creating the best smartphone lineage of the decade and is considered among the developing platforms that have provided the most optimal results to its target audience. The management of pictures across an iPhone can be made easier through various means. This article introduces you to various techniques that explain to a user how to transfer photo to PDF with ease.
Part 1. 3 Easy Methods: Transfer Photos to PDF on iPhone
The process of transferring a photo to a PDF file involves multiple methods and mechanisms that can be adopted by users for efficiently managing their images and pictures within the device. To understand these methods, you are advised to look over these methods in detail to get a better understanding of the propagation of the mechanism.
Method 1: Transfer a Photo to PDF on iPhone Using Share Sheet
Out of the many techniques that exist in the market, utilizing Share Sheet can be considered one of the most fruitful methods to transfer a photo to PDF on an iPhone. For this, you are not required to print the image itself but perform the operation across the Pinch Out gesture in the "Print Options" screen.
This feature allows the image to be converted into a PDF, which can then be shared across various platforms. To successfully transfer a photo through the Share Sheet, you need to follow the steps provided as follows:
Step 1 Access the "Photos" application across your iPhone and approach the album that contains the video you wish to transfer. Long press the image and tap "Share" on the menu that appears on the screen.
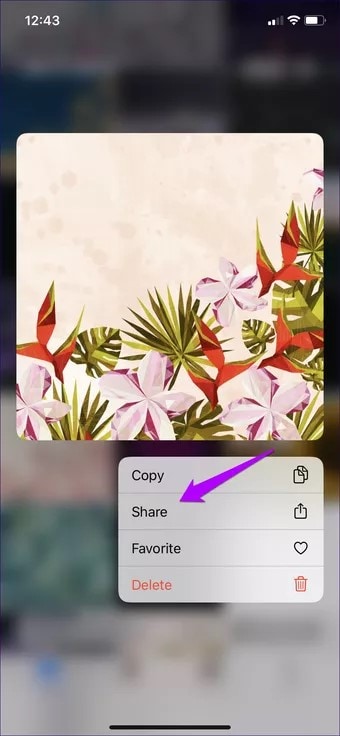
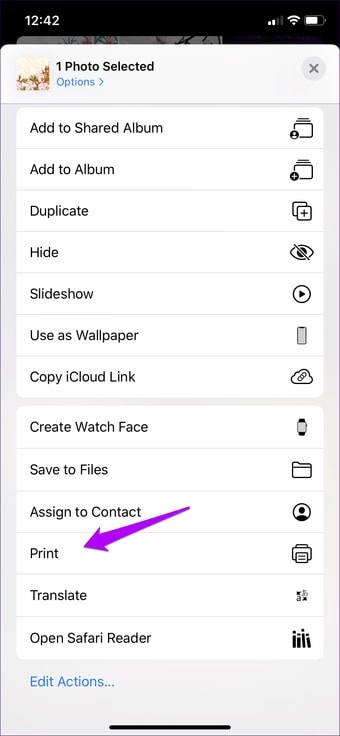
Step 2 With the Share Sheet on the front, you need to tap "Print" from the provided options. In the "Printer Options" section, select the Pinch Out gesture across the screen, which would convert it into a PDF.
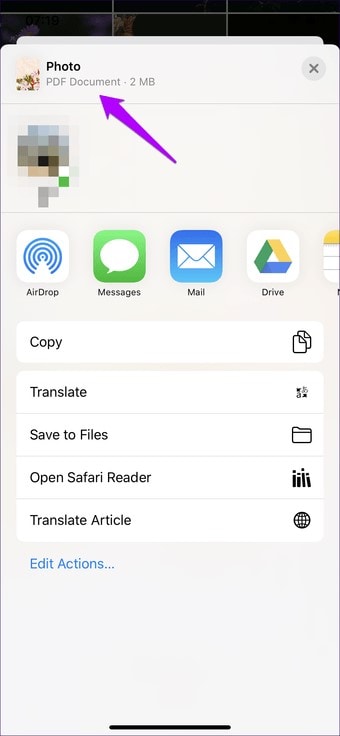
Step 3 Tap on the "Share" icon and save the PDF file across your local drive.
Method 2: Save Photos as PDF on iPhone and iPad Using Files App
The conversion or transfer of the photos across the "Photos" app on an iPhone is considered difficult as compared to converting it across the "Files" App. However, it should be considered that this method is convenient for images that are downloaded, are screenshots, or scanned documents. However, when considering saving single or multiple images as PDF on iPhone, you need to follow the steps provided below.
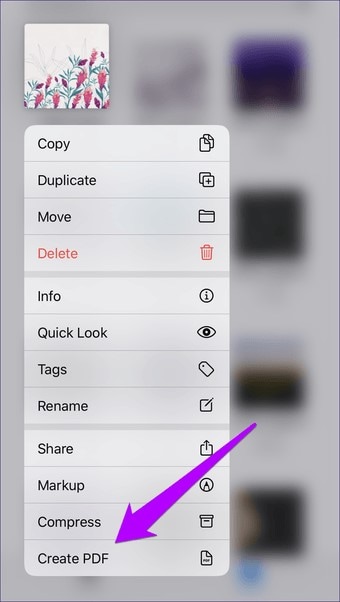
Step 1 For converting a single image, you need to access the appropriate file across the Files App and long press to open a series of different options. Tap "Create PDF" to execute.
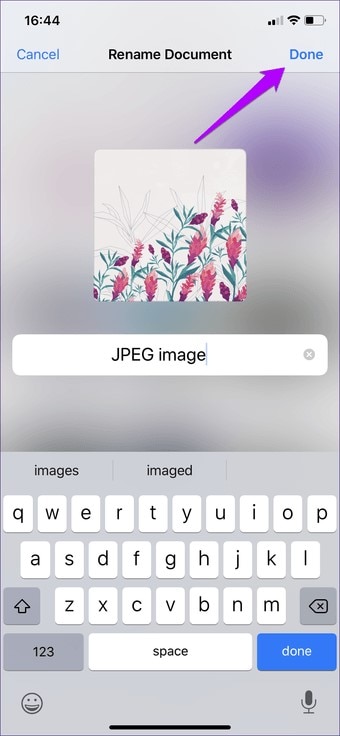
Step 2 Before converting multiple images, the File App provides you the ability to rename the image files according to your requirements and have them ordered accordingly. Since the executed result with being in the form of converted files in alphabetical order, you should be careful while naming them.
Step 3 Once named, access the selection mode, and select all the photos that you wish to save as PDF. Tap the "three-dotted" icon after selection and select "Create PDF" from the list. The files would be converted across a similar location as a PDF.

Method 3: Copy to Books on iPhone and Saved as PDF
Another typical method that can be adapted to transfer photos to PDF files is through copying your images across the Books App. To successfully convert your image files into PDF through this method, you need to follow the guide provided as follows.
Step 1 Access "Photos" on your iPhone and long-press the picture that you wish to convert. Tap "Share" on the menu that appears on the screen.
Step 2 Tap "Books" in the options provided in the Share Sheet. The files would be converted to PDF and will be displayed in the Library section of the Books app.

Part 2. How to Transfer Photos from iPhone
If you are looking for simpler and efficient methods that can successfully transfer multiple photos and albums from your iPhone, you should consider using Dr. Fone – Phone Manager (iOS) to cater to your issues.
Third-party dedicated platforms provide users with the perfect options to cover different procedures and processes with ease. There are several reasons that make Dr. Fone a very impressive choice among users.

dr.fone - Phone Manager (iOS)
Download dr.fone - Phone Manager (iOS) to have a try!
- It allows you to transfer media files and manage them efficiently.
- Backs up the media files that are saved on the computer.
- Provides easy restoration of files with transfer across multiple smartphones.
- Offers to transfer files between the iOS devices and iTunes.
Check the following guideline allows you to transfer Photos from the iPhone efficiently.
Step 1 Connect your Device
You are required to select the "Phone Manager" tool from the home window of the platform. Following this, connect your iPhone with the desktop containing the platform.

Step 2 Selecting Option
You need to select "Transfer Device Photos to PC" on the next screen. This would open a new window.
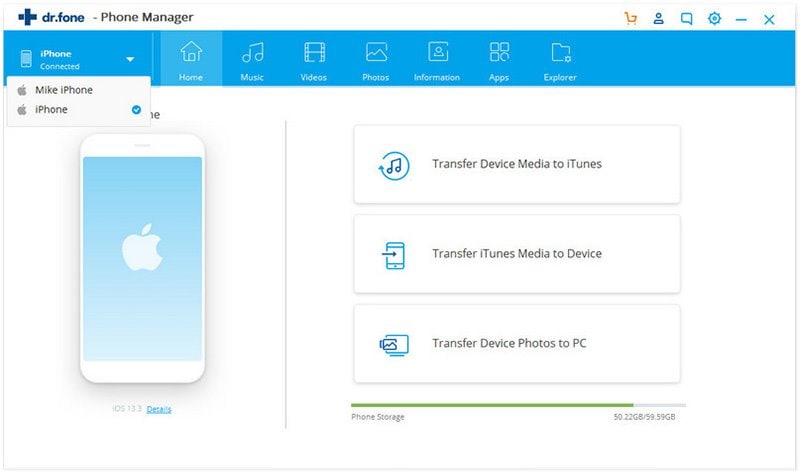
Step 3 Execute
The redirected window demands you to provide the location of saving the backup. Tap "Ok" to execute the task successfully.
Conclusion
This article has focused on offering unique and efficient methods of transferring photos across the iPhone to various other devices. These techniques allow the user to easily convert their desired image to PDF format and share it across various platforms. You need to go through this article to develop a better understanding of the functions and operations that are involved in the complete mechanisms.
Elva
staff Editor