Mac Data Recovery
- Mac Data Recovery+
-
- Undo Empty Trash Mac (macOS Mojave Supported)
- Recover Overwritten Files on Mac
- Recover Lost Data on Mac after Upgrading to macOS Mojave
- How to Show Hidden Files on Mac
- Top 10 Mac Data Recovery Software Reviews
- How to Recover Deleted Files on Mac
- Recover Deleted Files on Mac Without Software
- How to Delete Partition on Mac
- Mac Hard Drive Recovery
- Top 6 Ways to Recover Deleted Photos on Mac
- Word Not Responding on Mac? Fixed Now!
- Recover Files from Recycle Bin or Trash Folder on Mac
- 5 Best Methods to Recover Deleted Word Files on Mac
- Effective Solutions for “Desktop Files Disappeared on Mac”
- Recover Overwritten Files on Mac
- Apple Email Recovery
- Free Mac Data Recovery+
- Mac Repair and Restore+
-
- Format FAT32 and NTFS Drives on Mac
- All You Need to Know about MAC Recovery Mode
- A Detailed Guide on Mac Repair [2019]
- How to Perform Internet Recovery on Mac
- How to Restore MacBook Pro?
- How to Restore Mac to Factory Settings?
- How to Restore Mac from Time Machine? [2019]
- How to Restore Mac and Get All of Your Files Back
- How to Boot Mac into Recovery Mode?
- How to Restore MacBook Air Safely Without Loosing Data
- How to Securely Do a System Restore on Mac
- How to Restore iMac without Data Loss
- Best Mac Recovery Partition App
- Best Way to Perform Disk Recovery on Mac
- The Best Mac USB Recovery Tool

• Filed to: Mac Recovery • Proven solutions
We spend a large portion of our day in front of the Mac, whether it be for professional reasons or for entertainment. The amount of data being recorded and rerecorded on the iMacs is just staggering and with a byte of data being written or read, the process stresses the hard drive.
Normally, hard drives are built to withstand these stresses, however, they are susceptible to failure like every other electronic or mechanical device. The problem is that when they fail, they take the data with them. And it may include your important office files, school assignments or reports. In this guide, we will be going over ways in which you can recover data from Mac hard drive.
Common reasons that result in Data loss in Mac
Before we get into the actual methods, let’s have a look at the various ways in which your data loss in Mac takes place.
- Hardware damage: Whether you are using a hard drive or an SSD, physical damage can occur in many ways. Hard drives are more susceptible to physical damage. Hard disk damage can either cause damage to specific sectors or can affect a larger area. If you have noticed your computer taking longer load times or slower file transfer rate, it’s wise to run a hard disk scan.
- Malware or Viruses: If your mac has been infected with viruses or malware, then they can wreak havoc in your system. One of the ways in which viruses attack the system is by deleting files from the computer. These files can range from normal files to system files.
- Abrupt shutdowns: A file that you are working on will only be saved to the hard drive if you save it. If the computer abruptly stops before that, then the file will not be saved, and can even result in the corruption of perfectly saved files. Abrupt shutdowns can happen from power loss, technical errors, hardware problems, etc.
- Logical failure: Mac systems use HFS or Hierarchical File System, which is designed to be faster than other file keeps systems. However, they are also open to vulnerabilities like Catalog file corruption or journal file corruption.
- Human errors: last but not least, we humans are not perfect ourselves. Sometimes, we delete important files without knowing, or format the disk drive without moving all the important files.
It is inevitable that your storage will fail on you one day, and the hard part is that it may fail on you without any notice. In this guide, we will provide you with solutions using which you can recover lost data on mac.
Method 1. Recover Data from Mac Hard Drive from Trash Bin
MacOS has a feature that gives you one chance to get back a file that you have deleted through Trash Bin. When you delete a file in Mac, it doesn’t get removed from the system. it will be sent to the Trash Bin, and if you want to remove it from the system, you will have to delete it from there. So don’t worry if you have accidentally pressed the delete button, the following steps will help you recover the file.
Step 1 Locate the Trash Can on your Mac.
Step 2 Open the Trash Can and right click the file you want to restore. Click “Put Back” to restore the deleted file back to its original place.
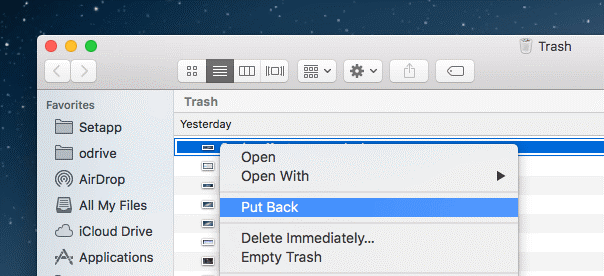
Having the Trash Can feature on Mac is a life saver. Accidental deletion can sometimes put us in a lot of trouble. But a feature like this makes restoring deleted files on a Mac a breeze!
Method 2: Restore from Time Machine
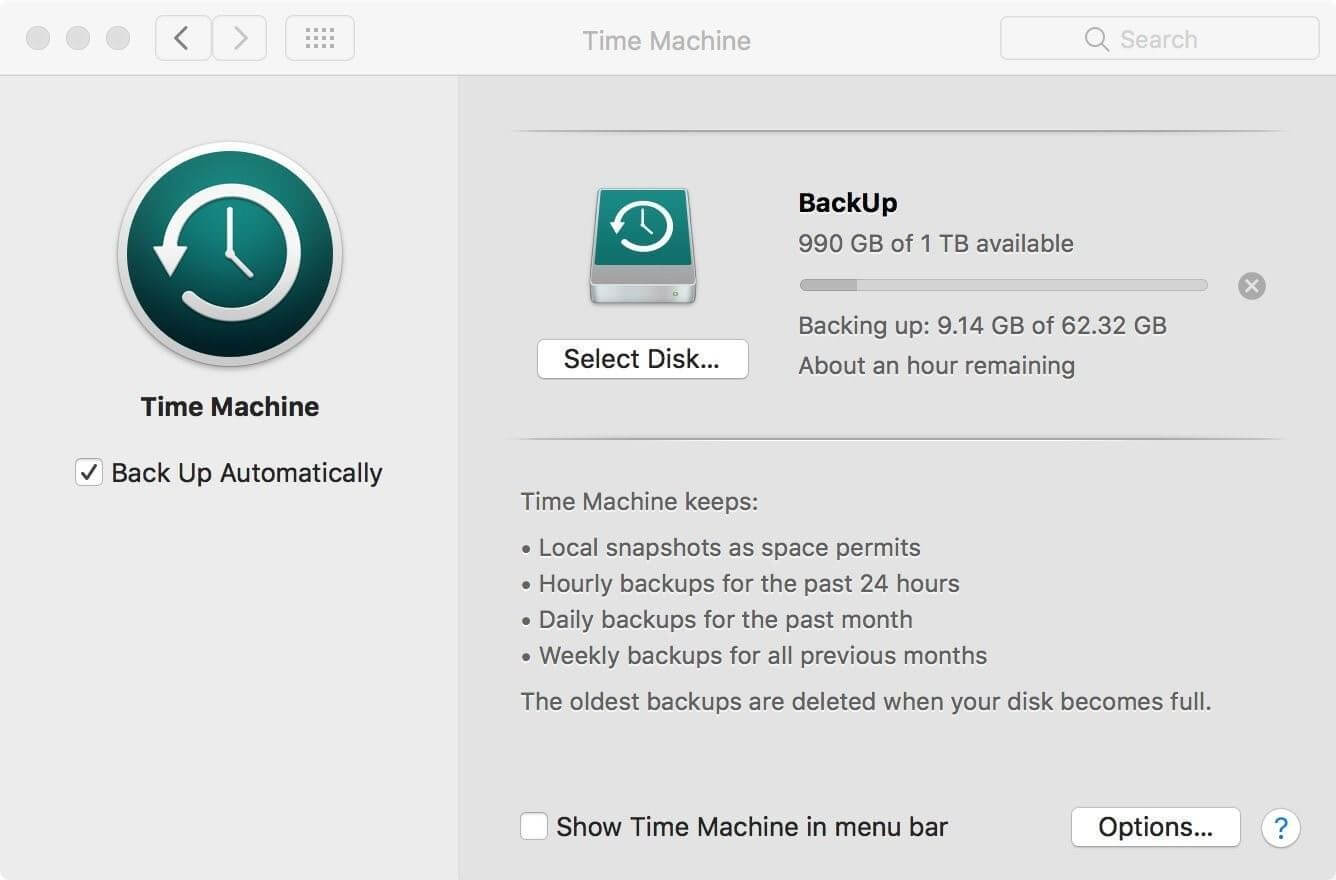
Time Machine is the backup feature that is present on Mac. Basically, Time Machine helps the user to back up the data on your Mac. This feature comes standard with every MacOS and you can find these features within iMac settings.
Time Machine periodically backs up the data on your Mac and saves them to your local disk. So if you were to lose some files or if some of your files are corrupted, you can restore them to their previous state using Time Machine. The following guide will help you restore Mac files using Time Machine.
Step 1 Navigate to Preferences → Time Machine and click on the Time Machine app.
Step 2 Navigate to the folder from where you lost your files. Adjust the time to a previous date by toggling the time stamp icon given on the right side of the folder.
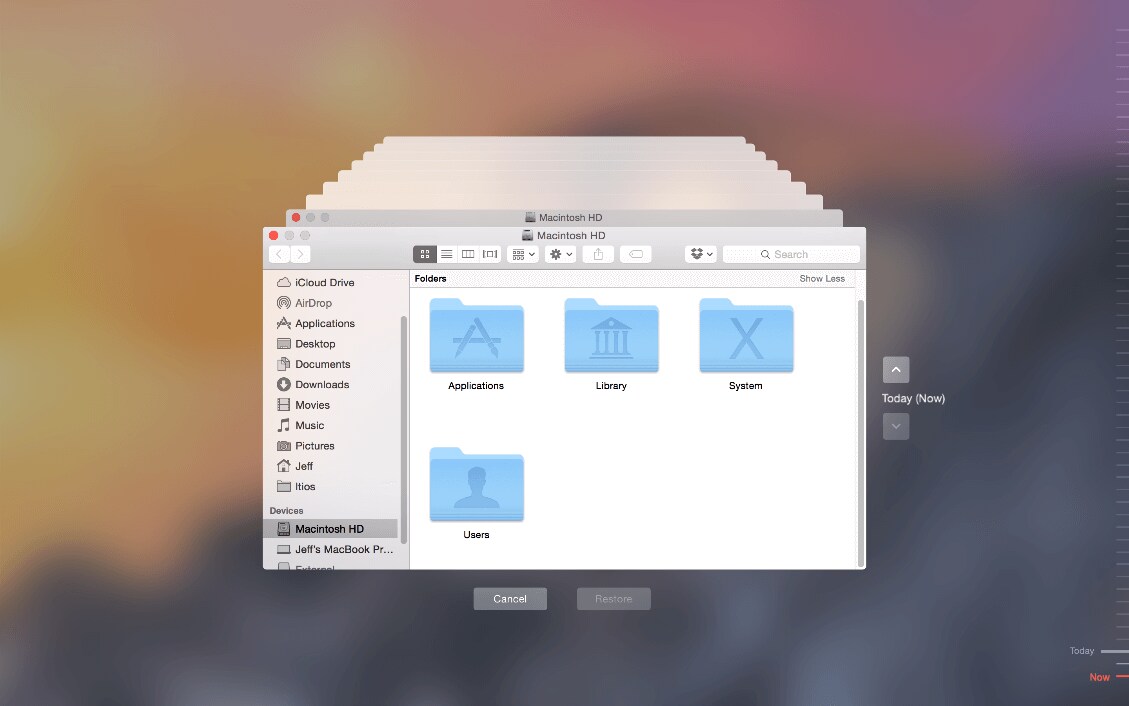
Step 3 When you find the file, click on Restore and the files will be put back to place.
The Time Machine feature is set to create timely backups by default. However, if you have turned off this feature, then you will not have any backup in place to do the restoration process. So if you want to use Time Machine, make sure you turn the automatic backup on in Time Machine.
Method 3. Restore with Data Recovery Software with High Success Rate
If you do not have the file in Trash Can or if you can’t use Time Machine to restore files, then you will need a more powerful software on the job. The Recoverit (IS) software is our recommendation to restore deleted files on your iMac.
iSkysoft Data recovery tool scans the disk for deleted or formatted files and recovers then based on your instructions. The software uses powerful algorithms to dig deep into the storage system to find and recover the files that you can’t get back using conventional ways. The following features show how advanced dr.fone is in file recovery.
Recoverit (IS) for Mac
A Life Saver to Solve Your Data Loss Problems!
- Internal and external drive support: You can use the iSkysoft Data recovery tool to recover files from your internal hard drive or from the external hard drives.
- Engineered for Mac: You can see that iSkysoft has perfected the software for Mac by how well it works on the system.
- Media files support: iSkysoft supports the restoration of all major audio, video and picture formats.
- Works on lost partitions: You can use Recoverit (IS) to recover files from lost partitions.
- External drive data recovery: You can also recover files from external devices using iSkysoft.
Even though iSKysoft comes with an impressive set of features, it is remarkably easy to install and use. the following guide take you through the whole process.
Step 1 Download dr.fone for Mac from the official website. Install the software on your Mac.

Step 2 Launch the software. Out of the options listed, select the disk where you lost data to scan.
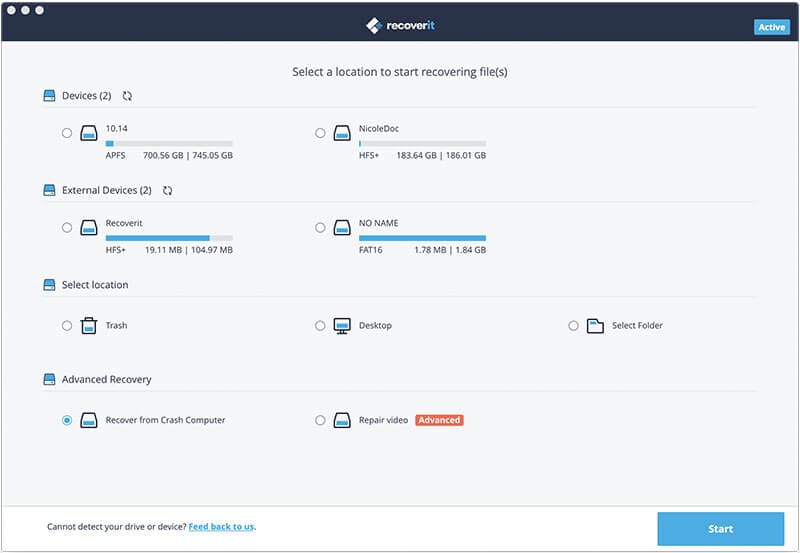
Step 3 Now the software will scan for files lost through deletion or formatting the drive.

Step 4 Select the files you want to recover and click “Recover”. Now all the selected files will be recovered to your local storage.

If you are in need of a software to get back all the files that were deleted from your hard drive, then Recoverit (IS) is your best option to get them back. You can see how easy it is to do from the step by step guide.
Bonus tips: Fix/Repair External Hard Drive on Mac
As we discussed, hard drive failures amount to quite a lot of data loss that we see on Mac. There are some general fixes that you can do if you spot something wrong with your hard drive. Let’s go through some of them and how you take care of your hard drive better.
Solution 1: Check if your drive is properly plugged in
Before you use any kind of software recovery on Mac, have a look at the physical drive itself. Check to see if you have plugged in the data cable properly. If there isn’t enough contact between the plugs and the hard drive, it can lead to poor hard drive performance.
Solution 2: Check if it is a faulty connection
There are two types of connections that go into a hard drive – The data cable and the power cable. Even if one of them don’t have a proper connection, it results in hard drive failure. Also, any kinks or tear in the cable can also result in a faulty connection. The result in that the hard drive will not be able to process information correctly.
Solution 3: Repair External Hard Drive with Disk Utility
Disk utilities are software that can help in boosting the hard disk health by optimizing it. When you store a lot of data on the hard disk, the computer takes time to open it in times of need. Disk utilities defragment the hard drive sectors so that the data is organized properly, making it easier for reuse.
Solution 4: Repair External Hard Drive with Terminal
If you don’t want to use a disk utility, you can prompt mac to repair the external hard drive through the terminal. To use this method, open the terminal app on your mac (you can find it in /Applications/Utilities/Terminal.app). Enter “diskutil repairvolume /Volumes/[drive name]/” into the terminal. Replace [drive name] with the name of the external drive. Now Mac will run some tests on your external hard drive and fixes errors that are detected by the system.
Solution 5: Repair External Hard Drive by reformatting
If all the above methods don’t work in your cases, then the best way to stop further damage is to format the hard drive. It will result in the deletion of all your files, so salvage what you can from the device. You can always use the Recoverit (IS) tool to get back files even from a formatted drive if you can’t move them beforehand.
Conclusion
Hard drives help us to store files so that we can use them whenever we want. However, you must also realize the fact that they are susceptible to errors and can fail if one day. So making sure that you have backups ready or have multiple saves is a great way to keep your files safe. In the worst case scenario where you might lose your files, you can always use a data recovery tool like Recoverit (IS) to get them back.
Though our first recommendation is to take good care of your Mac. Make sure you clean the system once in a while, run periodic disk health checks etc. if something were to go wrong, save this article to know what to do!
Elva
staff Editor