Photo Recovery
- Photo Recovery+
-
- Top 10 Best Photo Recovery Software
- Best Way to Do the Lost JPEG Photo Recovery
- How to Recover Photo on Google Backup
- How to Restore Lost Photos
- How to Restore Deleted Pictures
- Photo Backup Strategies
- 5 Free Photo Recovery Softwares
- Best Stellar Phoenix Photo Recovery Alternatives
- Restore Damaged Photos in Seconds
- Photo Recovery After Factory Reset
- How to Recover Corrupted Images
- Recover Lost Photos from A Formatted Drive
- Camera Photo Recovery+
- Computer Photo Recovery+
- Mac Photo Recovery+
- Phone Photo Recovery+
- SD Card Photo Recovery+

• Filed to: Photo Recovery • Proven solutions
Many times, we forget to save our photos or delete them by mistake, simply because of the huge number of photos on our phone or the various photo applications that we use. Whether you're using the latest Android phone or are a Windows Phone user with a Nokia Lumia 820 or 920, this is a persistent problem and hence needs to be solved. Here's a way you could easily go about the Nokia Lumia 820/920 photo recovery process.
Part 1: The Best Software for Nokia Lumia 820/920 Photo Recovery
One of the best software out there to help you with the Nokia Lumia 820/920 photo recovery process is the Recoverit (IS) (or Recoverit (IS) for Mac) which enables data recovery in phones with Android and Windows phones which support memory card . It simplifies the process and helps you easily recover deleted photos from your Nokia Lumia 820/920. It helps you recover data that has been lost in several situations including that lost due to virus invasion, improper formatting, system crash, and much more.

Recoverit (IS)
Why Choose This Nokia Lumia 820/920 Photo Recovery Software:
- The process is highly efficient with powerful algorithms that ensure the safety of your other files while recovering your photos.
- It allows to pause and restart the process whenever you wish to.
- Unique preview function allows you to preview all of your selected options and helps you easily spot the target file.
- The data recovery process in itself is extremely thorough and helps you keep the original names of the files and videos after recovery.
Part 2: Steps on How to Recover Deleted Photos from Nokia Lumia 820/920
Recoverit (IS) works on a simple 3 step process which includes scanning, previewing and recovering to help you quickly recover the files you wish to. Here's how you can easily go about the Nokia Lumia 820/920 photo recovery process by following these simple steps.
You need to make sure your phone's SD card is connected to your computer- you can either do this using an external SD card device or remove the card and directly connect it to your PC. Also, make sure you've downloaded the Recoverit Nokia Lumia Photo Recovery Software before beginning the process.
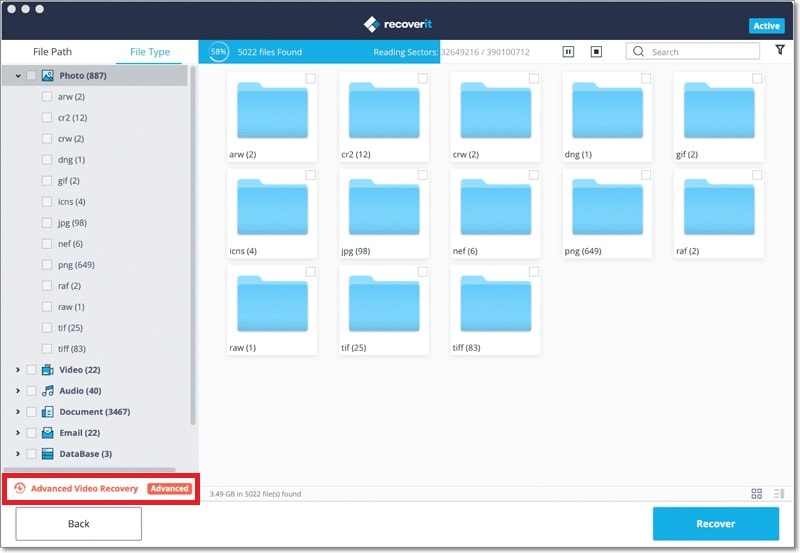
Step 1. Choose the File Yypes You Want to Recover
After connecting your memory card to the computer, open the software.
Step 2. Select the Location You Want to Recover Data from
Select your card from the options on the window and click "Scan". This will ensure that the device begins reading your card. In case your memory card isn't visible, click "Refresh".

Step 3. Recover the Data after Scanning the Card
After scanning your card, the software will show you the results. Select and preview the photos you wish to recover on to your PC. Now mark them and click "Recover".

Step 4. Select "Deep Scan" If You aren't Able to View Your Files
Sometimes, you may not be able to view the photos you want to from a Quick Scan. Select "Deep Scan" for a more time-consuming but thorough search of all your files.
Elva
staff Editor