
Recoverit
Photo Recovery
Expert in Recovering Deleted Photos, Videos, and Audio with 35+ Patents
Have you accidentally deleted your precious photos or videos? No worries. Recoverit Photo Recovery is a read-only and easy-to-use image
recovery software that specializes in restoring permanently deleted or lost photo, video, and audio files from HDD, SSD, cameras, USB Drives,
SD cards, and more devices.
For Windows 11/10/8/7/Vista
For MacOS X 10.10 - MacOS 15 (Sequoia)

4.6 out of 5 based on 4095 reviews
|100% Secure

Recover Lost Photos, Videos, and Audio Files without Limits of
Salvage Your Photos and Videos No Matter How They Were Lost
Have you lost media files? Take it easy! Recoverit Photo Recovery helps you with photo, video, and audio recovery from 500+ loss scenarios.
It is comprehensive and professional beyond your expectations in all situations for recovering lost pictures, videos, and audio.

"Oops, I accidentally deleted my photos." If you also meet the dilemma, then Recoverit can help you recover recently or permanently deleted files like photos and videos quickly and easily.

With advanced scan algorithms detecting all hard drive disks, Recoverit Photo Recovery can piece all data together and recover photos, videos, and audio on the formatted, resized or lost partition.

Formatting the storage makes for fixing many issues but also causes file loss. Free download the photo/video restore software to do the formatted photo and video recovery in no time.

Nothing can be more desperate than a computer system crash. Luckily, you still stand the chance of crash computer recovery. Recoverit automatically scans and recovers photos and videos of your choice.

Data loss will make you crazy when the hard drive is damaged or corrupted. No matter what kind of hard drives you have, this recovery software can get your photos and videos back.

Recoverit is an all-around photo and video recovery app that supports 500+ data loss situations, including emptied recycle bins, system reinstallation, inaccessible hard disks, etc.
Empower You to Retrieve Images, Movies, and Music from 2000+ Storage Media
Do deleted photos and videos recovery from computer hard drive, digital cameras, drone cameras, memory cards, etc.
Simply connect the device to your computer and let the recovery software scan its storage and recover your important media files.


Enable All Photos and Videos Recovery in Different Formats
Wondershare offers the best image recovery tool by supporting a wide variety of digital photo & video formats.
Standard formats as well as raw camera data from all major brands can all be restored using this versatile photo recovery tool.
Trusted by over 5 Million Users & Leading Brands


What Makes Recoverit The Best Photo and Video Recovery Software?
After nearly 20 years of development, Wondershare Recoverit owns 35+ data recovery patents,
offering a state-of-the-art solution to restore deleted photos and videos with the highest recovery rate.

Comprehensive Scanning
The Recoverit Photo and Video Recovery app can scrubs the internal and external storage devices deeply to find hidden deleted photos, music, and video files.

Patented Technology
Recoverit was awarded 35 Patents for innovative data recovery methods and video fragment file recovery. Enjoy the best recovery experience ever!

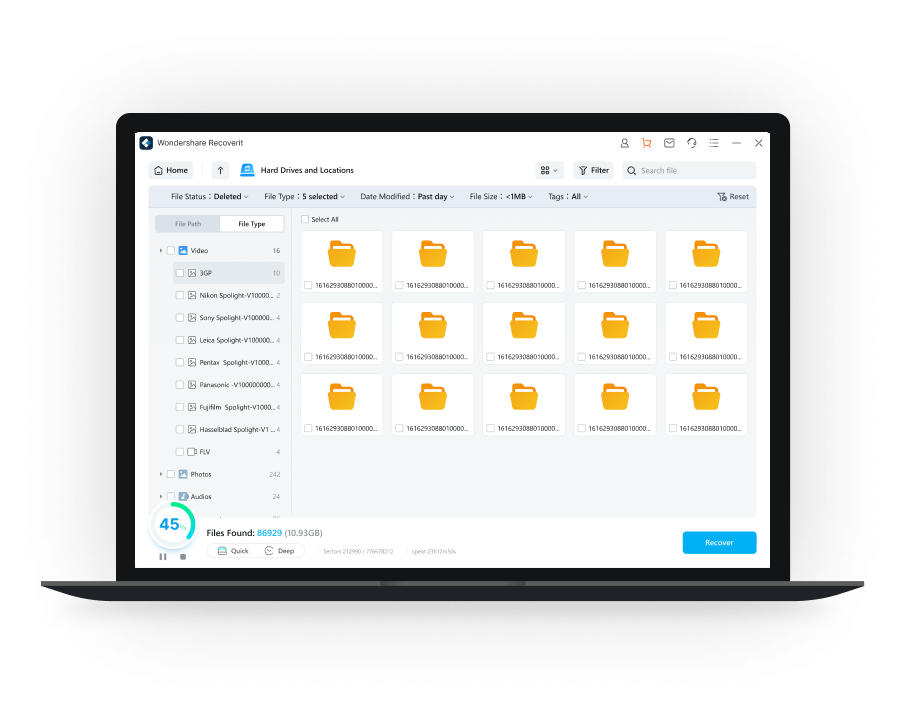
Preview in Real-time
You can preview the data before recovery. Unless your files are unrecoverable, you are not required to pay. Save your time and get your data back with 100% assurance.
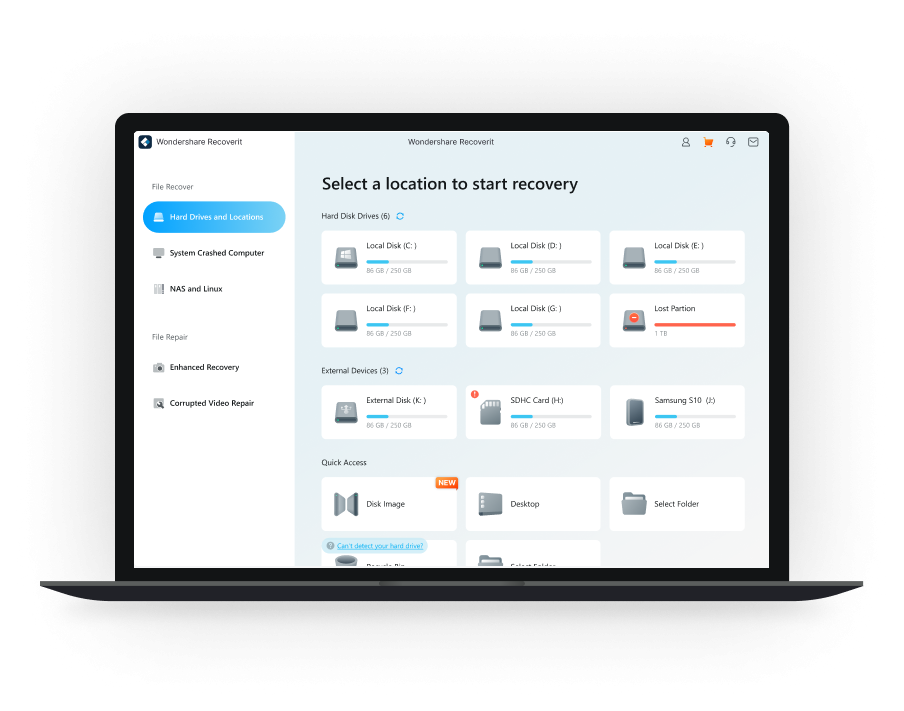
3 Steps to Recover Deleted Files - Quick, Easy, and Secure
You're able to perform the picture and video recovery within 3 steps and minutes. No tech knowledge is required.
Recoverit Photo Recovery features an intuitive interface and straightforward process to undelete photos and videos.

See What Our Users Ask Frequently
 Which file formats Recoverit Photo Recovery can recover?


Supported image formats: JPG, TIFF(TIF), PNG, BMP, GIF, PSD, CRW, CR2, NEF, ORF, RAF, SR2, etc MRW, DCR, WMF, DNG, ERF, RAW, etc.
Supported video formats: AVI, MOV, MKV, MP4, M4V, 3GP, 3G2, WMV, ASF, FLV, SWF, MPG, RM/RMVB, etc.
Which devices does Recoverit Photo Recovery support?
Can I recover photos and videos from a corrupted or damaged SD card?
- First, your damaged SD card should be recognized by the computer.
- Second, run Recoverit Photo Recovery and start to scan the card.
- Third, the software will take a deep scan for the card to search the photos and videos.
How to recover deleted photos from digital camera?
- Launch Recoverit Photo Recovery on your computer, and connect the digital camera to the computer through a USB cable.
- Let Recoverit scan the specific partition for your photos.
- After scanning completes, preview the recovered photos and select the location to save them.
How do I recover permanently deleted photos from my Mac?
- launch Recoverit Photo Recovery software.
- Select the recycle bin location where you lost the photos and start to scan the location to search the photos.
- After the scanning completes, you can preview recovered photos and save them.


