
• Filed to: Photo Transfer • Proven solutions
iCloud is known as one of the most proficient services offered by Apple to keep their data and the assorted system of the device intact and interconnected. iCloud is referred to as one of many features that are offered in iPhones, iPads, and other Apple devices, which provides them with the opportunity to keep important data backed up to it.
However, one of the major downsides of this platform is its limited space under the free version, which leads up to the need to purchase the services of iCloud to allow having up better space for keeping data such as images in it. This article issues a guideline on how to transfer photos from iCloud to external hard drive in cases where you have limited spaces in your iCloud.
Part 1. How to Set Up Your iCloud
Before understanding the procedures involving the guidance to transfer photos from your iCloud to other storage options, there is a need to understand the setting up of the iCloud itself. This usually has a very direct link with the data transfer, which leads you into addressing the iCloud Photo Library and its associated features.
The iCloud Photo Library is responsible for storing every media file that is taken across the Apple device and is updated across all devices that it is connected with. The edits performed at one device will be automatically observed in the other if they are connected with a similar iCloud. Its sharing feature enables the user to keep a very dividend system of sharing these media files with people of your choice.
The Library subtly stores photos and videos in their original resolution and keeps a lightweight version across the device it is associated with, thus bringing space for your device. This leads to setting up an iCloud account for managing and backing up data from your Apple device with ease.
However, if you wish to set up iCloud across your Mac, you are advised to follow the steps offered below.
Step 1 Launch the "Photos" application on your Mac and access its menu present on the top-left corner of the screen.
Step 2 Select "Preferences" from the drop-down menu and tap on the "iCloud" tab on the following screen.
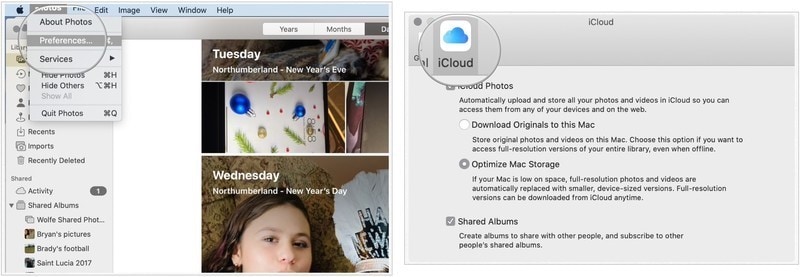
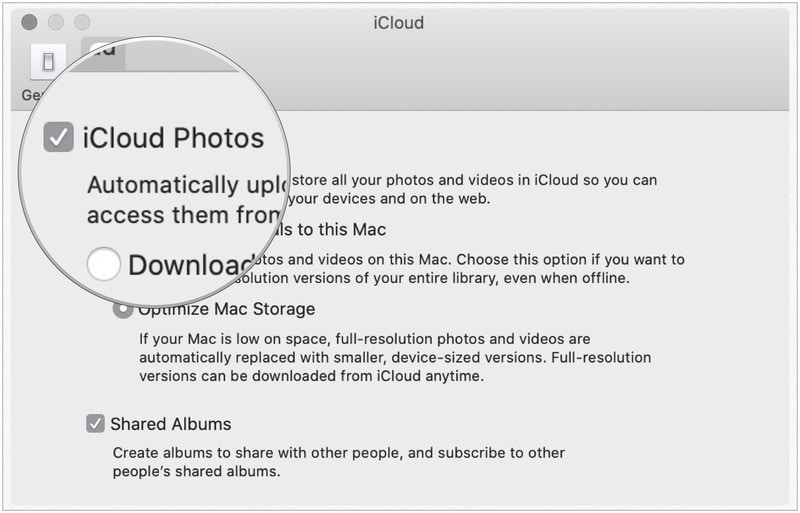
Step 3 Check the "iCloud Photos" option to initiate an automatic transfer of images from the application to the iCloud.
Conversely, if you wish to set up iCloud on your Windows PC, you need to look over the steps configured as follows:
Step 1 Download iCloud for your Windows and open it up after installation.
Step 2 On the next screen that opens up, select "Options" next to "Photos" and tap on "iCloud Photos" in the prompt window.
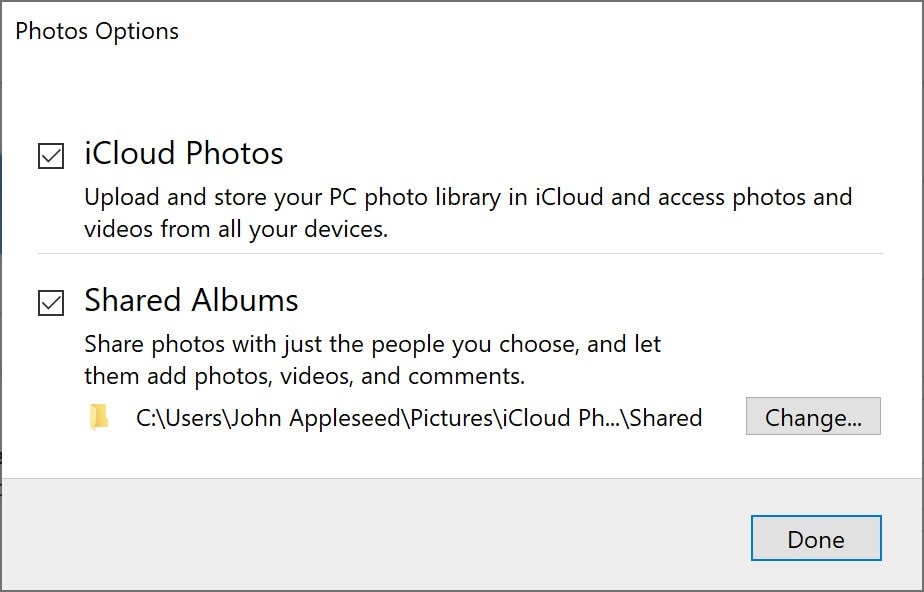
Step 3 Tap "Done" and turn on "iCloud Photos" across your devices to initiate an automatic iCloud backup.
Part 2: ow to Transfer Photos from iCloud to External Hard Drive
If you are an iPhone user with an iCloud that has filled up its limited space, you can always consider using an external hard drive for storing the important data in a secure place. For this, you are advised to understand a typical implementation of image transfer from iCloud to the connected external hard drive.
Step 1 With a Mac on your front, you are required to amend the preferences of the browser before going in-depth. Tap on "Safari" and lead to its "Preferences." In the new section, select "General" from the list of different options and change the default download folder.

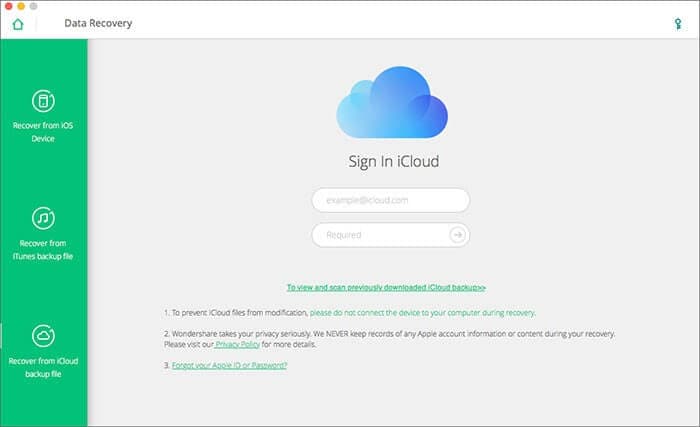
Step 2 You need to log yourselves into the iCloud with your Apple ID credentials. With a list of different folders on your front, you need to tap on "Photos" to proceed.
Step 3 With a list of photos emerging on your front, you can select any image to download on your desired external location. For covering multiple images, you need to hold the "Command" key and select the photos simultaneously.
However, while using a Mac, there are several shortcuts that can be adapted to transfer photos from iCloud onto the external hard drive. If you wish to select all the photos, tap "Command + A" to choose all images. Conversely, for selecting a range of photos, you can start it by selecting a single image from the start and hold down "Shift" while choosing the last photo in the folder to download. On the other hand, if there is a non-consecutive selection of images, you are required to hold the 'Command" button on your Mac to select the images that you wish to download.

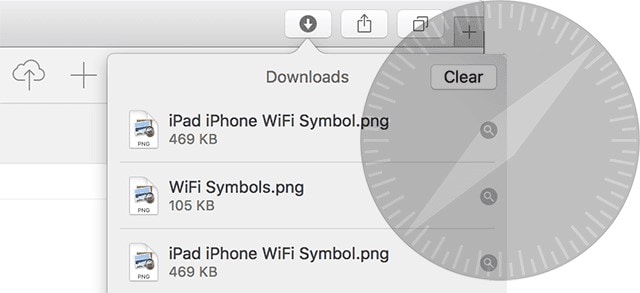
Step 4 With the images selected, tap on the cloud-shaped icon representing "Download Cloud" to download all the selected images into the desired location. Once you are done downloading them across the external hard drive as the desired location, you need to revert back to the default location from the "Preferences" options of your Safari.
Part 3. Want Another Way? Transfer your Photo with dr.fone
While you get to know the other methods that allow you to transfer iCloud photos to your hard drive, you can always go for more diverse options. In regard to the available options, dedicated third-party tools can offer you a unique platform for transferring data across a device or an iCloud account to the other devices or the desktop with ease. These platforms ensure a very coherent experience in the management of files.
However, when it comes to realizing the best tool in the business, this article presents you with Dr. Fone – Phone Manager (iOS) that provides fruitful services to both Windows and Mac users.

dr.fone - Phone Manager (iOS)
Download dr.fone - Phone Manager (iOS) to have a try!
- It allows you to transfer media files and other data and have it managed.
- It backs up all major data present in your smartphone and allows easy restoration.
- Transfers data from one smartphone to the other.
- Transfer media files across iTunes and other Apple devices.
- Compatible with all models of Apple devices and the latest iOS version.
The following guide explains the steps that allow you to transfer iCloud photos to a hard drive with ease.
Step 1 Launch Platform
Download and install the platform on your computer and launch it to proceed. Select the "Phone Manager" tool from the list present on the primary window.

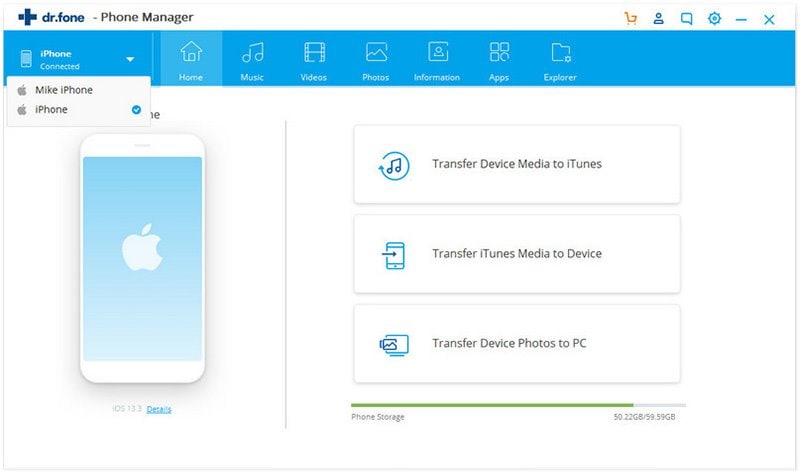
Step 2 Connect Apple Devicep
Establish connection of your Apple device with the computer through USB cable and get a prompt of the main connection window under the toolkit.
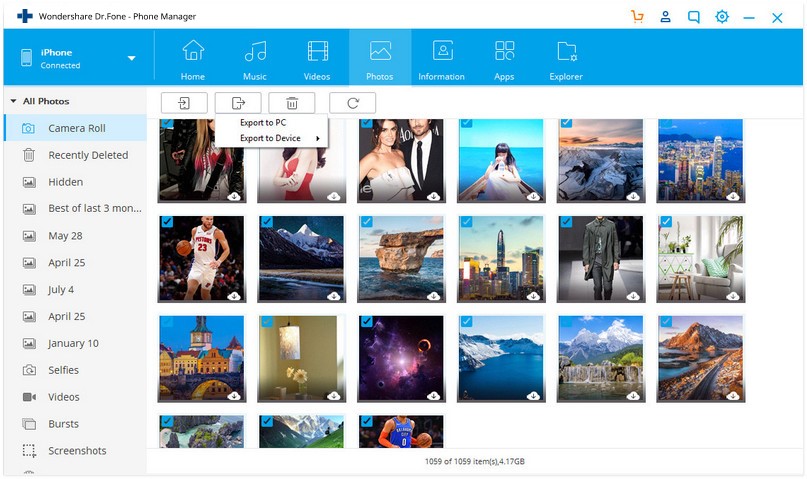
Step 3 Export the Images
In the "Photos" section on the top of the window, the platform would lead you to the photos present on the device and assorted iCloud. Select all the images and tap on the "Export" button to have them exported onto the PC. Set up a target location and execute the process.
Conclusion
This article has offered you a unique set of tools and methods that allows you to understand the simple guide on how to transfer photos from iCloud to an external hard drive with ease.
Elva
staff Editor