
iPads are regarded among the great tech products that have been created and made available for the community. While these fantastic products provide something great to users with multiple features and characteristics, there is a lot to see for these products. Although the good things outweigh the problems in these devices, there are times when these issues can lead to fatal results.
Thus, you must keep an eye on these problems and their effective solutions. For this article, we will answer all questions about why the iPad won't update to the latest version.
In this article
Part 1: Common iPad Update Problems
Apple always puts in some updates in their operating system to enhance the user experience with their devices. During this enhancement, multiple issues tend to emerge out of nowhere. While these problems involve the software, they can definitely be resolved. However, you should be aware of the common iPad update problems a user can face. In this part, we will recognize some of the most common iPad problems you should know.
1. iPad Won't Update
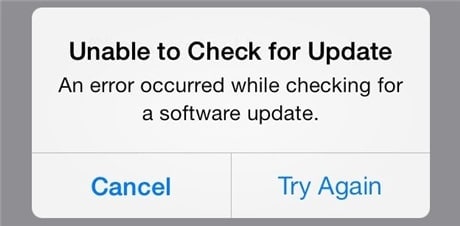
Have you been facing problems with updating your iPad? Has the update failed to download or install on your device? If that is the case, you might face issues involving the iPad getting stuck on the "Update Requested" window or the iPad not checking for any updates. If you observe error statements such as "An error occurred while checking for a software update," this is a clear description of the iPhone won't update errors.
2. iPad Update Failed
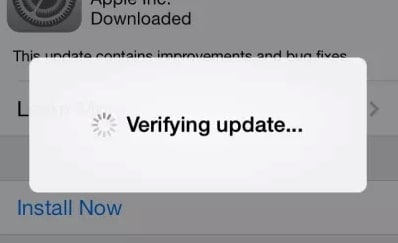
In another dimension, you might face problems while updating your iPad. If the updates install on your device but fail to install successfully, you may encounter errors, such as the iPad getting stuck on the "Verifying Update" pop-up. While the updates keep failing, this shows the various "iPad failed to update" errors that users might face.
Part 2: Reasons Behind iPad Not Updating
If you have been facing the iPad won't update or iPad update failed errors on your device, you might need to know the reasons that potentially lead to such problems. With an overview of these reasons, you will observe the right solutions that would bring closure to your issues:
1. iPadOS is Not Compatible
The first case that might lead to the iPad not updating its software might involve compatibility concerns. If the device is incompatible with the iPadOS that is about to be updated through specific means, it won't corroborate and execute.
2. Temporary Glitches in iPad
Software often comes with different glitches that can lead to multiple issues. Such is the case with the iPad not updating properly, as some temporary glitches in the iPad might lead to the ascertained problem. Thus, you might need to manage these glitches with some appropriate contingency plan.
3. Faulty Update Installed
If you have any update installed on your iPad which is not installing properly, the problem might lie in the iPadOS update itself. Faulty updates are not resolvable, and the best way to eliminate the concern is by deleting them from the device.
4. Issues with Apple Servers
Apple servers hold the responsibility of providing services to their users on time. If you are looking to update your iPad to the latest version but failing to execute it, you should always look into the Apple Servers in such a case. Having an overview would surely help you realize the potential of the problem at hand.
5. iPad Storage Might Be Full
Any operating system requires space to update on a device. If the iPad won't have any space and seeks to update its OS, there won't be any successful execution of the process. It is necessary to free up some space from the iPad to make room for updates.
Part 3: Common Ways to Fix iPad Update Problems
We will now be looking into some ways that you can use to fix the iPad won't update problems. This section will surely help you cast all the issues and lead to a proper remedy that will save you from causing more damage to the operating system of the iPad.
1. Check Your Backup File First Before Proceeding
The first thing advised for any iPad user facing such problems is to check the backup files of their data. Important data won't be protected under the common techniques applied as a remedy. Thus, using iCloud and iTunes are the generic ways of keeping backup files on your iPad.
However, if you wish to make some significant management of data, it is best to consider using Dr.Fone – Phone Backup (iOS), a prodigal solution to keeping data backups of iOS devices. Make sure to use the tool properly for assessing your conditions and maintaining backups of your data. Dr.Fone – Phone Backup (iOS) is a straightforward solution to maintaining backups, where you do not have to worry about the data and its privacy.

2. Ways to Fix iPad Update Problems
Since you are in search of the right methods to fix the problems of your iPad won't update, we have set up some perfect methods for you which will help you get out of the problem in reality.
Method 1: Restart iPad (Both Home and Without Home Button)
The first thing that you can try to resolve update problems in your iPad is to restart the device. Since temporary glitches might be causing havoc to the device, issues like failed iPad update is a common thing to watch. Thus, the best thing to do in such a situation is to restart the device. Rather than going for something stricter, you can manage the problem within a few seconds.
For iPad with Home Button: Hold the "Power" button on the iPad until the slider screen appears on the device. Slide to power off the iPad and use the "Power" button again to relaunch the iPad for yourselves.
For iPad without Home Button: For such iPads, use any of the "Volume" buttons and "Power" buttons and hold them down simultaneously. As you see the slider screen, turn off the iPad and restart the device by holding the "Power" button.

Method 2: Check iPad Storage
Another quick resolution to the particular error in your iPad is to check the device's storage. With every OS update, there is proper data coverage that it needs to be put in the data. Thus, if the iPad is out of storage, there is no chance that the OS of the iPad will upgrade. In such circumstances, you will have to look into the storage of the iPad and delete the useless applications and services present.
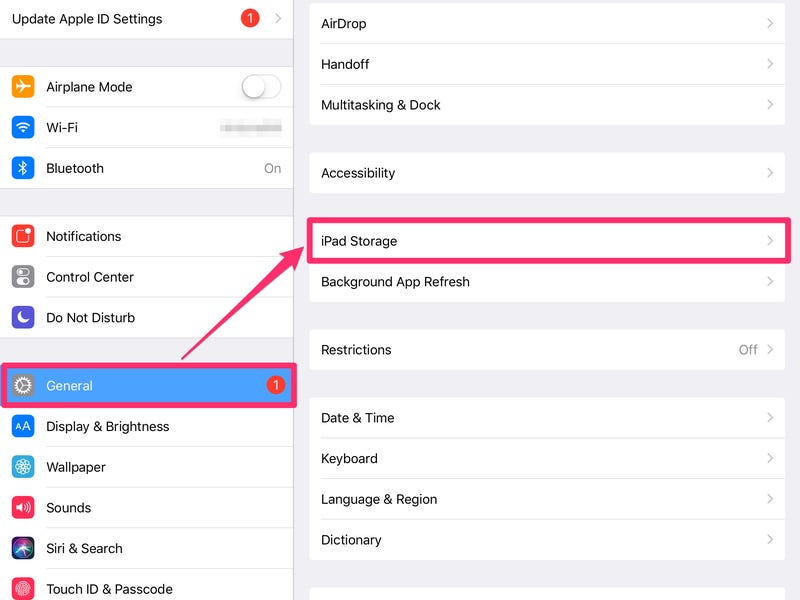
Step 1. Open the "Settings" of your iPad and redirect to the "General" section of the settings.
Step 2. Look for "iPad Storage" in the list of options by scrolling down.
And leading to a new screen where you have to figure out all about the storage space available on the iPad.
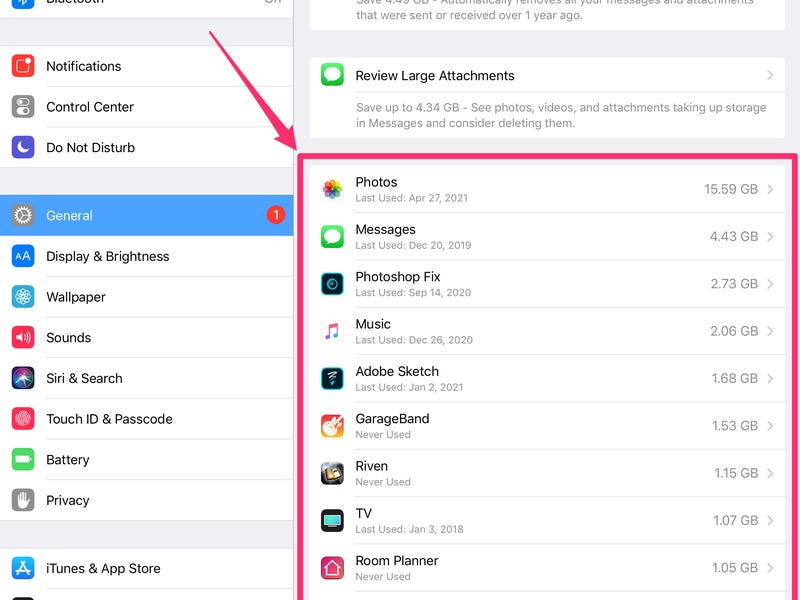
Step 3. If there is any particular application that you feel is unnecessary, tap on it.
And select the option of "Delete App" to make space for your iPad to update.
Method 3: Update iPad Using iTunes
Another intuitive approach that you can take to update your iPad is through iTunes. The process is quite simple and effective; however, at times, you might have to take such a step rather than going through the device itself.
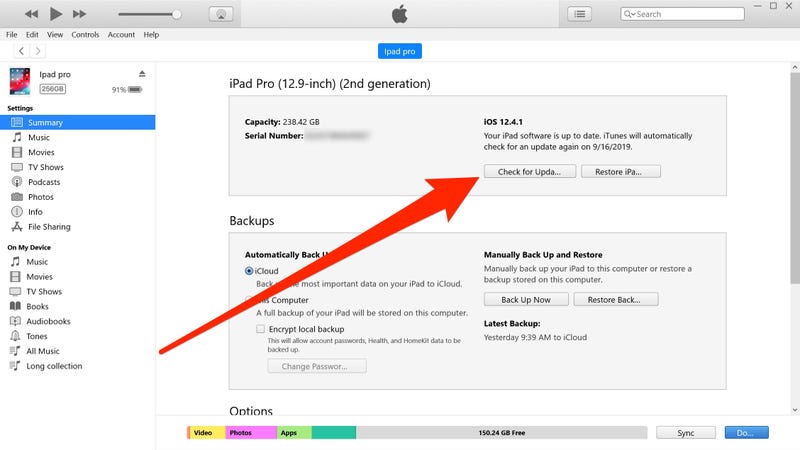
Step 1. You must connect your iPad to the computer and launch iTunes on the device.
Proceed to select the device on iTunes as it appears in the left column.
Step 2. Select the option of "Check for updates" in the list and wait for updates, if available.
If there are updates to install, select the option of "Download and Update" and agree to confirm the execution.
Method 4: Reset All Settings on the iPad
To resolve issues such as the iPad won't update on your device, you might have to take some strict steps that would lead you to a proper solution. Resetting all the settings of your iPad means that there is no room left for the data present in the device. When trying out this process, ensure to follow the guidelines to avoid any problems:
Step 1. Launch the "Settings" of your iPad and proceed to look for the "General" settings.
Step 2. As you lead next, find the option of "Transfer or Reset iPad," which will open a new set of options.
You will have to select "Reset" from the bottom of the screen.

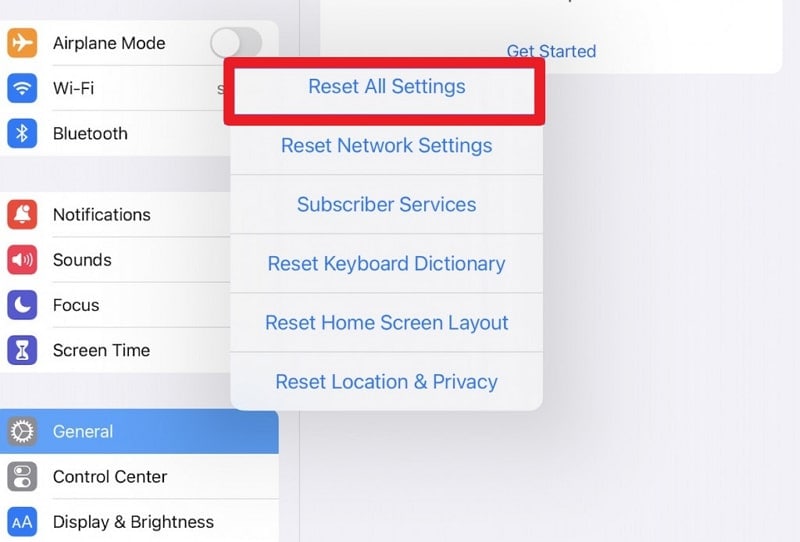
Step 3. From the menu that appears, select "Reset All Settings".
And follow the on-screen instructions to reset the settings on your iPad successfully.
Method 5: Delete the Update from Storage and Re-Update iPad
There might be a chance that the update installed on the iPad might not be properly inducted into the iPad. This is why it won't install on the device and causes issues. To resolve such a case, it is best to delete the update from the storage and re-update the device. You must follow the on-screen instructions provided below to execute this method properly:
Step 1. Lead to the "Settings" of the iPad and find the "General" settings in the list of options.
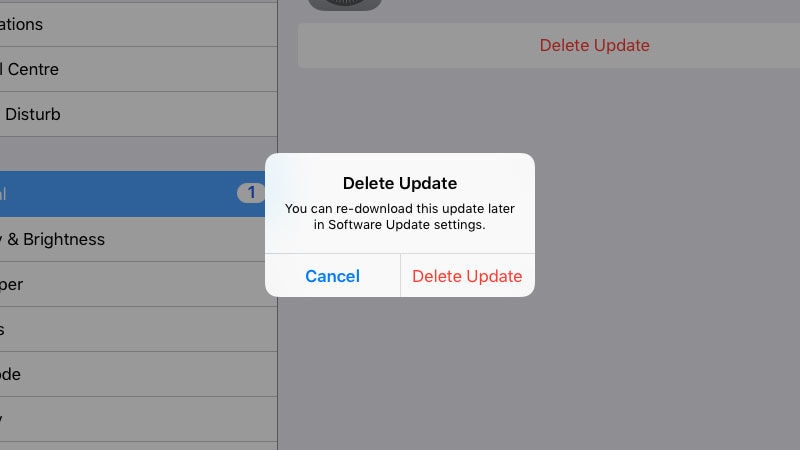
Step 2. Next, look for "iPad Storage" and scroll down to assess the update installed on the iPad.
Delete it from the iPad and lead back to the previous screen.
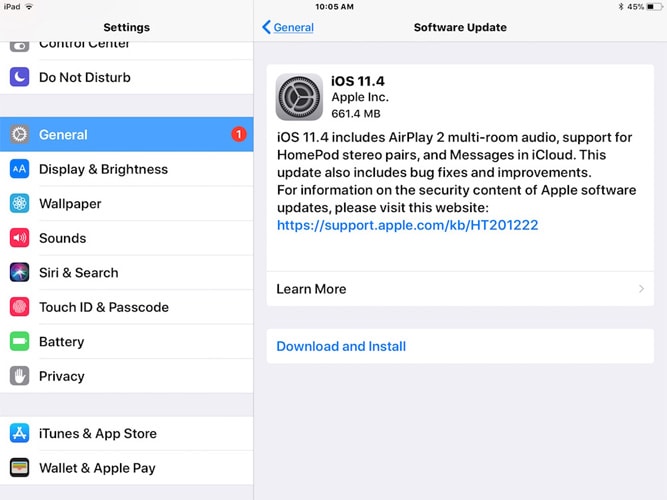
Step 3. You will find the "Software Update" option in the list, which, when accessed, will automatically search for updates on the iPad.
If there are any available ones, click on the "Download and Install" button and execute the process successfully.
Method 6: Factory Reset iPad
If you want to resolve the problems with your iPad that is not updating properly, you might have to take harsh steps for it. Factory resetting your iPad is the best thing that you might come across if you are trying to apply a solution to the device. However, make sure that proper backups of the device are kept up that would save the data after the reset. To factory reset your iPad, you must follow the steps provided as follows:
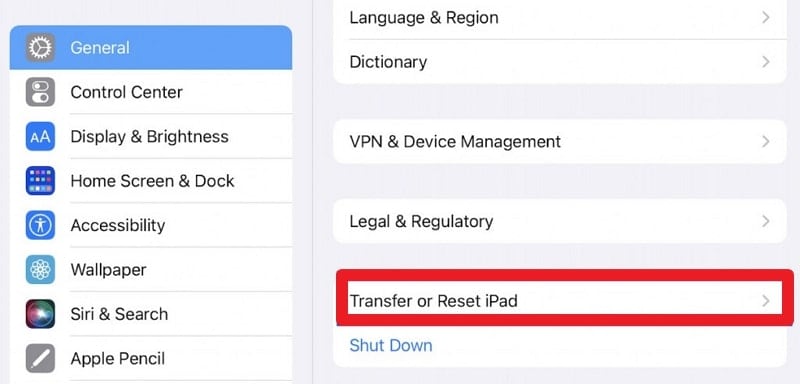
Step 1. Open up the "Settings" of your iPad and lead into the "General" tab.
Find the "Transfer or Reset iPad" option by scrolling down.
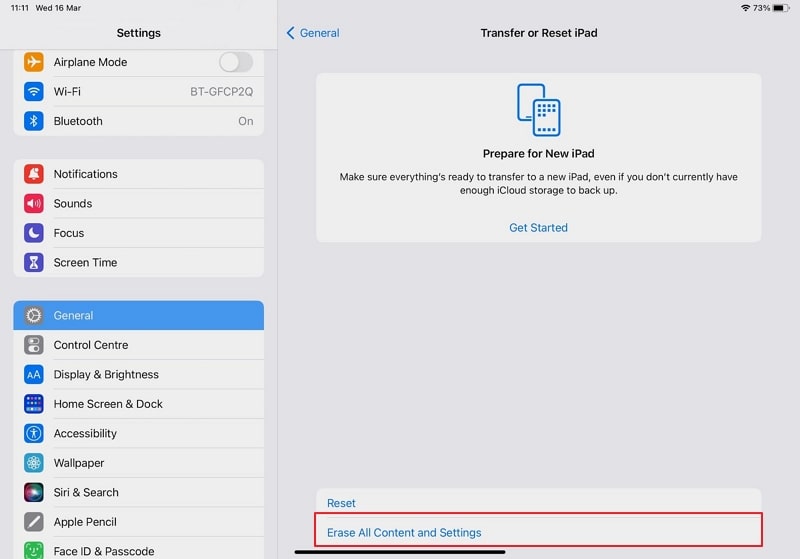
Step 2. As the new menu opens, select the "Erase All Contents and Settings" option.
And follow the on-screen instructions to reset your iPad successfully factory.
Part 4: What If Your iPad Still Won't Update
However, what if you can repair your iPad that won't update without losing its data? Although there are many conventional techniques that you can apply, there still is something great about Dr.Fone - System Repair (iOS) that makes it one of the best in the market. Dr.Fone - System Repair (iOS) provides one of the perfect systems repairing facilities for iOS devices, where it easily and automatically repairs all major system errors for them. The tool is undoubtedly great to see and use, which makes it an excellent option for iPads that won't update.
However, if you seek to use this tool for updating and managing your iPad, you must consider following the key features to mark some critical points before knowing more about the tool:

Dr.Fone - System Repair (iOS)
Fix iPhone frozen/stuck on Apple logo with 3 simple steps
2,985,172 people have downloaded it
It provides support to more than 150 errors on iPad, which includes all significant system errors such as the Apple logo stuck on the iPad, iPad Frozen, etc.
The tool is one of the best in the market that supports no data loss system. You won't lose your data after using the tool for system errors.
It supports the latest iPadOS 16 and iPad models, which makes it a compatible option in the market to use.
To know more about how you can utilize Dr.Fone - System Repair (iOS) to perfection, you must follow the steps shown below:
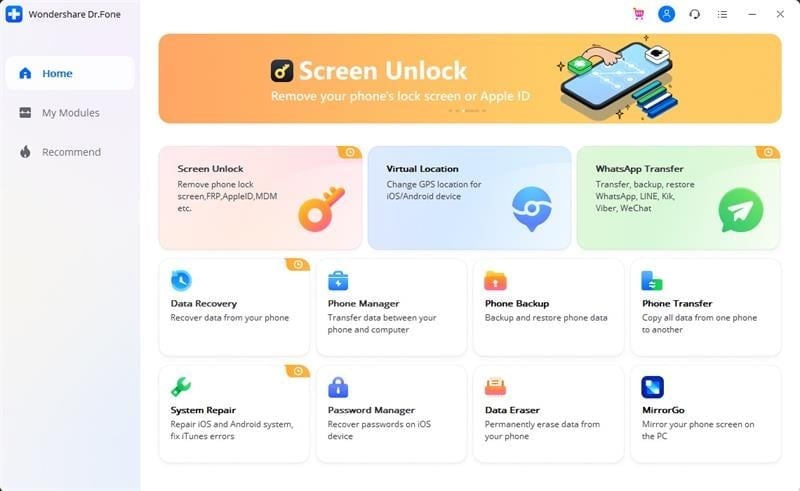
Step 1. Launch System Repair and Proceed to iOS Repair.
Download and install Wondershare Dr.Fone on your computer and proceed to launch System Repair from the list of tools provided on the homepage. You must define the nature of the device to be "iOS" and redirect to the "iOS Repair" section to initiate the system repair of your iPad.
Step 2. Select the iPad Error and Mode of Repair.
Next, you will have to select the nature of the error that your iPad is facing. Select any error if it matches the description of your problem. If not, you must choose the "Repair Now" button and let Dr.Fone assess the problem by themselves. Following this, you will have to select the right mode for this purpose, which would be "Standard Mode," as you seek to protect your data too.

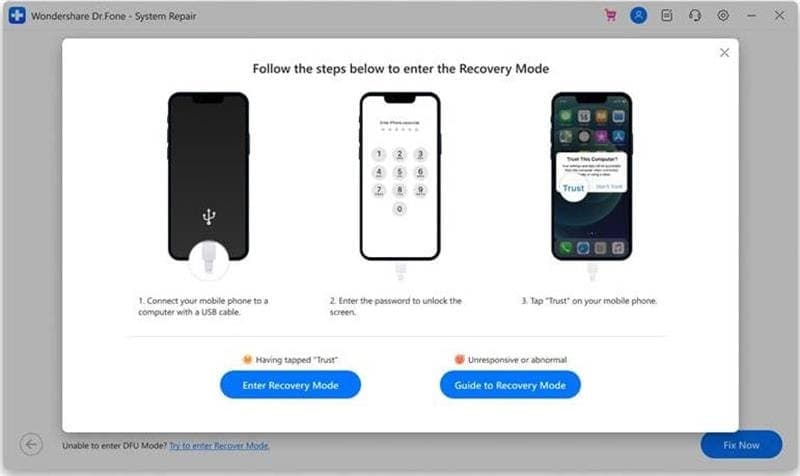
Step 3. Put iPad in Recovery Mode.
Once you have selected the mode, you will have to find the proper way to put the iPad in Recovery Mode. If you successfully do the process, select the "Enter Recovery Mode" button. However, if the problem prevails and you are not able to assess the conditions, you must look for choosing the "Guide to Recovery Mode" button. This will provide you with on-screen instructions that you must follow and put the device in Recovery Mode.
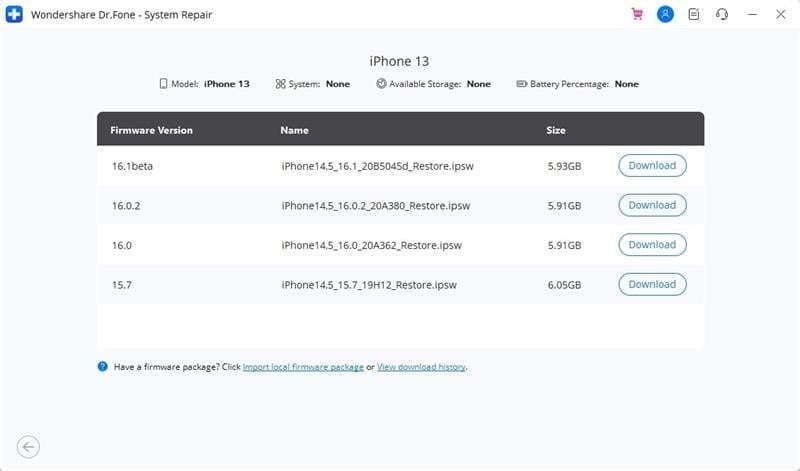
Step 4. Select iPadOS Firmware.
Once it is in Recovery Mode, Dr.Fone automatically detects it and displays the list of iPadOS firmware on the next screen. Select the "Download" button adjacent to the firmware option to download the iPadOS firmware.
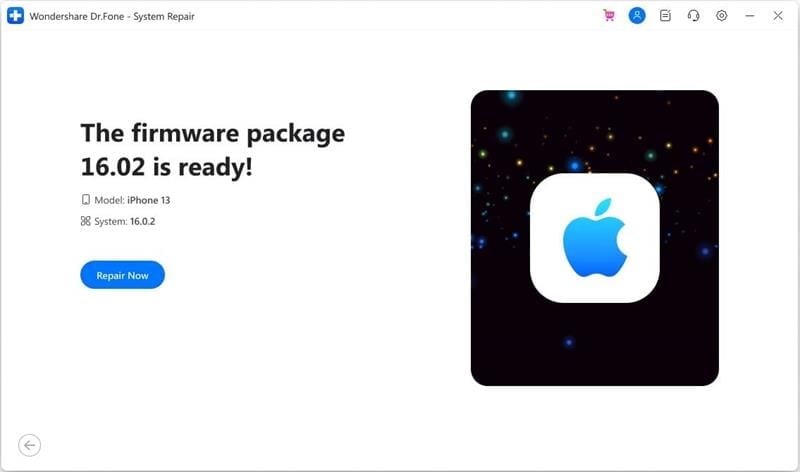
Step 5. Repair the iPad Successfully.
As it downloads, the firmware is verified by the tool and then made available for installation. Select the "Repair Now" button to execute the process of installing the iPadOS firmware successfully on the iPad.
Part 5: FAQs About iPad Update
Q1. How to update an old iPad?
A1: The simplest way to update an old iPad is to access Settings and look for the "Software Update" option in the "General" settings section. The iPad will automatically look for the most compatible OS that can be installed on the iPad.
Q2. What does Apple mean when it says Update Requested?
A2: This specific message means that the device has requested an update from the server to ensure that the firmware is downloaded.
Q3. How long does it take for Apple to approve an iPad update request?
A3: Apple usually reviews such requests in less than 24 hours for the user, and you will be notified of them through emails.
Q4. What does verifying an update mean?
A4: The terminology initially means that the iOS firmware installed in the device is completely downloaded and has no data damage during the process.
Q5. How long does it take for Apple to verify an iPad update?
A5: The process only takes a few minutes; however, it might take up to 15 minutes to thoroughly verify an iPad update.
Conclusion
This article has provided clear guidelines on how a user should proceed if the iPad won't update upon trying. With all the mentioned solutions, it is clear that you can easily manage this problem through different means. Dr.Fone - System Repair (iOS) has turned out to be a savior in such situations, where it easily repairs your iPad without compromising its data.