
• Filed to: iPhone Recovery • Proven solutions
Downloading Photos from iTunes or iCloud backup using the conventional iPhone data management ways, i.e. iTunes or iCloud, is often troublesome. You run an inevitable risk of getting all your data overwritten while restoring Photos from an iTunes backup using iTunes. Likewise, there are drawbacks with iCloud too, the process is not just time consuming but requires high speed internet connectivity too. Wondering how to download photos from iTunes iCloud backup selectively? Fret not pal! Read the article further and discover yourself the best one stop solution for the same.
Part 1: How to Download Photos with iTunes or iCloud Backup
#1. How to Download Photos from iTunes Backup using iTunes
One of the ways to download photos from iTunes backup is using iTunes itself. Of course many people and you also would prefer this way. Here are the steps for the purpose.
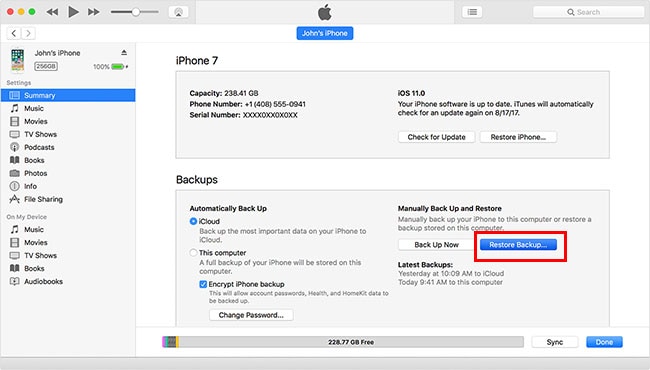
Step 1: First of all, download the latest iTunes in your computer and run it later. Connect you iPhone to the PC and choose the device icon noticeable at the top left side. From the left panel, click on ‘Summary’ tab now. Choose, ‘Restore Backup’ now.
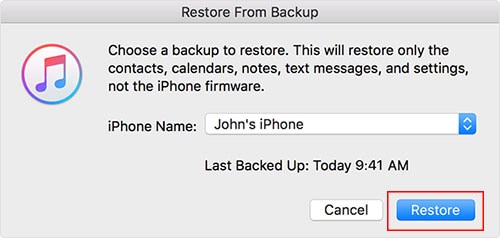
Step 2: Lastly, select the preferred backup file from the pop up window and then hit ‘Restore’ to confirm your actions. You will be done now.
#2. How to Download Photos from iCloud Backup using iCloud
To download photos from iCloud backup, the common way i.e. using iCloud can help you. Without talking more, we would demonstrate the steps directly.
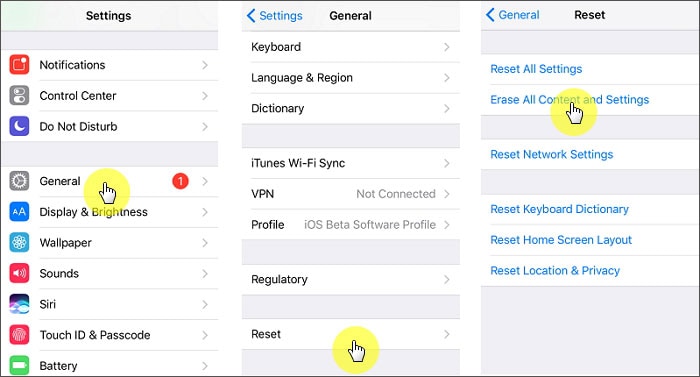
Step 1: First of all, you need to factory reset your iPhone. For this, go to ‘Settings’ in your device and tap ‘General’. Now tap ‘Reset’ followed by ‘Erase All Contents and Settings’ and confirm your actions.
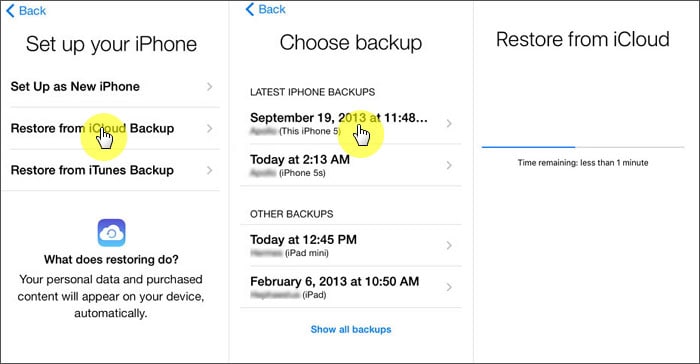
Step 2: Now, restart your device to download photos from iCloud backup to iPhone. Setup the device as you usually do. When you get ‘Restore from iCloud backup’ option, tap on it and your data will be restoring from iCloud backup.
It is apparent that using the conventional methods to download photos from iCloud backup or iTunes backup involves certain disadvantages. More importantly, you will need to erase everything from your device when opting for these aforementioned conventional methods. We have brought you the list of disadvantages of these methods:
• Selective downloading of your data from iTunes or iCloud backup isn’t yet possible via the conventional methods.
• The process is quite very time consuming and abandons you from making use of the device meanwhile.
• The process of downloading data from iCloud backup requires a stable internet connection too.
• The worst disadvantage is that you have to complete erase everything on your device when downloading data from iCloud Backup and in the case of iTunes backup, the iTunes will itself wipe off all previous data on your device and replaces the data from the backup.
Part 2: How to Flexibly Download Photos from iTunes and iCloud Backup
Apart from that common way explained above, we would like to introduce you the best way that can help you download photos from iTunes/iCloud backup to PC. You can choose this method over the above described since this will allow you to preview your backups before recovery as well as you are allowed to download selectively with the help of dr.fone – iOS Data Recovery. This tool is one of the most reliable ones around. Moreover, this is the most compatible tool, be it with latest iOS or any iOS device or data type. It will NOT overwrite the data on your iPhone.
- This tool offers scanning and previewing options which implies you can first view your data, get satisfied and then recover it.
- Next good thing about dr.fone is its three professional recovery modes which can help in recovering data from iOS device directly, iTunes backup as well as iCloud backup.
- The tool is available for Mac as well as Windows operating systems and can work with both without any complications.
- You can try it free first and recover your data selectively.
- It supports iPhone X/8 (Plus)/ 7 (Plus)/SE/6s (Plus)/6(Plus)/5S/5C/5/4S/4.
Now, we are going to provide you the tutorial for downloading backups from iTunes and iCloud one by one. Check out the guides carefully and get what you longed for.
[Guide] How to Download Photos from iTunes Backup using dr.fone – iOS Data Recovery
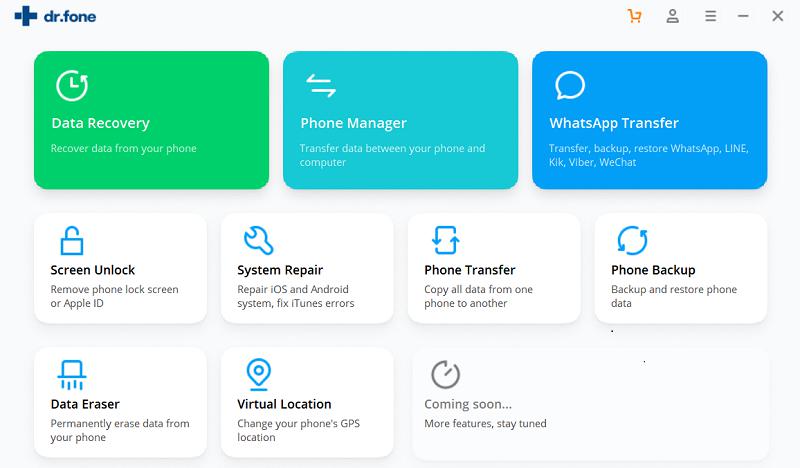
Step 1: Assuming you’ve downloaded the correct version of the software according to your PC, you need to launch it now. Click on ‘Data Recovery’ followed by ‘Recover from iTunes backup file’.
Step 2: Now, you will get a table containing list of all iTunes backup files that got automatically detected by dr.fone. Just proceed to select one file you need to download photos from and click on ‘Start Scan’.
Step 3: In the last, you can choose photos from the left panel and then preview them on the screen. Subsequently, select those you wish and click on ‘Export to Mac/PC’.

[Guide] How to Download Photos from iCloud Backup using dr.fone – iOS Data Recovery
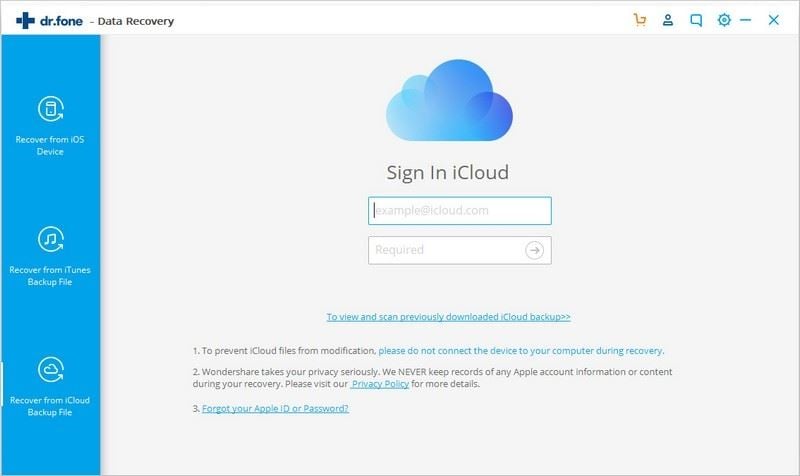
Step 1: Open dr.fone - iOS Toolkit on your computer and click on ‘Data Recovery’ from the main interface. Now, look at the left panel and you will notice an option saying, ‘Recover from iCloud Backup File’. Once this gets done, it’s time to recall your iCloud account information and entering those in order to sign into iCloud. software will never keep your personal information or leak it in any way. So, don’t worry about the security of your personal information.
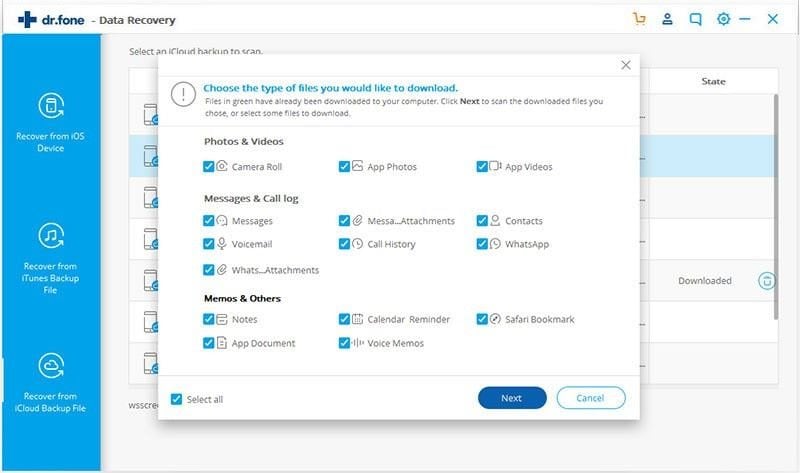
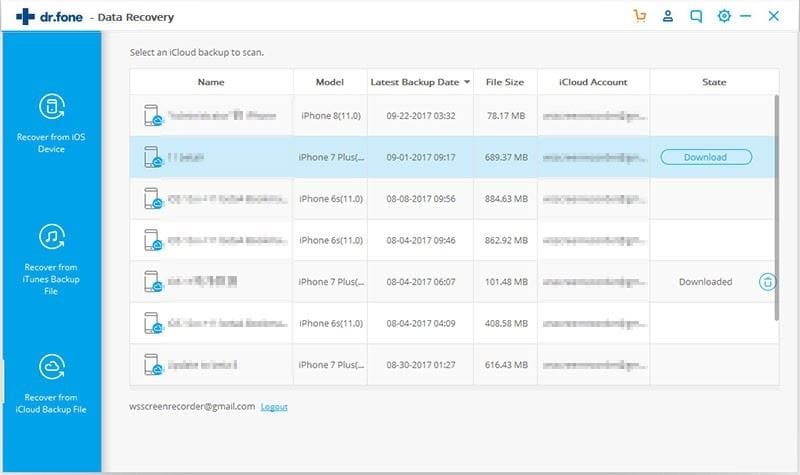
Step 2: After signing in, you will see your iCloud backup files getting displayed on the screen. You can now choose the backup file that contains the photos you want. After selecting, click on ‘Download’ button so that you will be able to download photos from iCloud backup. A pop-up window will now become visible prompting you to select the files you want to download. As you need photos, you can select on it and proceed. Click on ‘Next’ after selecting.

Step 3: Your photos will get scanned and you can select the category from the left panel to preview them. Once done with previewing, get them to you by clicking on ‘Export to Mac/PC’.

Elva
staff Editor