
Several users do not know System Reserved Partitions because they do not recall creating any Windows System Reserved Partitions during the installation process. Some are still unsure whether it is safe to delete it. Before taking action against this partition, it is essential to comprehend it. This article will help you understand the System Reserved partition and discuss the steps to remove it.
In this article
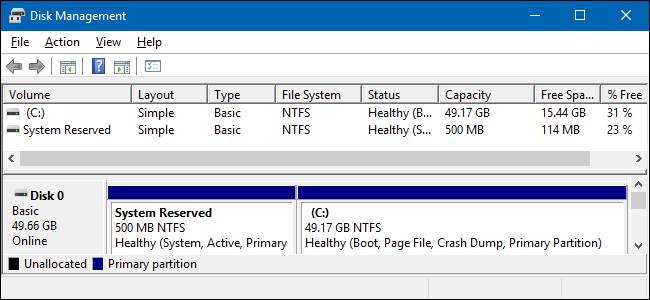
What Is System Reserved Partition?
When you choose unallocated space to install a fresh new Windows operating system or Windows Server, a System Reserved Partition (SRP) is created. This partition stores the Boot Manager Code, the Boot Configuration Database, and the startup files needed for BitLocker Drive Encryption.
The Windows Boot Manager recognizes the boot data from the Boot Configuration Data Store whenever the computer boots. The boot loader is launched by your system from the System Reserved partition, which starts Windows from the system drive. If you use BitLocker drive encryption to encode your hard drive, the System Reserved partition contains all the files needed to boot your computer properly.
Your system boots from the unencrypted System Reserved Partition before decrypting the main encrypted drive and booting the encrypted Windows system.
System Reserved Partition sizes vary depending on the operating system.
|
OS Versions |
SRP Size |
|
Windows 7 |
100MB |
|
Windows 8/8.1 |
350MB |
|
Windows 10 |
500MB |
|
Windows 11 |
500MB |
Can I Delete the System Reserved Partition?
Removing the System Reserved Partition is technically possible, but you shouldn't do that because it will almost certainly break your system. As previously stated, Windows stores your critical boot files on the System Reserved Partition.
It is highly advised not to delete this partition as the System Reserved Partition takes up to only 500MB or less. If you remove this, you lose the ability to use BitLocker to encrypt your drive and end up with a system that cannot boot. Deleting it won't help you free up disk space.
How To Delete System Reserved Partition
Again, you must NOT delete the Windows System Reserved Partition. Instead, you can hide it in Disk Management by selecting "Remove" to prevent others from accessing and deleting it. This method hides but does not delete the System Reserved Partition. Follow the steps to get this through:
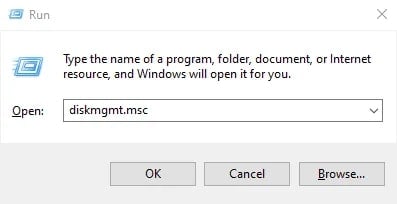
Step 1. Press Windows Key + R.
Then, type diskmgmt.msc and press Ok.
Step 2. Wait for Windows to scan your disks and obtain all of the data.
Locate and right-click the System Reserved Partition. Pick Change Drive Letter and Path.
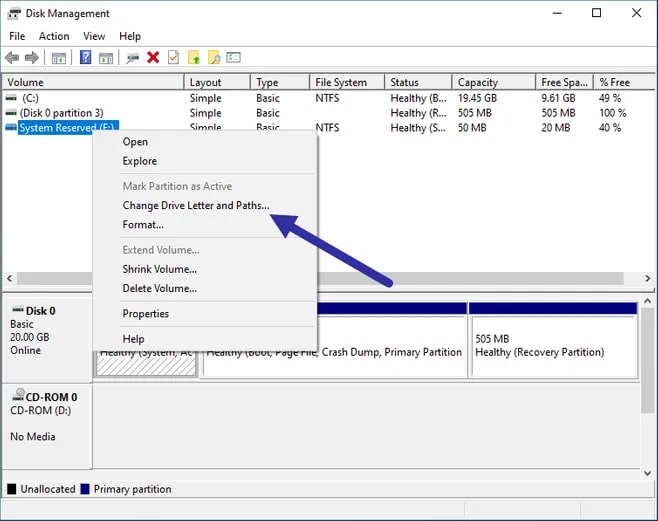
Step 3. Choose the only available letter and press Delete.
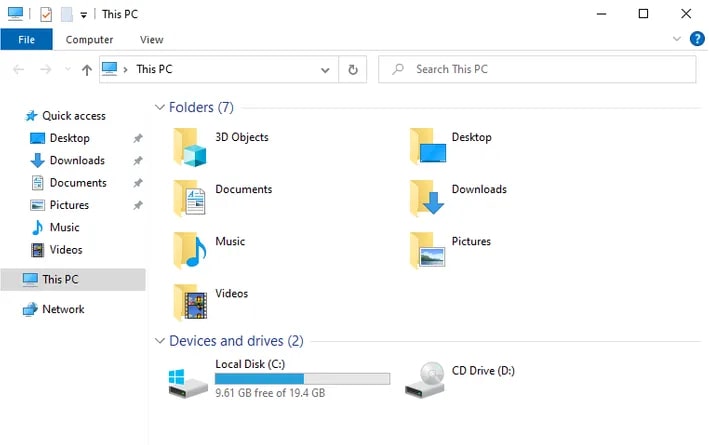
It will delete the System Reserved Partition from Windows Explorer while keeping all necessary files available for the system's needs.

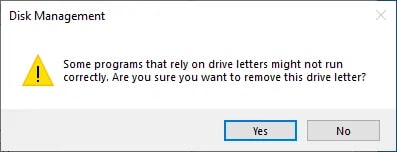
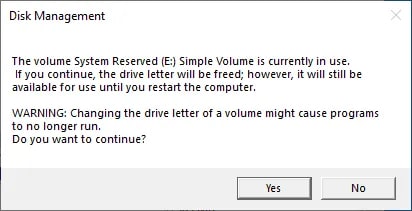
Step 4. Select Yes in the warning window.
Step 5. Hit the Yes option to continue.
Step 6. That's all. Windows will remove the drive letter for the System Reserved Partition; it is now hidden and no longer appears in the file explorer.
What To Do if You Accidentally Deleted the System Reserved Partition?
Many users have deleted the System Reserved Partition by accident. However, regardless of how the partition is deleted, as long as it is lost, Windows will fail to boot up. If this happens to you, don’t panic. We will get it back through Windows Installation Media and reliable data recovery software.
Fix #1 Restore the System Using Your Windows Installation Media on a USB/CD
If you are not concerned about your computer data because you have kept recent backups, you can restore Windows by installing the Windows system. It is simple to complete with Windows installation media.
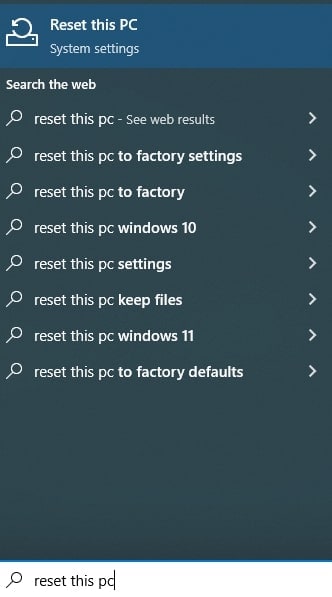
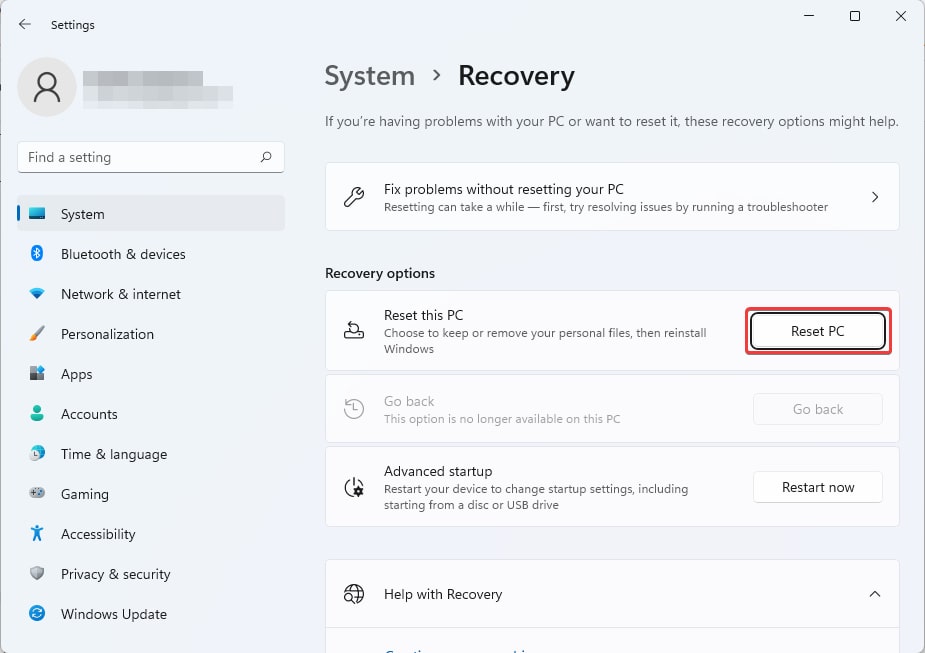
Step 1. Press Windows + Q and type Reset this PC.
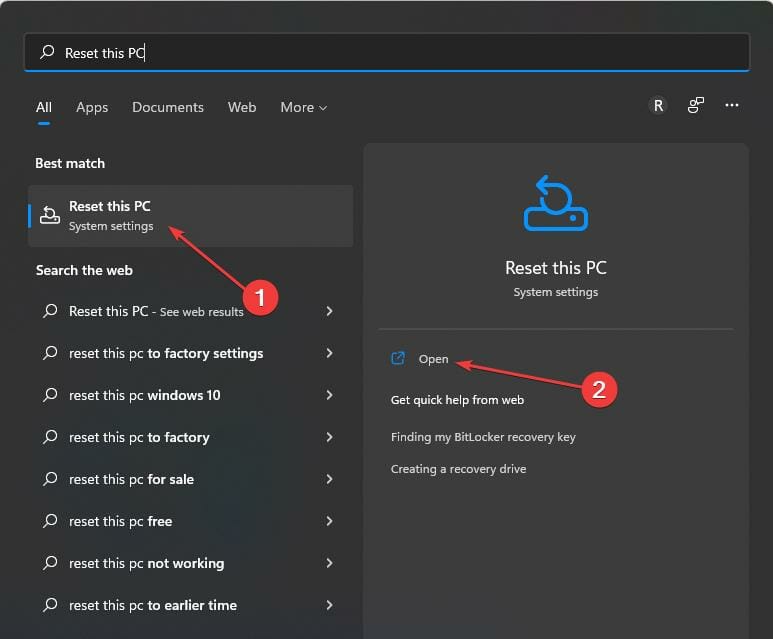
Step 2. Select Reset this PC System Settings. Then, click Open.
Step 3. Under Recovery options, select Reset PC in System Recovery.
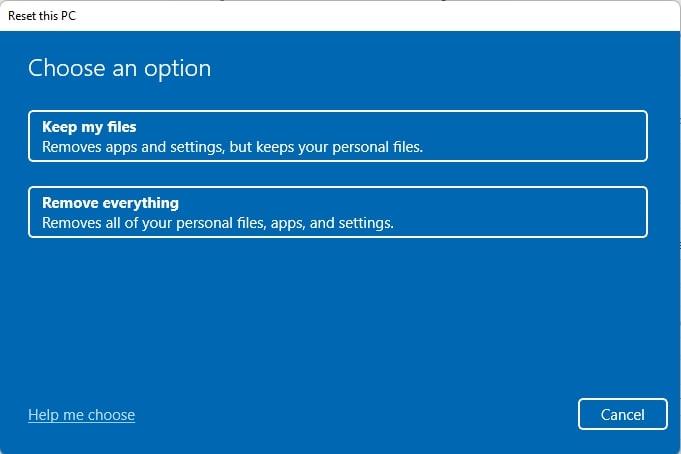
Step 4. Choose between the two options: Keep my files or Remove everything.
To complete the action, follow the screen prompts.
Fix #2 Access and Backup Important Data Using Recovery Software
Reinstalling Windows is only recommended if you have effective data backups. If it doesn't work for you, it is best to use a well-known brand's high-quality, experienced crashed computer recovery tool.
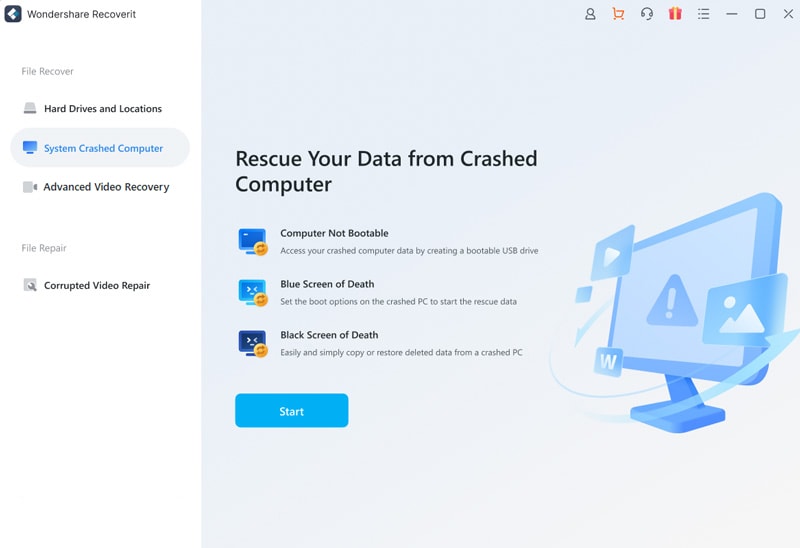
There are many such tools available on the market today. However, you should only trust and try the dependable one like Wondershare Recoverit. Recoverit offers an excellent System Crash Computer recovery feature for recovering deleted System Reserved partitions by creating a bootable USB.
You can follow these steps for restoring the System Reserved partition in your Windows computer or watch a video tutorial.
Step 1. Select System Crashed Computer.
Download and Install Wondershare Recoverit on a working Windows or Mac PC, then insert a blank USB drive. Select System Crashed Computer and press Start after launching Recoverit.
Step 2. Create a Bootable USB Drive.
To restore data from a crashed computer, you must first create bootable media from which to boot. Select the inserted USB drive and click Create.
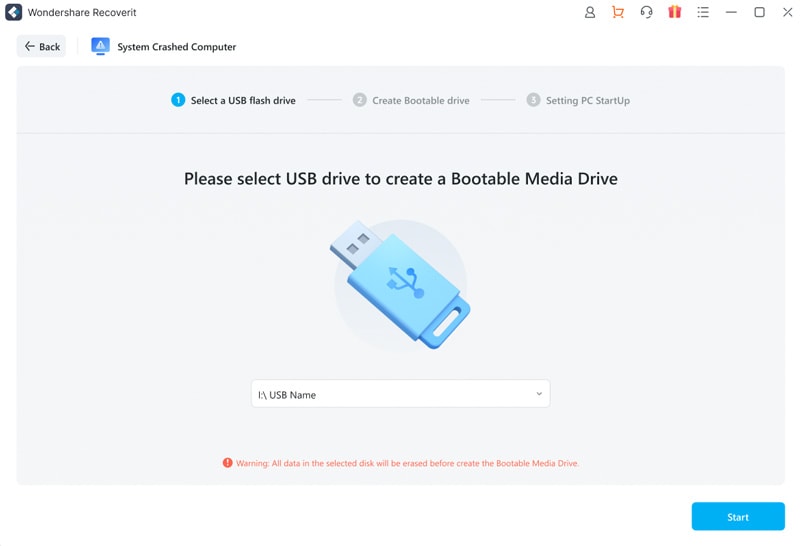
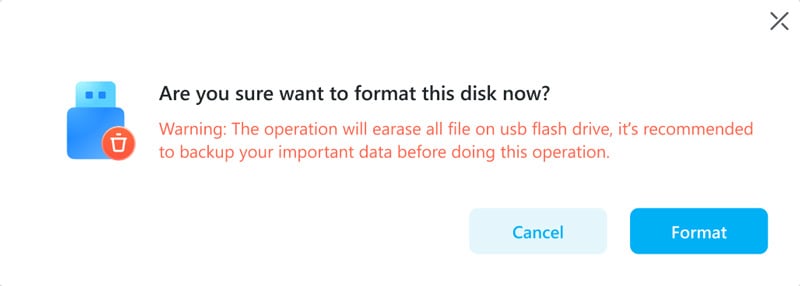
You are required to format the USB drive to create a bootable disk. Before formatting the media, ensure a backup of any important data.
After that, the crashed computer recovery software will start creating the bootable USB automatically.

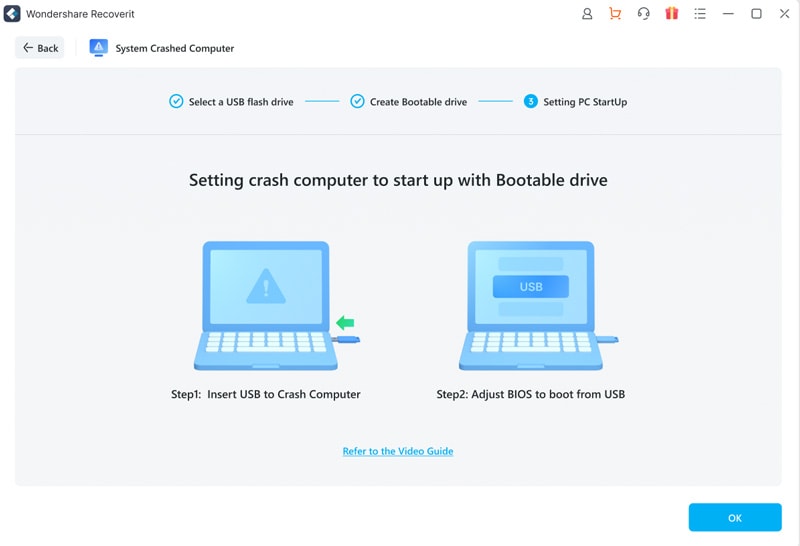
Step 3. Restart the Crashed Computer Using the USB Drive.
After you've created a bootable USB flash drive, do the following:
- Connect your computer to the USB flash drive. Start the crashed computer and press the BIOS entry key to boot from a USB drive.
- Users can access any system's BIOS (Basic Input Output System). They can change the BIOS settings and make the attached USB drive the primary boot source. Press the BIOS Entry key when the system boots to access the BIOS options.
Step 4. Recover Data.
After finishing the steps, the unbootable computer will be bootable. Select “Hard Disk Copy” and “Data Recovery” as needed.

- Select Hard Disk Copy and then navigate to the Copy directory. Connect a hard drive to the computer that has crashed. Select the newly connected hard drive and press Copy. When the copying process is complete, the message Data copy completed will appear.
- To begin the scanning process, select Data Recovery and select a disk. Connect a hard drive to the computer that has crashed. After completing the scanning process, you can specify where you want the recovered data saved. After selecting the hard drive connected to the crashed computer, click Recover.
Final Words
You should now have a deeper understanding of what a System Reserved Partition is, how it appears, whether you can delete it, and how to restore an accidentally deleted System Reserved Partition using two methods. Exercise caution when managing disk partitions. If you accidentally delete some partitions, ask Wondershare Recoverit for help.