
Apple File System or APFS is the newly launched file format ideal for Solid State Drives (SSDs) and flash memory. It solved the persistent problem of file storage for macOS users. APFS is a recommended file format for Macs, which can handle different chores like pasting, copying, data handling, etc. Moreover, it is reliable, so many users look for APFS formatting.
It is easy to go through the key basics before how to format APFS in Mac, followed by the process on different macOS like Big Sur, Monterey, Catalina, Mojave, and High Sierra. After that, it is possible to recover lost data from APFS drives with the Wondershare Recoverit tool.
Part 1: What Should You Know Before APFS Formatting?
It is essential to know the Mac versions supporting the APFS. These are:
|
Sr. No. |
Version |
|
1 |
MacOS 10.13 or High Sierra |
|
2 |
MacOS 10.14 or Mojave |
|
3 |
MacOS 10.15 or Catalina |
|
4 |
MacOS 11 or Big Sur |
|
5 |
MacOS 12 or Monterey |
|
6 |
MacOS 13 or Ventura |
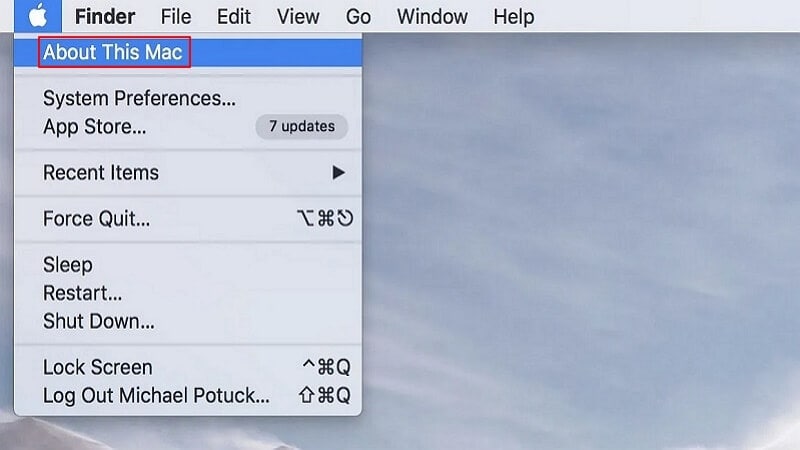
Many users face the issue of not knowing the macOS version. All you need to do is go to the Apple icon and go to the “About this Mac” option. You can get the operating system details in the following way:
Multiple reasons call for formatting the APFS drive on mac. Some of these are:
- It is easy to make data recovery convenient and timestamp the files for nanoseconds. The TRIM command offers the use of obsolete drive areas.
- Getting rid of the unwanted setbacks on Mac like malware attacks, wrong partitioning, etc.
- It is easy for the users to get rid of sensitive content.
- It is easy to format data from external drives having different encryption keys.
If you’ve accidentally formatted the APFS drive, it is easy to jump to the bonus part to recover the formatted data quickly using Wondershare Recoverit. Let us go through the different steps for formatting the drive to APFS on different macOS versions.
Part 2: How to Format Your Drive to APFS on macOS Big Sur and Monterey?
If you’re looking for how to format APFS Mac versions- macOS 11 Big Sur or macOS 12 Monterey, it can be achieved with a couple of steps only. However, for Windows, it is essential for the users to go between macOS and Windows and then format the ExFAT drive. With the Big Sur version, APFS is now the default for Time Machine.
Further, APFS works only for versions earlier than 10.13 High Sierra and will not be shown when Scheme is set to Master Boot Record. It is essential to set Scheme to GUID partition Map.
The quick steps to format the drive to APFS on macOS Big Sur and Monterey are:
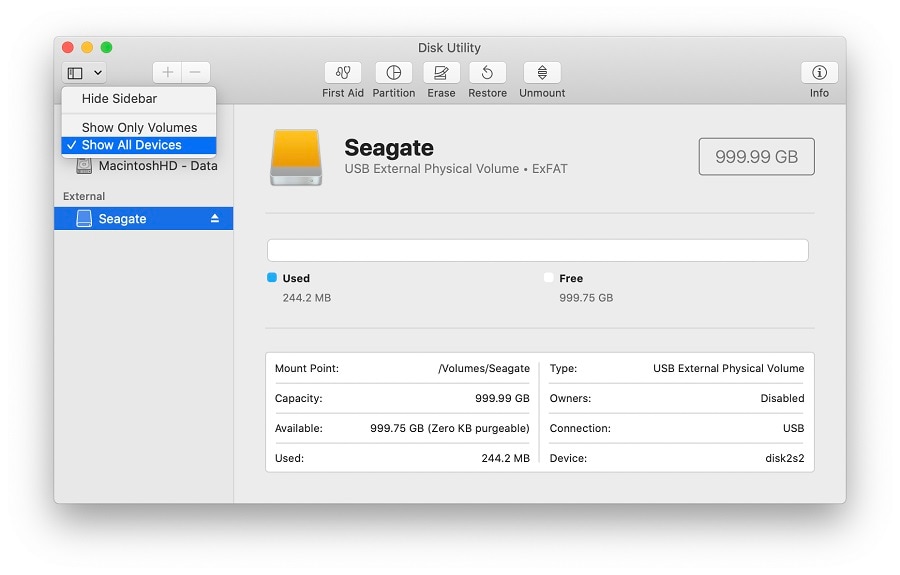
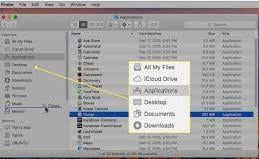
Step 1. Open the disk utility in the “utilities” menu by selecting applications in the finder menu.
Step 2. Go to show all devices by clicking in the upper left section.
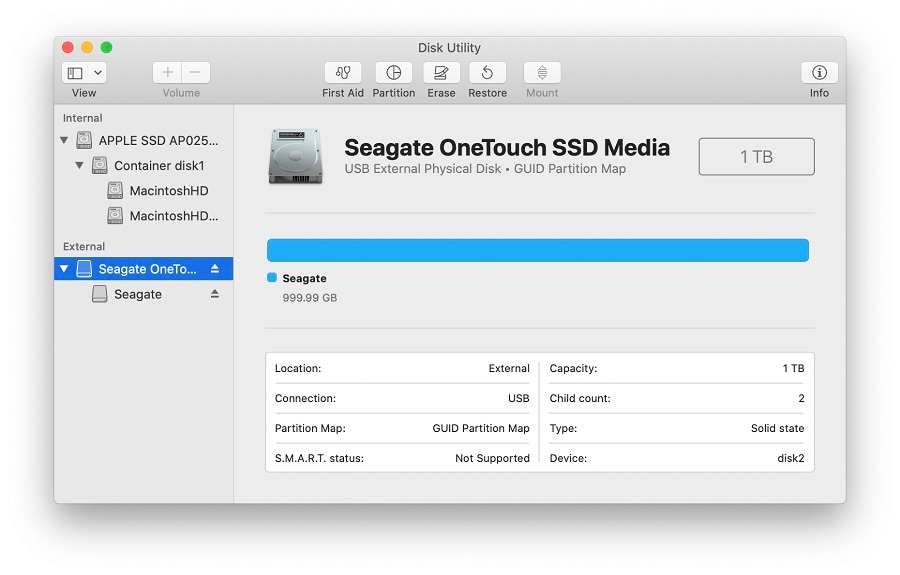
Step 3. Go to the non-intended entry and look for the media in the name.
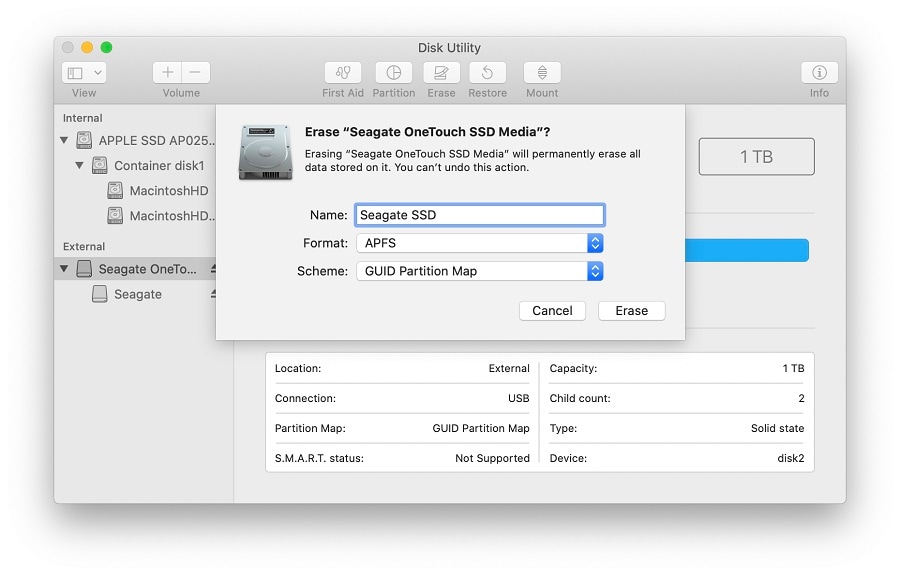
Step 4. Go to the “Erase” button, and a pop-up window will come.
Step 5. Offer a name for the volume, set the scheme to GUID Partition Map and when erase is clicked, the data will be formatted from the drive.
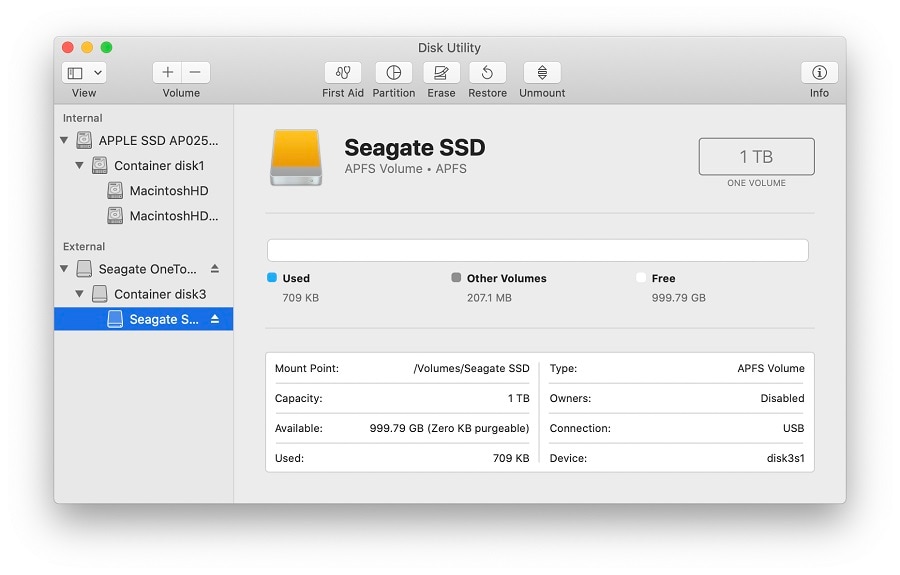
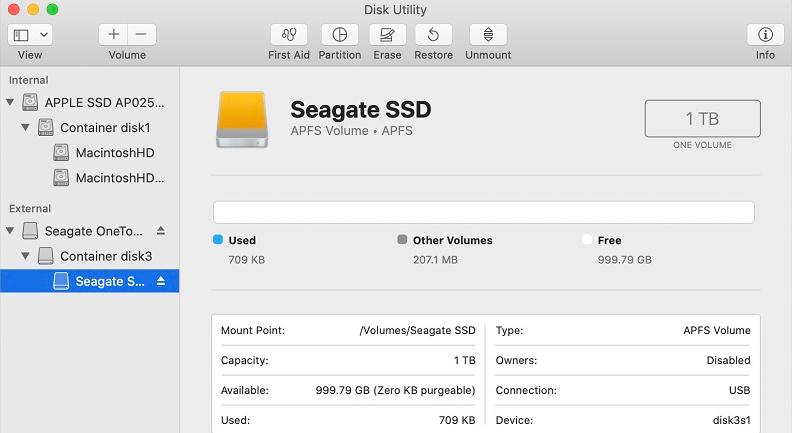
Step 6. It is easy to confirm the cleanup by confirming the selected indented entry, which shows APFS volume under the offered name.
Part 3: How to Format Your Drive to APFS on macOS Catalina, Mojave, and High Sierra?
It is easy to go through APFS formatting on macOS 10.15 Catalina, macOS 10.14 Mojave, and macOS 10.13 High Sierra. It is essential to copy any useful data on the drive before formatting it to protect against data losses. It is important to note that APFS is not supported on 10.13 High Sierra prior versions and on 10.12 or earlier.
Further, APFS is available only if GUID Partition Map is set as Scheme. APFS doesn’t work natively on Windows. It is recommended to format the drive ExFAT on macOS. The APFS formatted drives are not compatible with Time Machine on macOS versions High Sierra to Catalina. For these versions, it is easy to use an external drive for Time Machine to format macOS extended drives.
The quick steps to format the drive to APFS on macOS Catalina, macOS Mojave, and macOS High Sierra are:
Step 1. Open the disk utility in the“Utilities” menu by selecting applications in the finder menu.
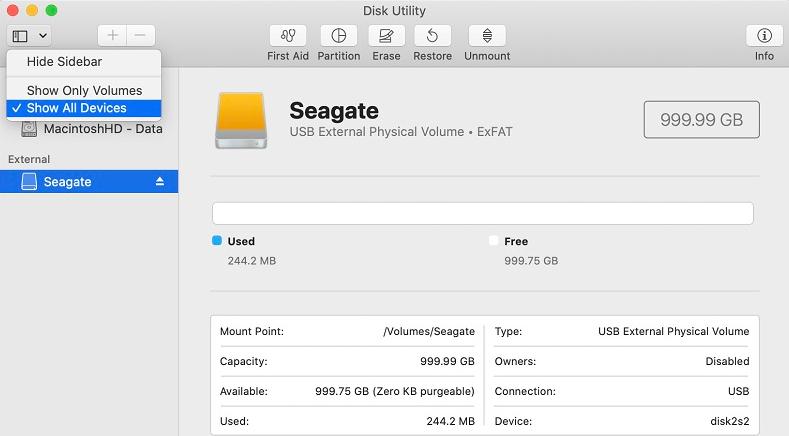
Step 2. Go to show all devices by clicking in the upper left section.
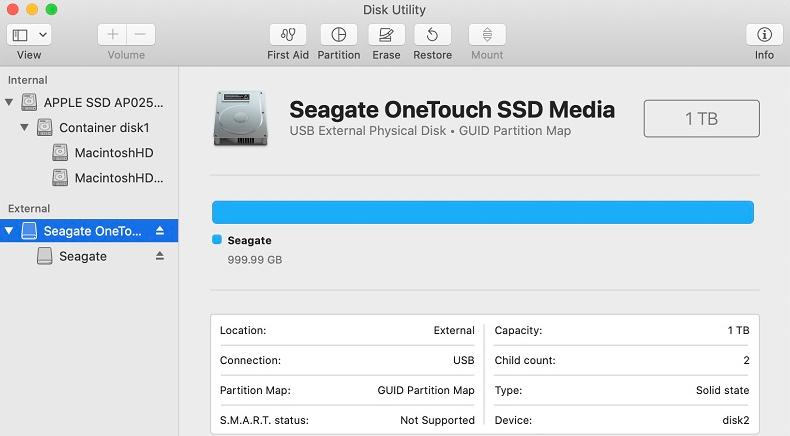
Step 3. Go to the non-intended entry and look for the media in the name.
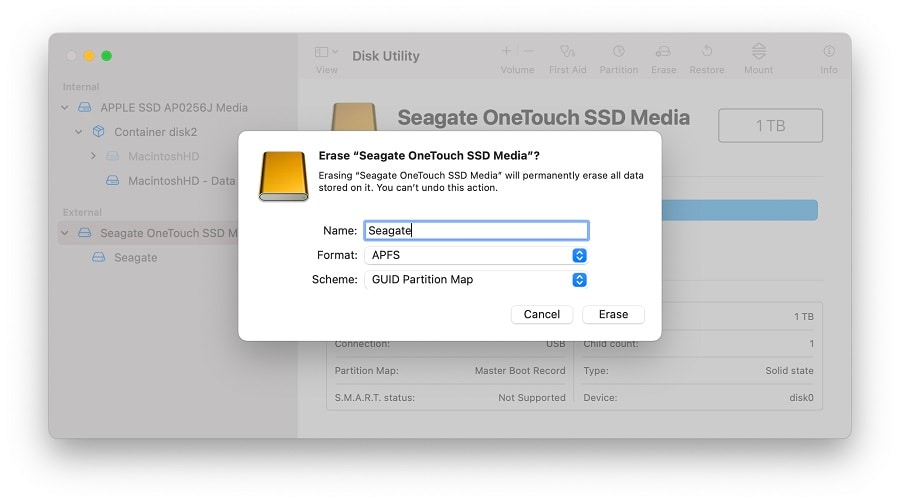
Step 4. Go to the “Erase” option in the menu.
If there is any issue in the Scheme, it is recommended to go for the selection of the non-intended entry.
Step 5. Offer a name for the volume, set the scheme to GUID Partition Map and when erase is clicked, the data will be formatted from the drive.
Step 6. It is easy to confirm the clean up by confirming the selected indented entry, which shows APFS volume under the offered name.
Part 4: How to Recover Lost Data from Formatted APFS Drives?
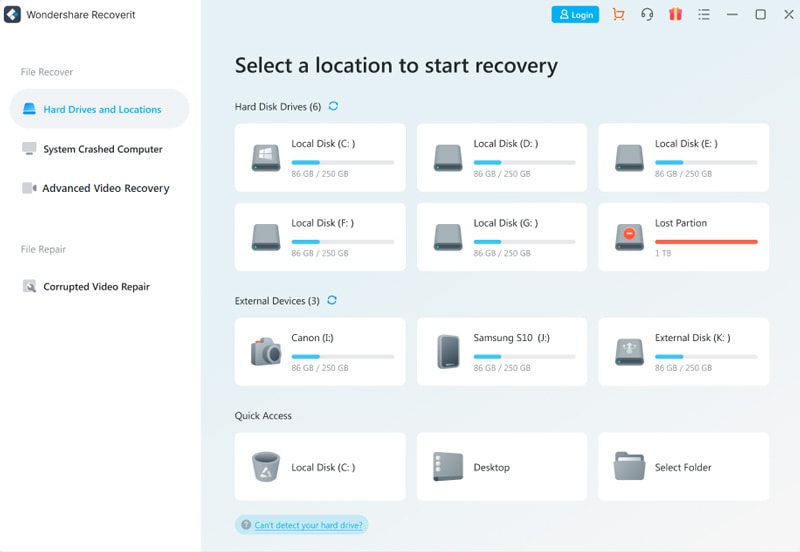
After going through the quick steps of APFS formatting, the user often faces issues in recovering the list data from the formatted drives. All you need is Wondershare Recoverit which is an expert solution in recovering data with a high success rate and quality. It supports more than 2,000 storage devices, including APFS drives.
Wondershare Recoverit supports more than 1,000 file types or formats in archives, audio, videos, photos, documents, etc. The process is simple when it comes to recovering lost data from formatted APFS devices. No more hassles when you can use Wondershare Recoverit for recovering the formatted data. This can be corrupted or deleted data which can be recovered in the following way:

Recover over 1000 types of data types, like photos, videos, emails, files, audios, etc.
Recover data from numerous scenarios. Be it due to files being overwritten, a system crash, accidental formatting or virus attack, Recoverit is able to make a total recovery.
Recover from any storage device, such as Hard Drive, Desktop, USB Drive, SSD, SD card, recycle bin, etc.
Ensure 100% data safe and easy operations.
Step 1. Click on the APFS drive.
Step 2. Go for drive scanning. It is easy to locate or filter files.
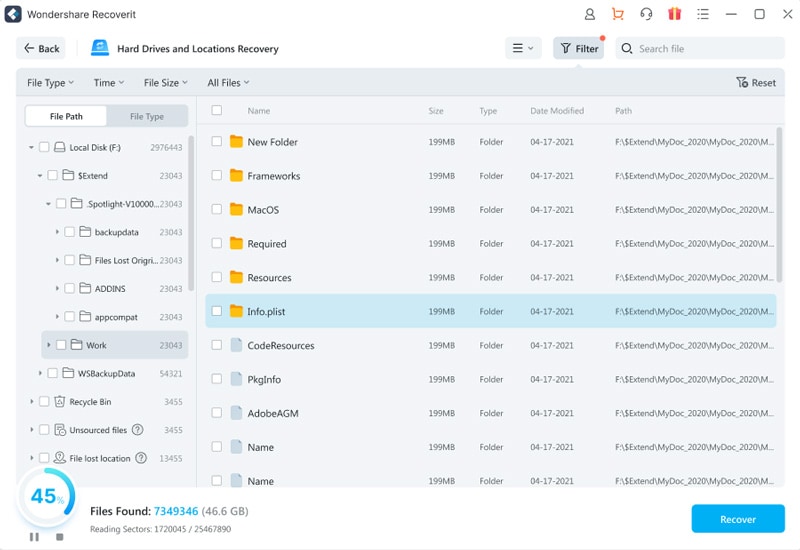
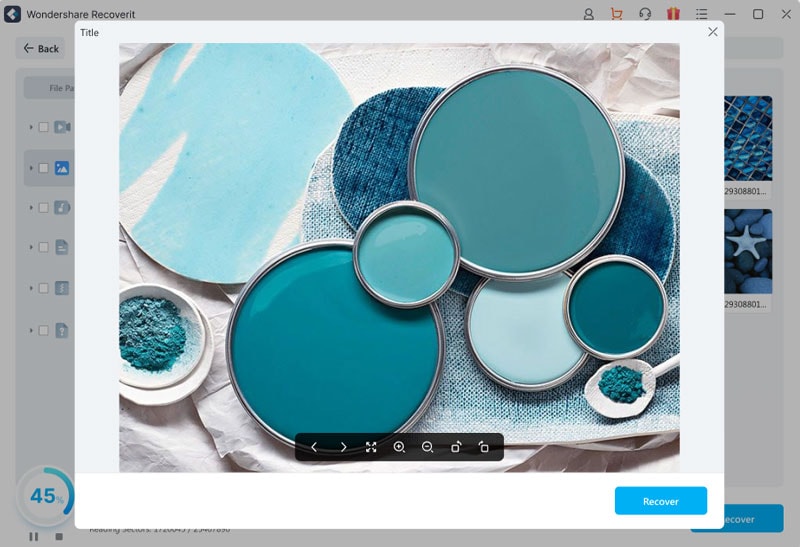
Step 3. The next step is to preview and recover the file. Hence, it is easy to get the data back quickly.
Conclusion:
Hence, it is easy to format the drive to APFS on macOS. The quick steps for different Mac operating systems like Big Sur, Monterey, Catalina, Mojave, and High Sierra ensure that the process is simple and effective. For users accidentally formatting the APFS drives, Wondershare Recoverit can be the ideal tool to recover the lost important data.