We very well know how complicated is the relationship between iOS and Mac OS, and that certainly makes you think that you can not import file from Android to Mac, and that’s true to a certain extent. You can not copy files from Android to Mac, or you will find it a difficult task to export files from Android to Mac if you don’t know how to do it or don’t have the right tools to do so. But, with the right method and good tool, it’s as easy as anything. If you know which tool is perfect for you, you can easily get files from Android to MacBook.
Now, the question remains, how to know which method to transfer files from Android to Mac is the best method? The answer lies within this article, you need to figure it out by yourself. We have compiled all the best methods to copy files from android to Mac, you need to go through the article, and figure out which one works best for you.
Part 1. Transfer Files from Android to Mac using iSkysoft Transfer Toolbox
It’s the first and the best method that we would like to recommend, it transfers your files from Android to Mac like magic, just a few clicks, and all of your data gets transferred with so ease. The iSkysoft Transfer Toolbox for Mac is easy to use yet one of the most feature-rich transfer tool out there for your Android, PC, iOS, etc. You can use it to transfer, manage, and edit your files. It’s fast, reliable, and featureful, have a look at its great features.

Why choose dr.fone
-
The iSkysoft transfer toolbox for Android is so powerful that it lets you transfer all kinds of files from your Android to your Mac, or vice versa. Let it be Music, Videos, Photos, Contacts, Zip files, or anything in data.
-
The iSkysoft Transfer Toolbox is very flexible, flexible enough to fulfil your transfer needs of all the devices. You can transfer files from Android to Mac, from Mac to Android, from PC to Mac, from PC to iPhone and vice-versa, and to and from all kinds of devices and platforms.
-
iSkysoft Transfer Toolbox is very intelligent, intelligent enough to let you select specific files that you want to transfer, unlike many other tools, where you either get to sync the whole data or transfer a whole playlist at once. You can select which files you want to transfer by using iSkysoft.
-
iSkysoft Transfer Toolbox is packed with features. More then transferring the files, you get to manage the files, edit them, or do a couple of other twerks with them.
-
iSkysoft Transfer Toolbox is very easy to use, so easy that you only need to follow a couple of steps, or can be said that you need to do only a few clicks, to transfer files from Android to Mac, and through any other devices.

2,965,271 people have downloaded it
How Can You Easily Transfer Files from Android to Mac Using iSkysoft?
Step 1 Connect & Install
You need to download the iSkysoft Transfer Toolbox for Android first. Just simply go to the iSkysoft website, and download the toolbox, once you have it, simply install it on your Mac. Connect your Mac with your Android phone with the use of an authentic USB cable.
Step 2 Launch & Select
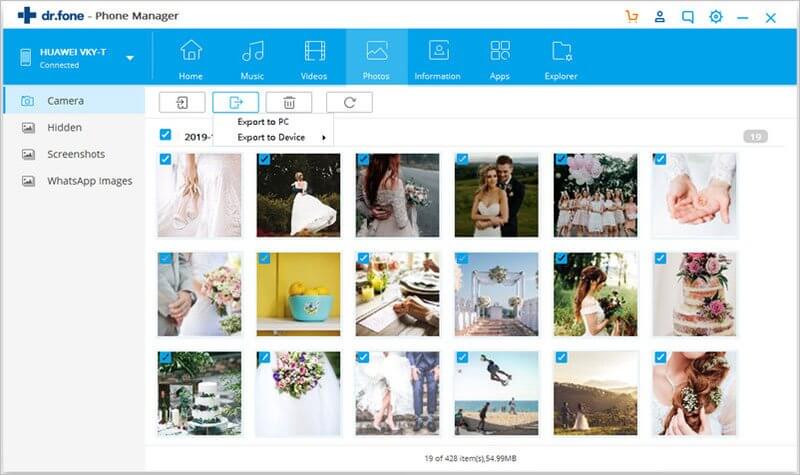
Once you have the iSkysoft toolbox on your Mac and the android is connected to your Mac, you are good to transfer files from Android to Mac. As soon as you are in the program, you will see several kinds of option on the main window, you need to focus on the different kinds of data tabs on the upper menu shelf. You will see Music, Videos, Photos, etc. tabs, go to the tab of the kind of file you want to transfer.
Step 3 Export
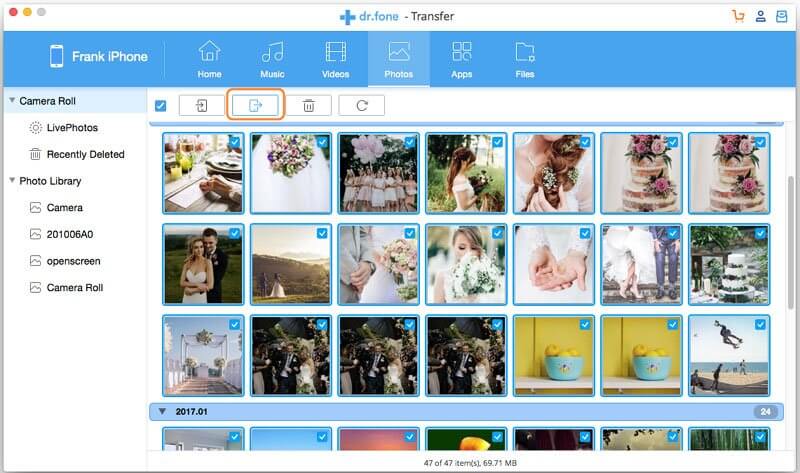
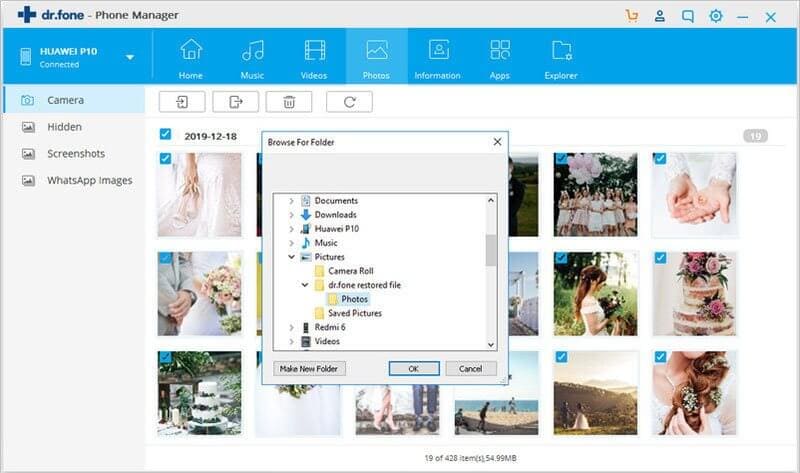
Once you are in the particular tab, you will see all the files stored in your android device. To move files from Android to Mac, you first need to select the files that you want to transfer from that particular tab. Once selected, choose “Export to PC” option by navigating to it through the “Export” button on the upper left corner of the window. Select a location to store on your Mac, and click Ok. This will upload your files from Android on your Mac.
Part 2. Use Android File Transfer to Get Files from Android to Mac
Android File Transfer is without a doubt one of the very useful ways to copy files from Android to Mac. It follows the basic drag and drops way to copy your files, thus, making it very easy for anyone to move files from Android to Mac. All you need to do is to install it on your Mac. It can simply copy all of your data and all kind of data without any much hassle.
Follow the Steps Below to Copy Your Files from Android to Mac
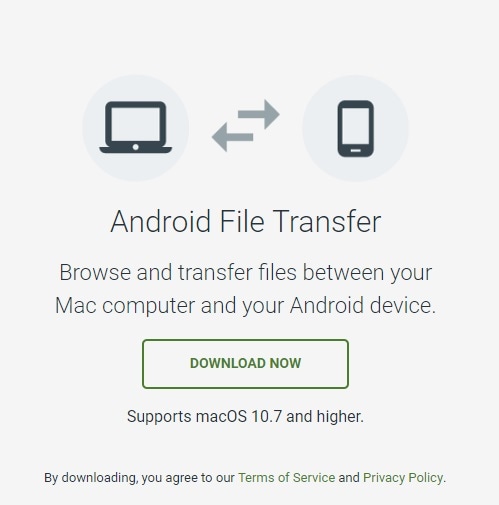
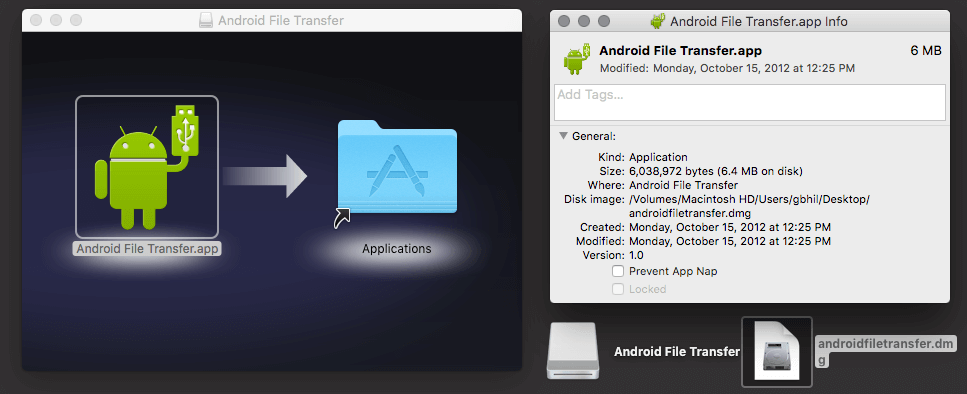
Step 1 To start the transfer, you need to go to the Android File Transfer website and download the Android File Transfer application for Mac. Once you download it, install the Android File Transfer on your Mac.
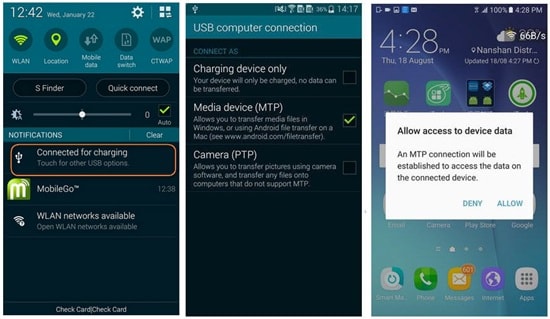
Step 2 Once you have installed the Android File Transfer on your Mac, you now need to connect your Android with your Mac, use a compatible USB cable to connect your Mac and Android with each other. Once you have plugged in the USB on both the devices, you might need to pull down the notification bar on your Android and choose “Media Transfer (MTP)” through a USB option appearing thereafter the connection.
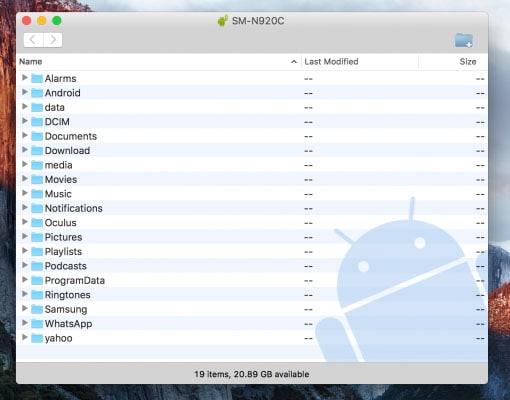
Step 3 Once connected, you will see a popup on your Mac from Android File Transfer, asking you to click “Get Started” to start the copy of files from Android to Mac. Click “Get Started”, this will take you to the directory of your Android device on Mac.
Step 4 Now, once you are in the root directory of your Android File, all you need to do is to locate the file you want to copy from Android to Mac. Navigate through the folders to reach to the file, once you have the file, simply drag it and drop it, or copy and paste it to your Mac’s desktop or in the desired folder in your Mac.
You can copy all the desired files from Android to Mac by following the same method.
Part 3. Try Dropbox to Easily Transfer Your Files from Android to Mac
Well, we have got some wireless ways as well to help you in copying files from Android to Mac, and one of the best wireless ways to do so is by using Dropbox. You can use Dropbox to transfer files from your Android to your Mac and believe us, it’s super easy, unlike other wireless ways. You only need to have Dropbox on both of your devices, accounts to log in, and then you can simply upload file to Dropbox from one end and download it on other. Dropbox can easily transfer all kinds of file and among multiple kinds of the operating system.
How to Use Dropbox?
Step 1 Go to the Dropbox’s website on your Mac to download Dropbox on your Mac, and to download it on your Android, you can either go to the Play Store and search for it or else download the android version from the website itself. Once downloaded, install the downloaded file of Dropbox on your Mac and as well as on your Android device.
Step 2 Now launch Dropbox on both of your devices, launch Dropbox on your Mac and as well as on your Android. Once launched, you will require to log in, log in to the Dropbox on your Mac as well as on your Android from the same login ID. If you don’t already have the login ID, then register yourself on the Dropbox first, and then use that account to log in from both of your devices.
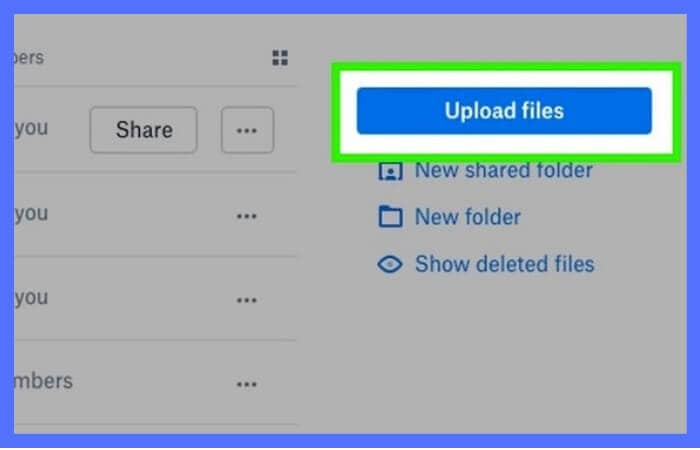
Step 3 On your Android. Once you are logged in to the Dropbox and are into the app, you will find an Upload file option, now, you can click on “Upload File” and select and upload all the files to copy from Android to Mac on the Dropbox. You can also make a separate folder on Dropbox and upload files there to transfer files from Android to Mac.
Step 4 On your Mac. Once you have uploaded the file on Dropbox from your Android, you can simply download it on your Mac. How? As you are already logged into Dropbox on your Mac with the same account as on Android, you will find the uploaded files in the Dropbox or the same uploaded folder, just navigate to the folder, select the files you want to download and store in your Mac, and just do it.
Part 4. You Can Also Try WhatsApp web
There is no doubt to the fact that WhatsApp is a really great way to share your thoughts and have some chit-chat, but do you know that you can use WhatsApp to get files from Android to MacBook? Well, yes! You can use your very convenient chatting app to copy files from your Android to your Mac, not only Mac, you can use WhatsApp to transfer files between multiple platforms and operating systems, and that too by an integrated method, how?
Go through the step-by-step method below:
On your Mac:
Step 1 To start with the transfer of the file from Android to Mac using WhatsApp Web, you need to first download WhatsApp Web on your Mac, you can do that by simply going to WhatsApp Web on your browser, and then downloading the WhatsApp for your Mac and installing it.
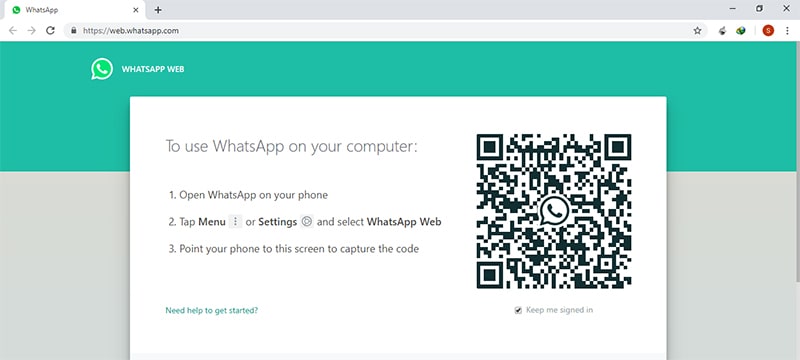
Step 2 Now, as soon you launch the WhatsApp web on your Mac, it will take you to a QR code, that QR code is meant to be scanned by the integrated QR code scanner in your WhatsApp for Android, so you need to switch to your Android mobile from here on.
On your Android Mobile:
Step 3 To export files from Android to Mac, go to your WhatsApp on your Android device, click on the “3-dot menu” on the upper corner, and then sneak into the option “WhatsApp Web” option, it will take you to an integrated QR scanner of the WhatsApp for Android.
Step 4 Once you have the QR code scanner, you need to scan the QR code on the WhatsApp Web on your Mac. As soon as you scan the QR code successfully, the WhatsApp web on your Mac will be successfully linked to the WhatsApp on your Android.
The Common Steps:
Step 5 Now, here comes the main trick. You need to save your own number that you use to access WhatsApp as a contact in your Android phone. Once you do so, it will reflect as a WhatsApp contact on your WhatsApp. Now, all you need to do is to select the files that you want to transfer from Android to Mac and send them to the same contact.
Step 6 Now, once the files are sent to your own number through the WhatsApp from your Android, you are supposed to receive it on your own WhatsApp, on you Mac WhatsApp and as well as on your Android WhatsApp. Simply go to the WhatsApp on your Mac, navigate to the newly received message from your own number. Now, download the received files, and store them in your Mac.
Part 5. Use Email to Send Files from Android to Mac
Email is meant to be a means of official conversation, sharing of information, and a lot of spam, but the same sharing of information can also be used by you to copy files from Android to Mac. Indeed, it’s not the most convenient way, but it is a way for sure. You can always get into your Email account, and share some quick files with yourself. All you need to do is to follow the steps, there are several other ways to get your files from Android to MacBook using Email, but this one comes out on top of our list.
Step 1 Go to the Email/Gmail app on your Android mobile, or browse to your Email through the web browser. Once you are into the Email app, log in by using your own Email id, or if you don’t have an Email account, create one first, and then log in to your Email.
Step 2 Once you are into your Email account, search for “New Email”, “Compose”, or “+”, option, as different Email apps or browsers have different UI. Once you find any of these, you need to click on it, it should take you to an Email templet to create a new Email.
Step 3 Now, click on the “Add File” option in the templet, and browse through your Android Device to select and upload the files that you want to transfer from your Android to your Mac by Email. Once the files are selected, just wait for them to get uploaded. Once uploaded, save the mail as a draft.
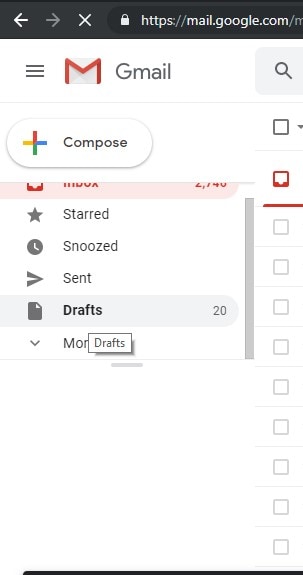
Step 4 On your Mac, access the same Email account through the Email app or the web browser. Remember, you need to access the same Email account. Once you are into your Email account, navigate to the “Drafts” section by using the left menu shelf.
Step 5 In drafts, you should see the newly saved mail that you recently saved from your Android. Go to that mail, if your files were properly uploaded, you should see them here in the saved mail, and should be able to download them on your Mac as well. Now, simply download and store all those files on your Mac.
Part 6. Let’s Conclude – Which Way to Transfer Data from Android to Mac is Better?
To conclude, we need to give you our view on what we think about all these ways to copy files from Android to Mac. Which method to get files from Android to Mac is best, and which one is just somewhat usable. Let’s discuss that rather than coming to a point, let us tell you what we think about each of them in short so that you can decide it better by yourself that you want to import file from Android to Mac by this way or another way.
-
iSkysoft - The Best Way to Transfer Files from Android to Mac:
iSkysoft Transfer Toolbox is the best way to transfer files from Android to Mac, it’s not only us, who are saying so, but the highest ratings and the rave user reviews are also the proof. The main reason being the compatibility with every OS, being able to transfer all kinds of data, fastest data transfer, extremely easy to use UI, and many more features.
-
Dropbox - The Second-Best Way to Transfer Files from Android to Mac:
Dropbox is certainly the easiest way to get your files from Android to Mac, even when it is done wirelessly. Dropbox lacks extra feature like iSkysoft, but it can transfer all of your data, with the same ease.
-
Android File Transfer – The Third Best Way to Transfer Files from Android to Mac:
The only difference between Dropbox and AFT is that it requires a USB connection. Other than that, you can use AFT to transfer all types of data and as much as you want. It is more trustable and is supposed to be faster due to the USB connection.
-
WhatsApp Web & Email – Somewhat Usable Method to Transfer Files from Android to Mac:
You can use WhatsApp Web or Email to transfer your files from Android to Mac, but the main problem comes when it’s about bulk files or files that are large in size. Both the methods use internet connection as the medium, thus they consume time and aren’t reliable either. Also, there are many limitations of the kinds of file you can send, and how big the size of the file can be etc.




Elva
staff Editor