Technology is paced to render users with the ease of operations to its users. There have been a number of ways that have catered to provide solutions to all kinds of problems. The cloud service is one of them that ensures to maintain a replica of your data components. But, it has to be done at the cost of undergoing complex set of procedures. However, if you are a true old school by heart, maintaining backup over PC can be considered as a viable option to have all your contacts there. So, in this article we give you some of the modern ways of exporting contacts to PC as well as enlighten you with a great tool to cater the service!
Part 1. iTunes
Apple’s iTunes is a renowned, multi-dimensional media player incorporated to work excellently as the mobile device management application. This application renders user to backup files and then transfer them to the desired location. Even if the users are working on Mac and Windows system, there is little to no worry at all. Hence, exporting iPhone contacts from iPhone to computer can be achieved using iTunes. But, if you wish to take selective backup of a particular data that is certainly not possible with it.
Here is how to get contacts from iPhone to computer:
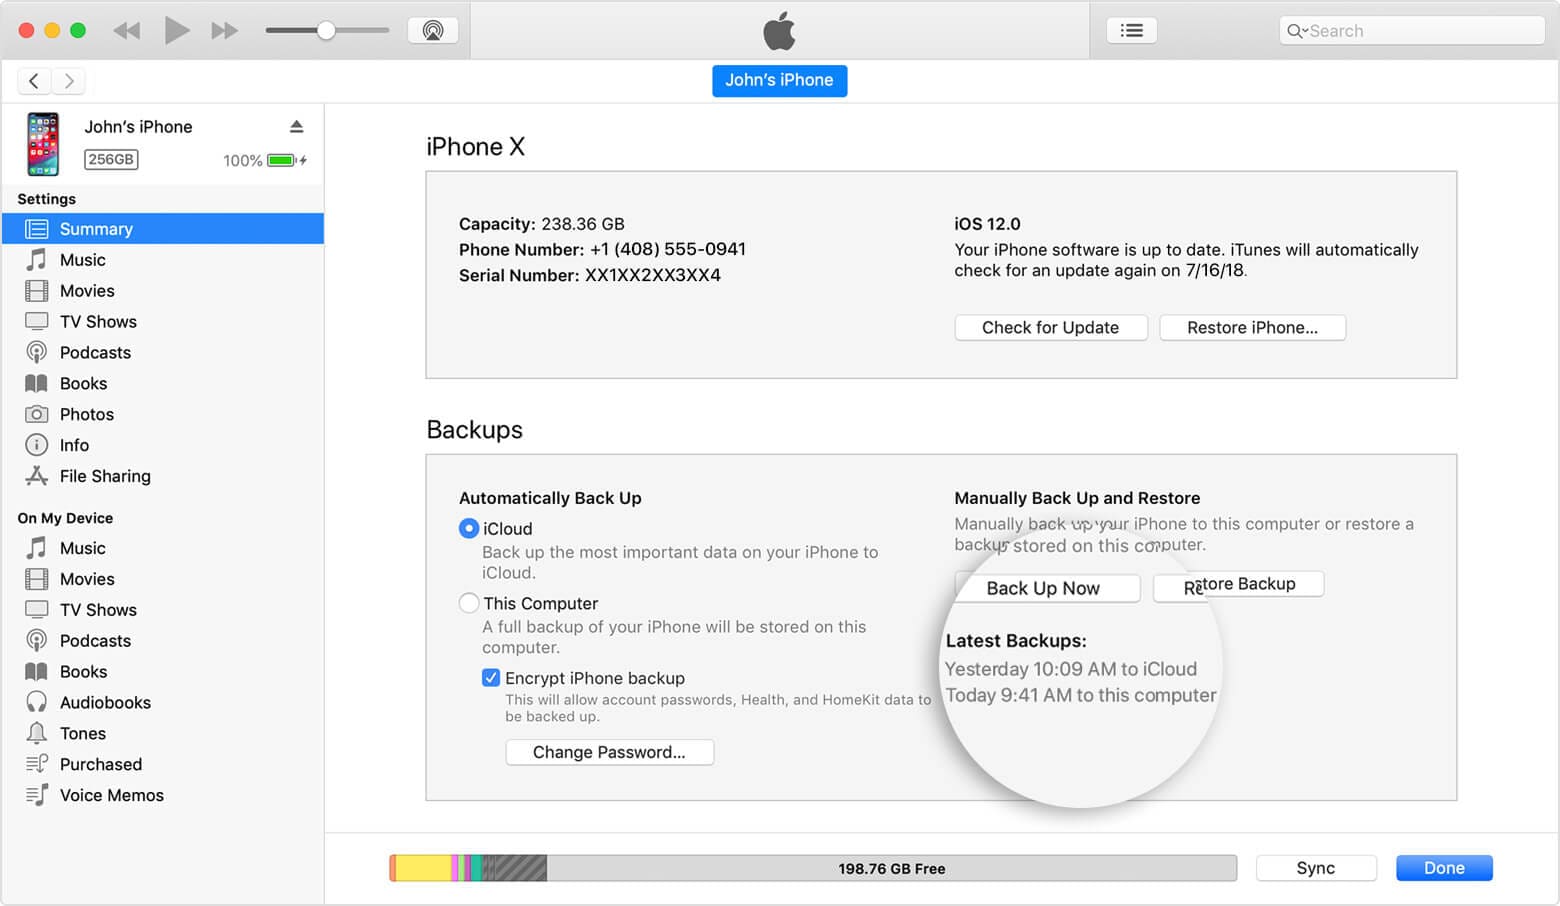
Step 1 Open the latest version of iTunes over your Mac/Windows PC. Meanwhile, draw connection of your iPhone with the system respectively. In the interim, allow the program to detect your device by its own.
Step 2 After your phone is recognized by the program, just opt for your iPhone from the “Devices” section and then visit the “Summary” tab.
Step 3 From the right panel, visit the “Backups” panel and opt for “This Computer” for stashing the device’s backup to your PC.
Step 4 At last, click on the “Backup Now” button placed under the “Manual Backup & Restore” section.
The backup will kick start, wait until it accomplishes. Then, you’ll be able to open contacts over your PC.
Part 2. iCloud
While iPhone users shares familiarity with iTunes, iCloud is no exception. Being used as one of the mediums to maintain the backup of the data components available in their respective device, iCloud is the most preferred cloud storage service for iDevice users. So, if you are finding it too hard to fetch the contacts using iTunes, iCloud is a good option for exporting iPhone contacts without iTunes. For this, simply export the vCard file to the PC.
Just follow down the step by step guide to transfer contacts from iPhone to PC in the said order:
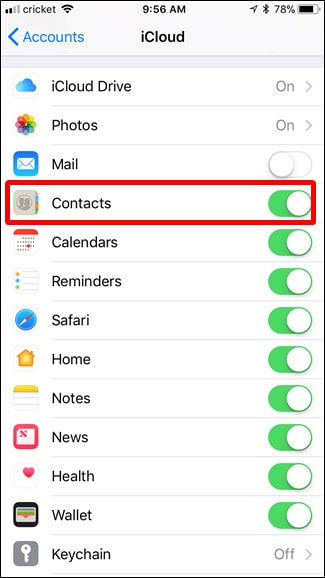
Step 1 Get hold of your iPhone and head on your way to its “Settings” from the app drawer or home screen.
Step 2 From the settings, go to “iCloud” menu and sync contacts by sliding right the “Contacts” option.
Step 3 Now that you’ve synced contacts to iCloud respectively, you now can sync the same with PC via the iCloud.
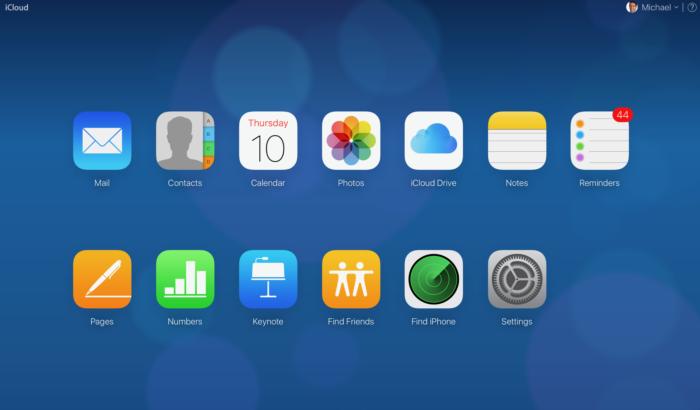
Step 4 Visit the official website of iCloud over your system and proceed with sign in using the same iCloud account.
Step 5 Here on, select the “Contacts” icon from the launchpad of your iCloud account. You’ll be redirected to a new interface that lists all the contacts synced with your respective device.
Step 6 Then, opt for the contacts that you desire to export to your PC and then hit the “Settings” icon from the bottom left panel.
Step 7 At last, move your cursor to “Export vCard” option and hit on it to initiate exporting contacts to the vCard file.
That’s how you can transfer iPhone contacts to computer. The vCard file stored in the PC can be copied to any other device for further usage as well.
Part 3. dr.fone – Transfer (iOS)
Undeniably, iTunes can prove to be a great stress for some users. As for its functionality concerned, not many gets used to it. But, there is certainly one tool you can look up to for transferring files in an ultra-lightning speed and that’s dr.fone – Transfer (iOS). One of the commendable and all in one file manager capable of executing transfer of almost all major file types such as photos, videos, contacts, messages between and iDevice to Windows PC in a hassle free manner. That too, without having to use iTunes at all.
1-Click to Transfer Files between iOS and Computer
-
Incorporates with the method of transferring photos and videos without iTunes.
-
Can easily monitor the media files available in your PC and manage other activities too.
-
If needed, this product can easily convert media files while running transfer process.
-
In case of disruptions, users can opt for rebuilt iTunes Library if the data is lost because of crashes, virus attacks or switching to new computer.

2,965,271 people have downloaded it
Now that you are acquainted with the essentials of dr.fone – Transfer (iOS), here is the complete guide for the same.
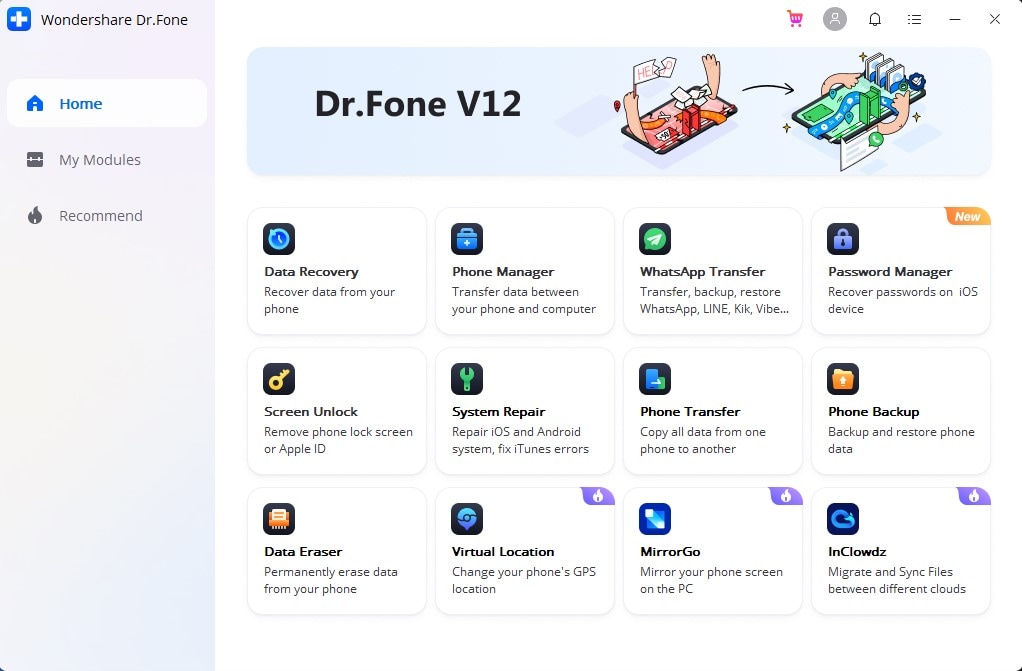
Step 1 Launchdr.fone – Phone Manager (iOS) on your PC
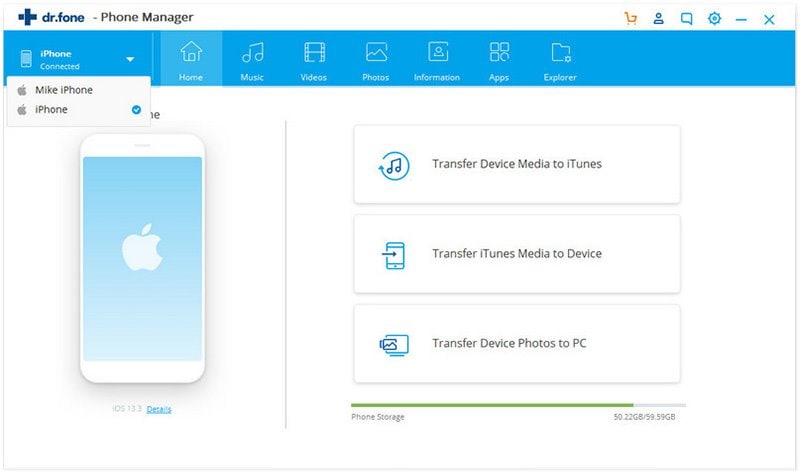
First of all, start by loading dr.fone – Phone Manager (iOS) on your native PC. Run the application afterwards. Simultaneously, draw connection of the iDevice with the system.
Step 2 Getting started with Transfer (iOS)
Right after the main interface opens up, proceed with “Information” option located in the navigation panel.
Step 3 Opt for the desired list of contacts
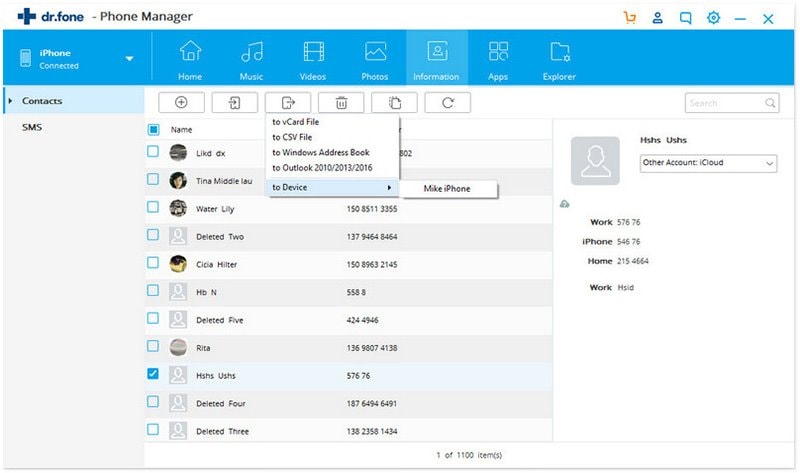
In “Information” option, you can opt either “SMS” or “Contacts” category, select “Contacts” in this case. Now, it is up to you to manually select the contacts or tick mark “Select all” option followed by hitting the “Export” icon.
Step 4 Export the file
Finally, tap “to vCard file” option and then select the destination folder. That’s about it!
Part 4. Email
In general sense, we use Email for corporate or personal use to send or receive information. But more than that, it is a great option to export iPhone contacts without using iTunes. Curious to know how? Well, here is the step by step tutorial on how you can!
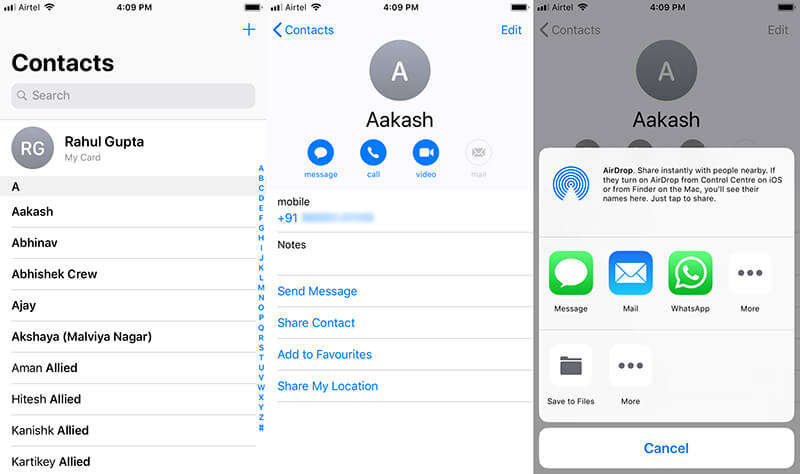
Step 1 From your iPhone, visit the “Contacts” app from the app drawer or home screen.
Step 2 Now, tap on the desired contact that you wish to export from your iPhone to your respective PC via email.
Step 3 Once done, tap on “Share Contact” followed by “Mail”.
Step 4 The mailbox will appear, simply insert the information to send an email to your alternative mail or send the mail to yourself.
Step 5 Finally, fetch the mail from your PC save the item on your PC!
Part 5. Export Contact
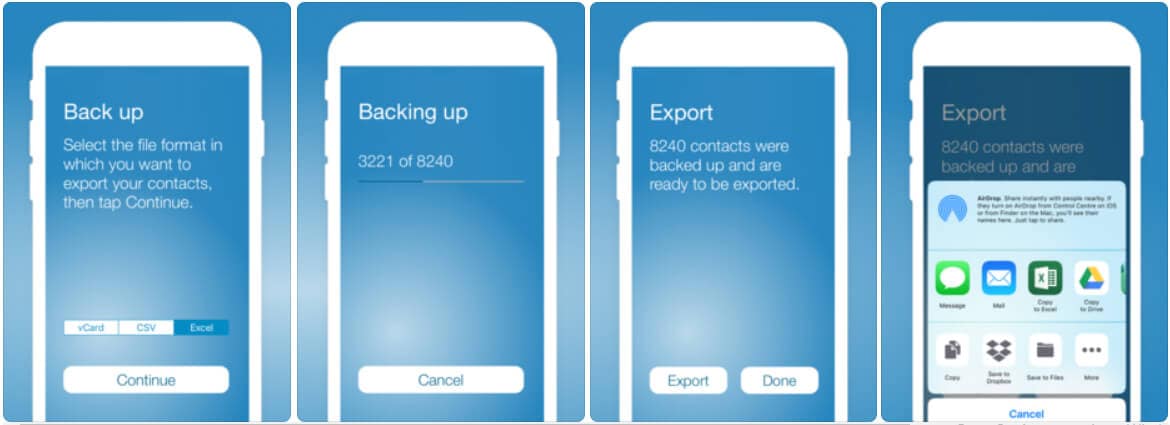
Last but not least, users can consider using “Export Contact” application that is flared to transfer contacts from your desired iPhone to computer. With its simple, user friendly interface, this application can very much be apt for the layman. Just execute the following steps to reap the benefit of this application and access contacts on your MAC/Windows PC.
Step 1 First of all, go to iTunes Store and get “Export Contacts” on your iDevice.
Step 2 Launch the application and start with performing backup of the contacts. To do this, select the desired output file format type (i.e. vCard, CSV, Excel) according to your convenience and hit “Continue”.
Step 3 The backup processes and will reflect with the contacts available in your device. Right after that, tap on “Export” option.
Step 4 From the following prompt, you’ll be asked to opt for the desired location, preferably opt for “Save to file” or Dropbox or any other cloud storage account from where you can download file to your computer.
Part 6. Comparison and conclusion
We hope we’ve eased out the burden of performing transferring contacts from your iPhone to the PC respectively. Depending upon your convenience, you can execute any of the said method. However, if you are one of those persons who wishes to save your time and due efforts, then allow dr.fone- Transfer (iOS) to export several kinds of media files, contacts from your iPhone to PC. It ensures to provide speedy output in less than 5 minutes!


Basil Rathbone
Editor