Excel Recovery
- Excel Recovery+
-
- How to Recover Excel File
- How to Fix “Excel cannot open the file” Error
- How to Recover Excel File After Crash
- How to Recover Corrupted Excel Files
- How to Recover Temporary Excel Files
- Ultimate Excel Recovery Methods
- How to Recover Unsaved Excel Files
- Excel AutoSave and AutoRecover
- How to Backup Your Excel Files
- Recover Unsaved Excel File on Mac
- Recover Corrupted Excel Files from Mac
- How to Repair Your Damaged Excel Files
- How to Recover Overwritten Excel File

• Filed to: Document Recovery • Proven solutions
“I have been working on an important Workbook from my computer when suddenly it went off. I need to know how to AutoSave Excel and get my files back. Any help?”
Microsoft Office is the most common program that runs on any given computer. Its components ranging from Excel, Word, PowerPoint, and Publisher are always at the forefront when working on any project. It is in such situations when you may realize that your computer suddenly goes off, not giving you a chance to save your 3-hours Excel calculations project. Luckily, Microsoft Office programs now entail built-in features that play a big role in doing AutoSaves and AutoRecovery functionalities that you can now use to AutoRecover Excel files when a need arises.
Part 1: What Are Excel AutoSave and AutoRecover in Microsoft Office?
1.1 Excel AutoSave and AutoRecover
AutoSave and AutoRecover are features that Microsoft Office brings on board to help users easily deal with issues of interruptions while working on their computers. In the event that power goes off or your computer suddenly shuts down without any further warnings, Excel AutoSave will step in and save the document you were working on before your machine went off. This makes it easy to recover AutoSave Excel if you are still in need of such files. Likewise, Excel AutoRecover feature steps in place when you switch on your computer, to recover any unsaved and lost file on your machine if you didn’t shut it down correctly.
1.2 How to Enable AutoSave in Excel?
If by any means your computer faces a crash problem, just know that you are bound to lose any data or file that you were working on by the time the crash occurred. Well, here’s the kicker; you don’t have to wait until you are faced with such an eventuality. You may opt for Excel AutoSave and save yourself the agony of looking through a heap of files for your unsaved document. Simply enable AutoSave on your Excel program. This feature will automatically save any document that was not saved by the user in the event that the computer crashes abruptly. Let’s see how to enable this feature.
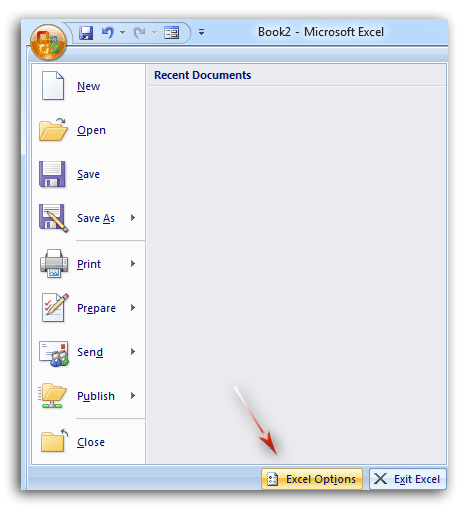
Step 1 Open Excel Application
Once you launch your Excel application, click on the ‘File’ tab. Then check on the left-hand pane to find other functionalities. Click on the ‘Options’ feature; this may, however, be labeled as ‘Excel Options’ in some Windows operating systems.
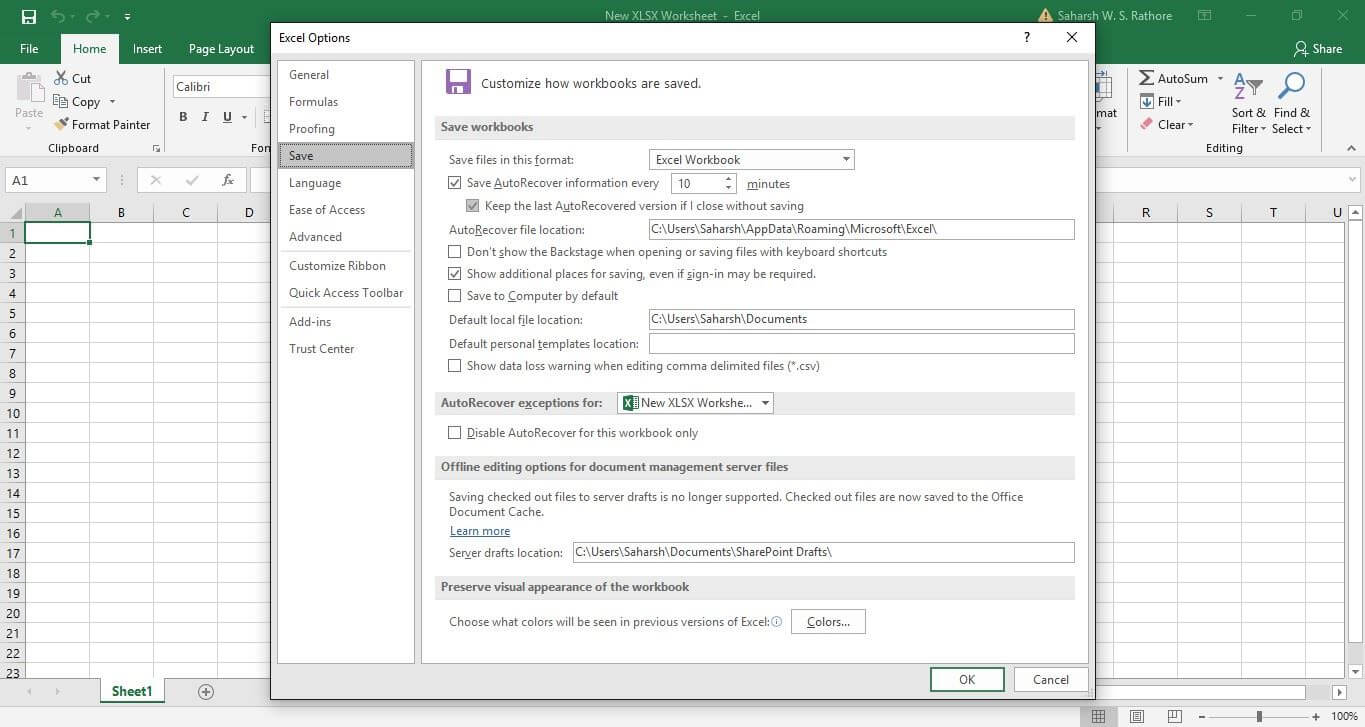
Step 2 Go to the ‘Save’ tab
Once the ‘Excel Option’ opens up, select on the ‘Save’ tab found at the left side of the screen. Then select the ‘Save AutoRecover information every’ Option. Do this by checking the box that is against it. It will allow you set time limit interval when you want your documents to be automatically saved. This will also enable you to do a quick AutoRecover Excel in the event that you lose data suddenly.
Step 3 Check the ‘Keep the Last AutoSave Version’
It is important to select the format that Excel should use when automatically saving your workbooks. Go to the ‘Save files in this format’ option and select the recommended ‘Excel Workbook (*xlsx)’. Next, check the ‘Keep the last autosaved version if I close without saving’ box. This will prevent Excel from deleting the backup in the event that the program closes before you save your workbook. Remember that this option is not available in Excel 2007 and hence only applies to higher versions like Excel 2010 and 2013, among others.
These simple steps are the leeway to turning on the AutoSave Excel 2016, 2017 and other higher versions. So, with this, you are sure to salvage your files back even if you forget to save your Excel project due to a sudden power cut-out or system crash.
1.3 How to Change AutoSave Location in Excel?
There is one location that the AutoRecover workbooks are generally directed to whenever you do an AutoRecover Excel. The default Auto saving folder is C:\Users\Username\Appdata\Roaming\Microsoft\Excel\. As you can see, it may be hectic, diving down to this location. If anything to go by, you may miss the point at any given step and this will lead to your files not being able to be restored even after successful file retrieval. This is the reason why many users opt to change the AutoSave location for easy tracing. To do this, just follow these easy steps.
Step 1 Find Excel Options
Click on the ‘File’ tab and then select the ‘Options’ feature. This is where to find Excel Options.
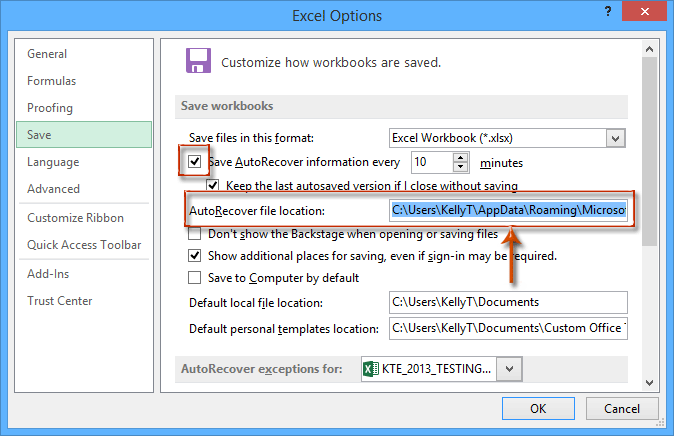
Step 2 Remove the saving path
From the Excel Options dialog box, look for the ‘Save’ tab. You’ll find this at the left bar. The ‘Save’ tab will direct you to the ‘AutoRecover file location’ box. From here, remove the original saving path. It is now time to select your desired AutoSave location. Ensure you pick a location that is easily reachable.
Step 3 Change location
Click on the ‘OK’ button to change the AutoSave location. By this single click, you would have enabled all the AutoSaved files to go to the specified location.
Part 2: Find and Retrieve “Unsaved” Excel File with AutoRecovery
The Excel AutoSave location is found within the ‘C’ partition of your hard disk. Go to C:\Users\Username\Appdata\Roaming\Microsoft\Excel\. However, this feature is only workable in the event that you had previously saved the file at least once. By any chance, if you had never saved the file, then it may require you to look for a third-party tool to aid in the recovery.
It is also possible to find and retrieve “Unsaved” Excel file with AutoRecovery. Follow these steps.
Step 1 Open your file
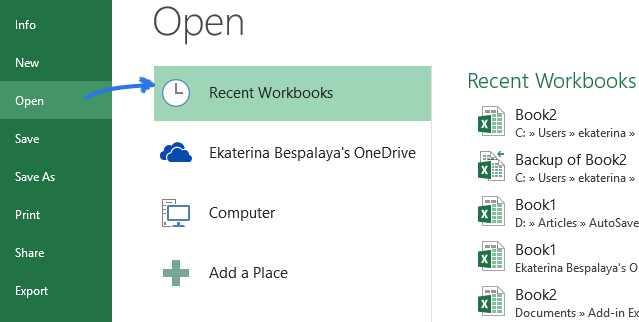
Do this by going to the ‘File’ bar and then selecting the ‘Open’ option.
Step 2 Choose Recent Workbooks
The open option has various categories. Pick on the ‘Recent Workbooks’ option for further actions.
Step 3 Recover
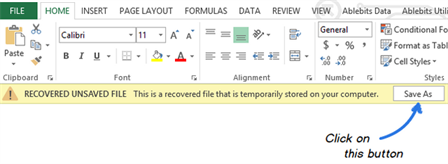
You will have to scroll down and look for the ‘Recover Unsaved Workbook’ button. This is located at the bottom of the available list.

Step 4 Save your file
Once you manage to recover AutoSave Excel, the next step is to save it to your computer. Go to the ‘Save As’ option and save your file in the desired location.
Part 3: How Do I Solve the Issue of AutoSave Not Working?
3.1 Use ‘Open and Repair’ inbuilt utility to fix and repair damaged Excel file
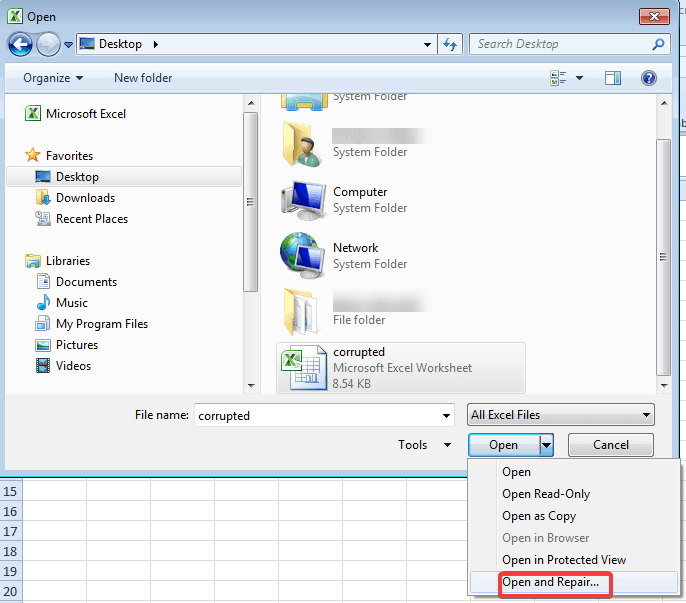
There are some times when you experience damaged Excel file scenario. The ‘Open and Repair’ tool can repair your damaged file.
- Click on the ‘Open’ option from the ‘File’ menu.
- Once a list has been populated, select the ‘Corrupted Excel File’ that need to be repaired.
- Then go to the drop-down list of the ‘Open’ tab and pick the ‘Open and Repair’ option. Click on the ‘Repair’ button so as to repair your Excel file.
3.2 Use reliable office document recovery software, Recoverit (IS)
In an event that the above option does not help you to Excel AutoSave, then probably a reliable tool will be of help. Recoverit (IS) is able to retrieve any file format in simple steps. Besides, it has the capacity to recover data lost in any situation such as recycle bin recovery, lost partition recovery, accidental formatting and virus attack recovery.

Recoverit (IS)
Reasons for choosing this Microsoft Excel AutoSave Tool
- It can recover over 1000 data types: These include photos, videos, Excel files, graphics and much more.
- It has a user-friendly interface: It has easy steps that are quick to use and follow. The tutorial is in-depth, enabling even beginners to successfully retrieve data.
- Ability to recover from any data loss scenario: Recoverit can recover data from virus infection, accidental deletion incident as well as does effective system crash recovery.
A step-by-step guide on how to how to recover Excel document using Recoverit (IS)
Step 1 Pick a preferred recovery mode
Once you launch the tool, select a recovery mode from the available options. These include lost partition recovery, deleted files recovery, recycle bin recovery and many more. In this context, pick the ‘Deleted Files Recovery mode’ to perform an AutoRecover Excel.
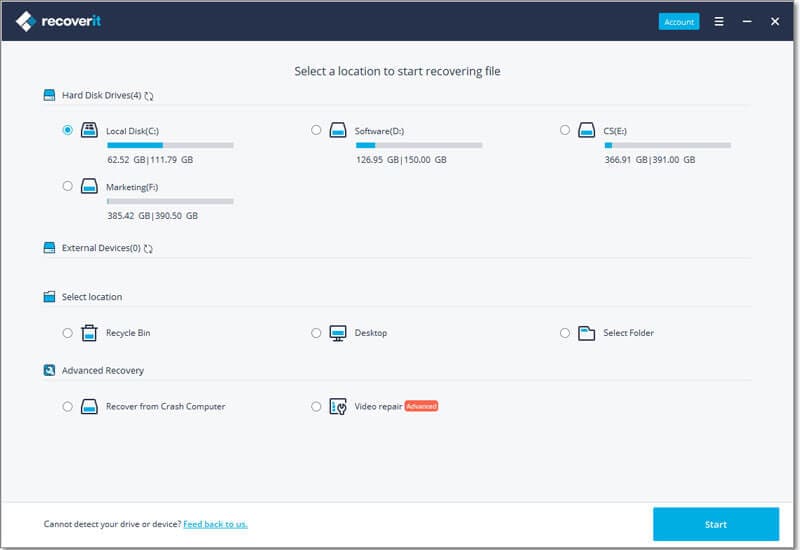
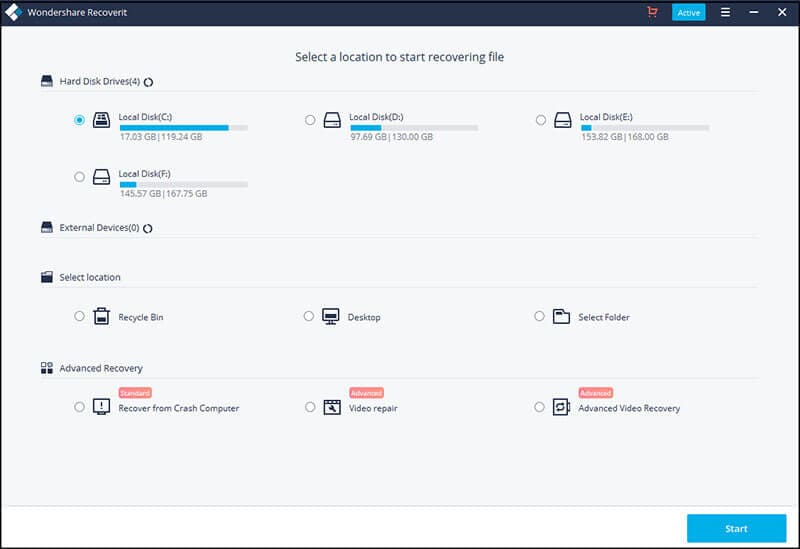
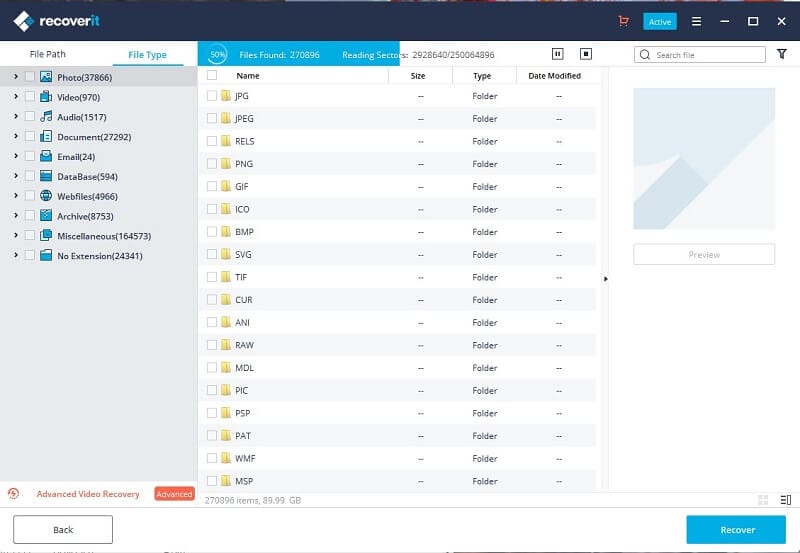
Step 2 Choose the location to scan
Depending on the lost scenario of your Excel file, pick the location from where to do a recovery. Then click on the ‘Start’ button and let the program continue to scan.
Step 3 Preview Excel file
The system lets you preview any Excel AutoSave that has high chances of being retrieved. Confirm the file that you need to recover by checking in the box beside it.
Step 4 Recover your files
The last step is for you to confirm the previewed files and then do a recovery. Simply click on the ‘Recover’ button at the bottom right of the screen. You may then decide to save your Excel file on the computer or save in an external drive.

Conclusion
Better said than done, I hope this article has shed some light on the possible ways how to AutoSave Excel. You just need a little caution in handling your files. Otherwise, Microsoft Office comes with powerful safety features to ensure that your files are well taken care of. You may also apply the assistance of a third party tool like Recoverit (IS) to do a quick restore for you. Just follow the steps until you become successful.
Elva
staff Editor