iPhone/iTunes Error
- iPhone Error List+
-
- iPhone Error 1
- iPhone Error 6
- iPhone Error 9
- iPhone Error 14
- iPhone Error 21
- iTunes Error 27
- iTunes Error 39
- iPhone Error 53
- iTunes Error 54
- iPhone Error 56
- iTunes Error 1035
- iTunes Error 13014
- iTunes Error 2001
- iPhone Error 2009
- iPhone Error 3194
- iPhone Error 4000
- iTunes Error 4005
- iPhone Error 4013
- iTunes Error 9006
- iPhone Error 9
- iTunes Error 3259
- iTunes Error 2002
- iTunes Error 17
- iTunes Error 51

• Filed to: Fix iPhone System • Proven solutions
iTunes error 27 or iPhone error 27 occurs when you try to restore your iPhone device. The error can occur in different iPhone devices like iPhone 6, iPhone 7 and iPad, This page explains ways you can fix it and suggests software that can not only fix error 27 but also many other iPhone errors.
- Part 1. Quit iTunes and reopen it
- Part 2. Disable anti-virus program
- Part 3. Check your USB cable
- Part 4. Use a different computer
- Part 5. What to do if your phone stuck on Apple/iTunes logo because of iTunes error 27
- Part 6. Restore iOS device in DFU mode
- Part 7. Check for outdated or modified software
- Part 8. Contact Apple support
Part 1. Quit iTunes and reopen it
A common cause behind the error 27 can sometimes be a minor glitch or technical error in iTunes. Usually, this can be resolved by restarting iTunes. Doing this procedure will also make sure iTunes starts afresh and is busy with no other tasks.
To exit iTunes completely, you should use the Windows Task Manager or Mac's Activity Manager. To quit and reopen iTunes, follow the steps below.
For Mac users
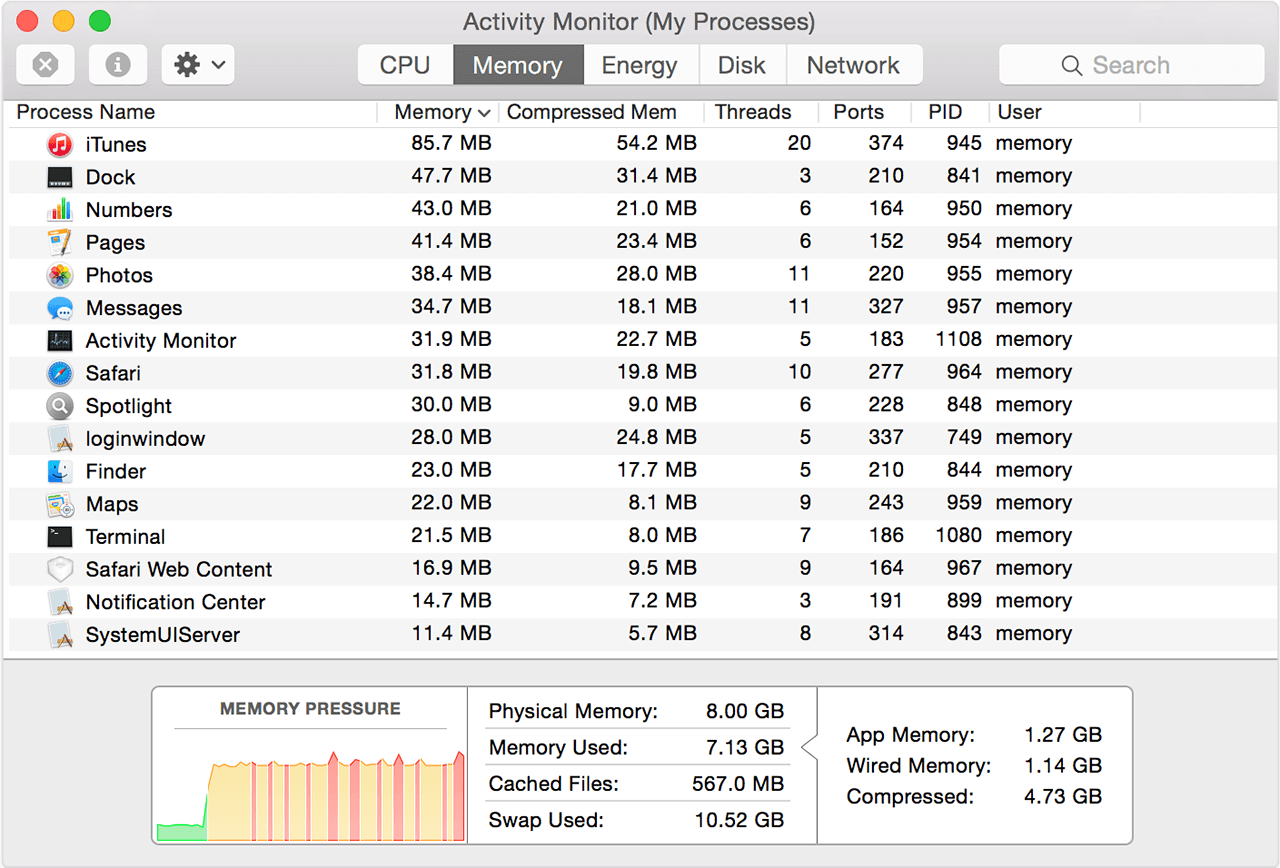
Step 1: Search for "Activity Monitor" in the spotlight search field.
Step 2: In the "Activity Monitor", select "iTunes" and then click "Quit Process". Click "OK" on the confirmation dialogue box to exit iTunes. This will close the iTunes program completely.
Step 3: Now open iTunes again.
For Windows users
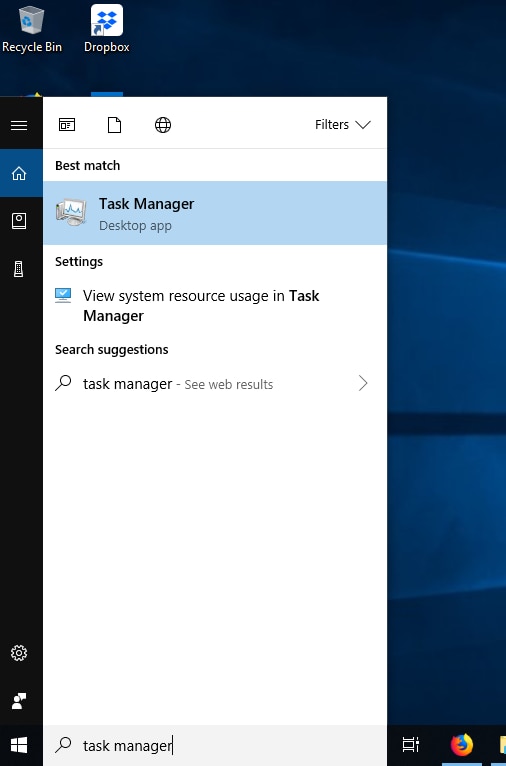
Step 1: Search for "Task Manager" by searching in the "Start Menu" or by pressing "CTRL + ALT + DEL".
Step 2: Select "iTunes" in the "Task Manager" and click "End Task". iTunes will close now.
Step 3: Launch iTunes again.
If this does not resolve the error 27 in your iPhone, one of the next solutions will definitely be helpful.
Part 2. Disable anti-virus program
Third party security software can block iTunes from connecting to the server. This can result in error 26 when you attempt to restore iPhone. See if this is the problem by disabling the anti-virus temporarily.To disable the anti-virus program, right click on the anti-virus icon and then click "disable".
If the problem persists even after disabling the anti-virus, then you should try the next methods.
If disabling the anti-virus resolves your problem, consider upgrading or replacing your anti-virus program.
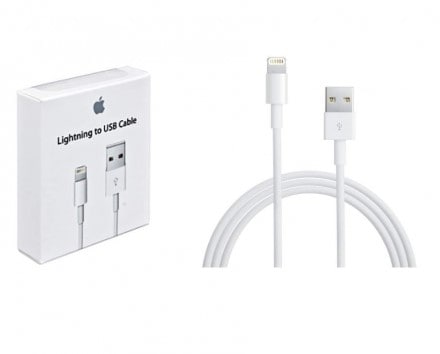
Part 3. Check your USB cable
Hardware issues lead to iTunes error 27 very often. Before you try more complicated methods, you can check if the issue is arising due to a defective USB cable. To ensure this, you can follow the steps below-
Step 1:Make sure you are using Apple-certified cable.
Step 2: Make sure your iPhone stays connected to your computer when you restore it.
Step 3: Check if the USB cable is defected or torn. If your iPhone doesn't respond when it is connected to your computer, it might mean the cable is damaged.
Part 4. Use a different computer
It is possible a certain process or malware in your computer interferes when you try to restore your iPhone. This method will work if -
1. Your computer's OS is out-of-date.
2. Your computer is infected with malware or virus.
If the problem lies with your computer, use a different computer that has an updated Operating System version and also the latest version of iTunes installed.
Part 5.What to do if your phone stuck on Apple/iTunes logo because of iTunes error 27
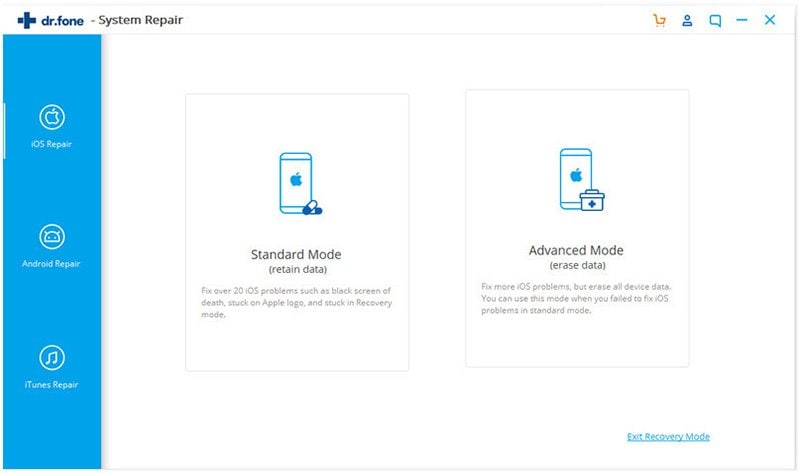
Did error 27 cause your iPhone to be stuck on Apple/iTunes logo? dr.fone - System Repair (iOS) is a simple iOS system recovery tool that can fix almost every iOS and iTunes problem including error 27.
If you would like to transfer backup music from Mac to your Android device, the best application to use is dr.fone - Phone Manager (Android). It is a very easy to use phone transfer tool that you can use to transfer many things between Android and computer, including apps, contacts, messages, call logs, music and videos. It also allows you backup phone data on your Mac computer without quality loss.

dr.fone - System Repair (iOS)
Best iPhone/iPad system recovery tool
- Easily fix common iPhone errors like stuck in DFU Mode, iPhone stuck on Apple logo, iPhone black screen of death, or iPhone frozen/not responding.
- It can fix errors on most iPhone devices including iPhone XS/XS Max/XR/X, iPhone 8 Plus/ 8, iPhone 7 Plus/ 7, iPad Pro, iPad Air, iPad mini, iPad, etc.
- It is compatible with different versions of commonly used operating systems like Windows and Mac.
- You will not use the important data stored in your iPhone.
- With this software, you can even schedule your iPhone for automatic updates.
How to fix error 27 using dr.fone - System Repair (iOS)
Use the following steps to recover your phone completely from error 27.
Step 1: Install and launch dr.fone - System Repair (iOS)

Download and installdr.fone - System Repair (iOS) on your computer and then launch it. Make sure your iPhone device is connected to your computer via USB.
Step 2: Begin repair
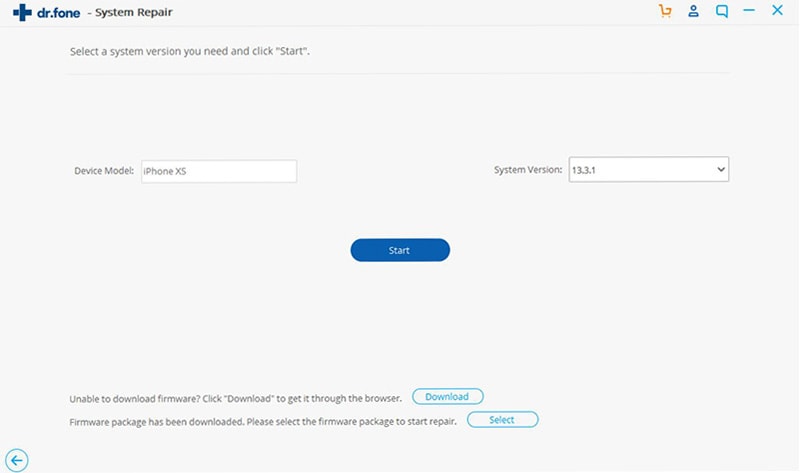
From the home menu, select the "Repair" module. A list of common iOS errors will appear. From this select your error, that is error 27 and click on the green colored "Start" button to continue.
The dr.fone - System Repair (iOS) will now detect your iPhone model and other details related to it. For example, if you connect iPhone 6, it will display, "iPhone's (iPhone 6) is connected". Check if the details are correct and click "Next" to proceed to the next step.
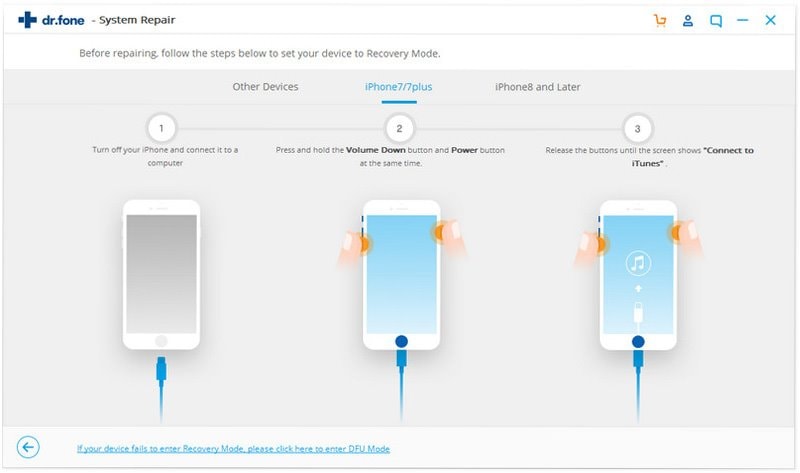
Step 3: Activate DFU Mode
Now you need to enter your device into DFU Mode, for which you can follow the steps below.
For iPhone 7/7 Plus
1. Start by pressing and holding the "Lower Volume Button" and "Power Button" just for 10 seconds.
2. Now release the "Power Button" , but you still need to continue holding the "Lower Volume Button".
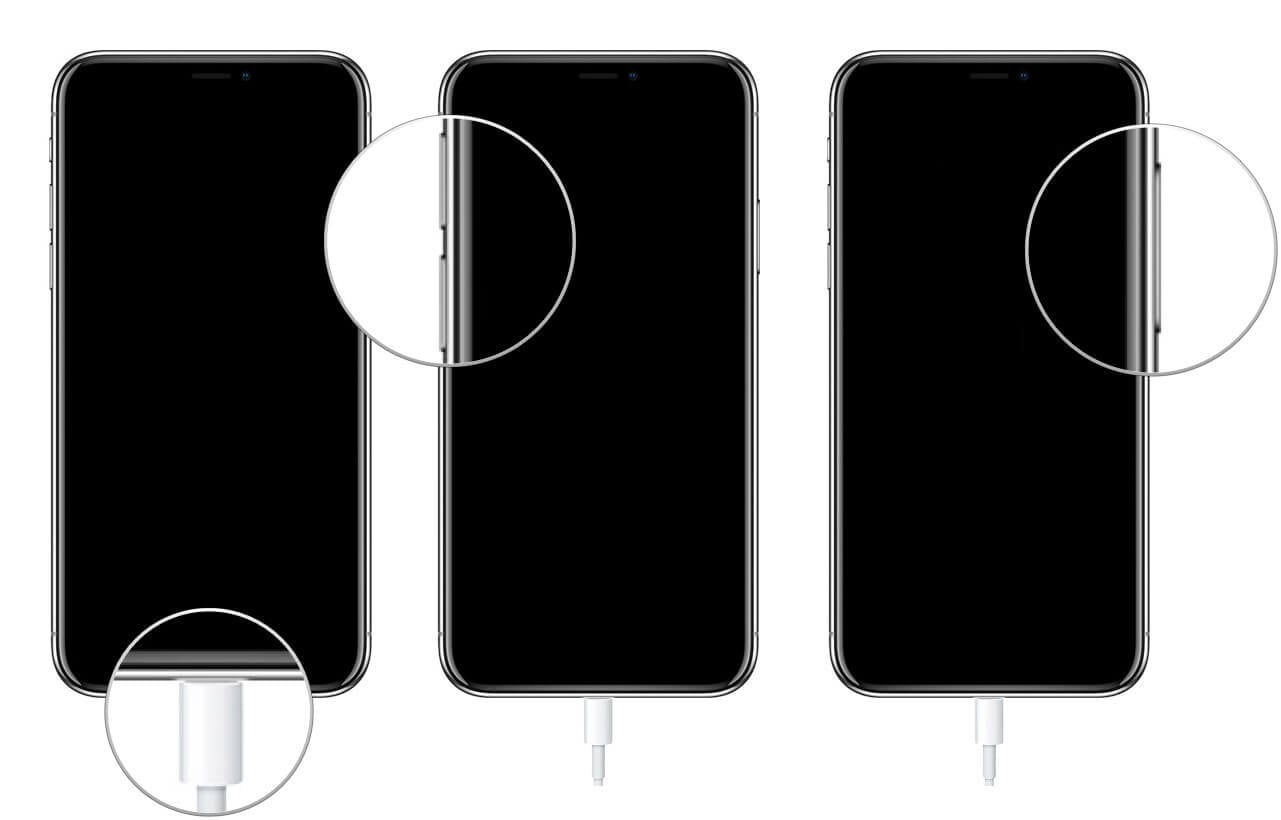
For iPhone 8/8 Plus/X:
1. Quickly press and release the "Volume Up Button" and then the "Volume Down Button".
2. Press and hold the "Side Button" until your device screen goes black.
For iPhone 6/6 S
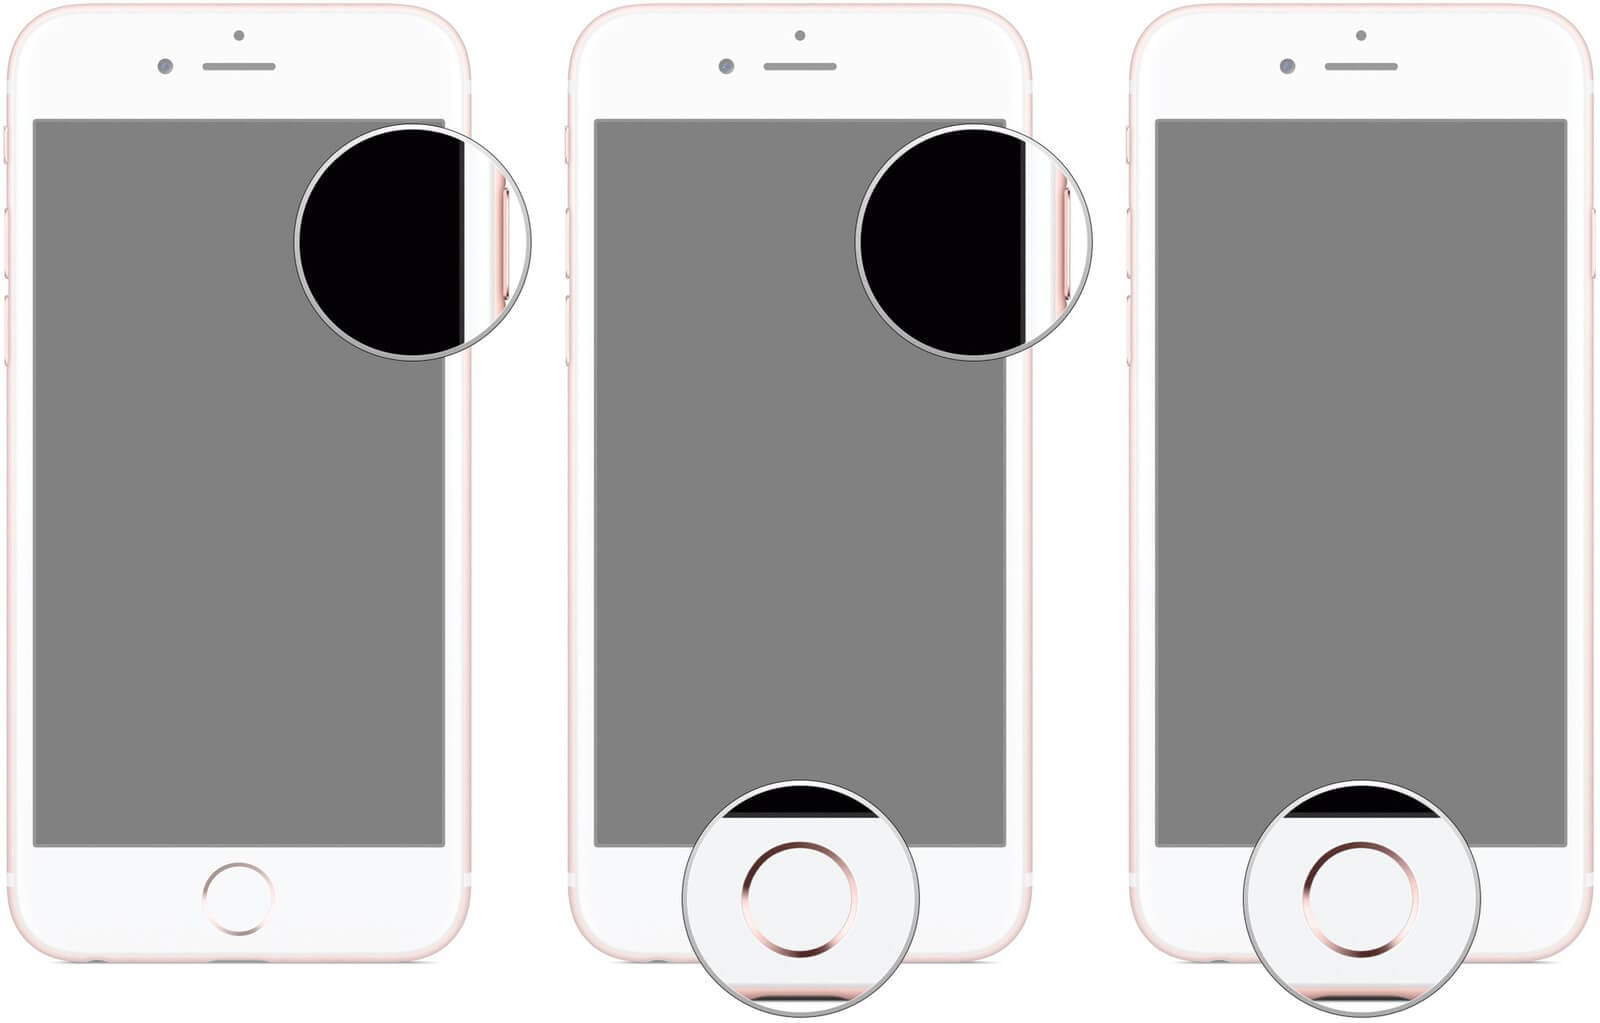
1.For iPhone 6/6s, just start by pressing both the "Home Button" and the "Lock Button" just for 10 seconds.
2. Release the "Lock Button" while continuing holding the "Home Button" until your device screen turns black.
Step 4: Download the required firmware package
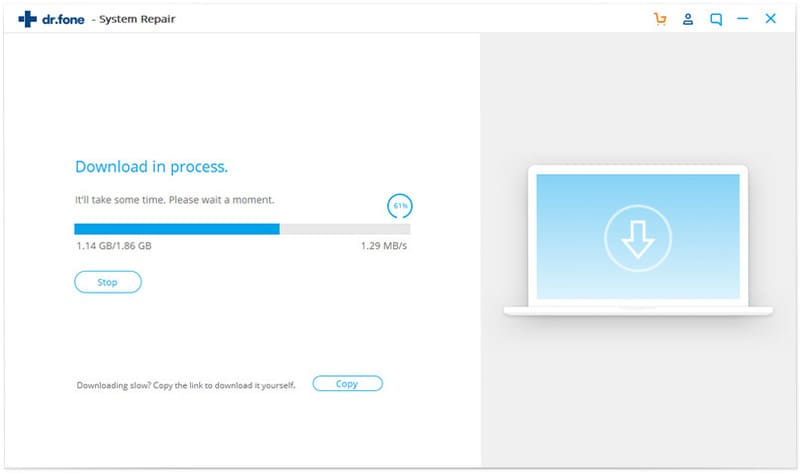
The dr.fone - System Repair (iOS) will recommend downloading a firmware matching your iPhone and the error you encountered. Click on the green colored "Download Button" to begin the download. Now, wait until the download finishes.
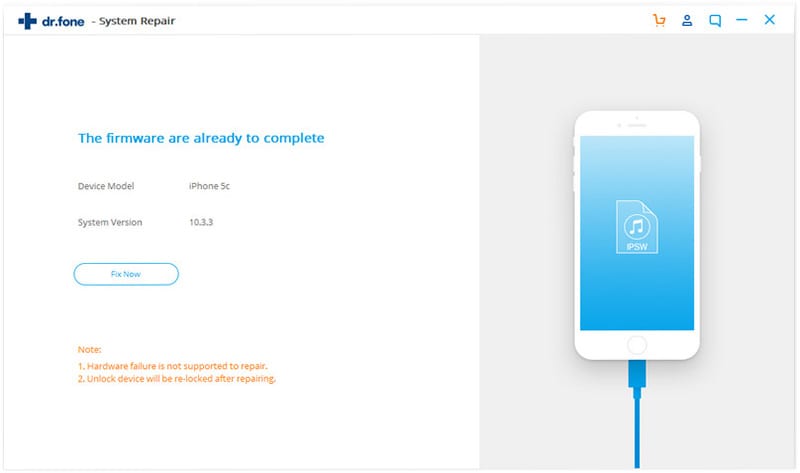
Step 5: Resolve iTunes error 27
When the firmware is downloaded, you can fix your iPhone by clicking on "Fix Now Button". But remember to check the checkbox underneath that says "Retain native data". This way, you can ensure that none of your data is vanished.
When the process is complete, your iPhone will be recovered to the state it was before the error 27 occurred.
Part 6. Restore iOS device in DFU mode
DFU mode stands for Device Firmware Update. The DFU Mode essentially reloads your device software and firmware. This will fix the error, but it will result in losing your data. You can put your iPhone in DFU Mode using the following steps.
For iPhone 6/6S
1. Connect your iPhone to your computer.
2. Now start by holding on the "Home Button" and the "Lock Button" for about 10 seconds.
3. Proceed by releasing the "Lock Button" while holding on the "Home Button" simultaneously.
4. ITunes will display when your device that your device has entered the DFU Mode.
For iPhone 7/7 Plus
1. Make sure your device is connected to the computer before you begin. Also, ensure you have iTunes open on your system.
2. Now start holding down the "Side Button" and the "Volume Button" together.
3. Let go the "Side Button" after 8 -10 seconds and continue holding the "Volume Button".
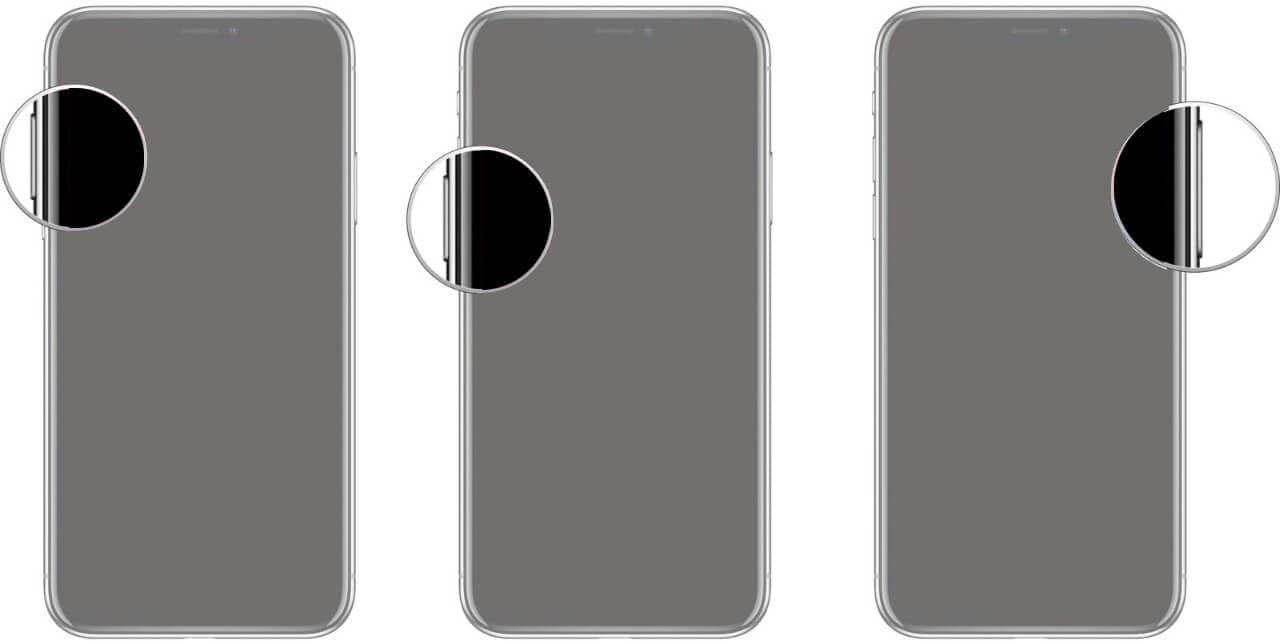
For iPhone 8/8 Plus/X
1. Connect your iPhone device to the computer using an Apple-certified USB cable.
2. Proceed by quickly pressing and releasing the "Volume up Button" and then press and release the "Volume down Button" quickly.
3. Now, hold down the "Side Button" until the screen goes black. iTunes will alert you when your iPhone enters the DFU Mode.
Part 7. Check for outdated or modified software
Outdated iTunes version can result in failure to restore iPhone. To update iTunes version, follow the steps below-
For Mac users
1. Start by clicking "Apple Menu" and then go to "System Preferences".
2. Now, click "Software Update". Update packages for iTunes in Mac are bundled together with MacOS updates.
If your MacOS is up-to-date, you can still check for iTunes update using this.
For Windows users
1. Open iTunes.
2. Open "Help" from the menu bar at the top and then click on "Check for Updates".
3. Follow the instructional prompts to update iTunes.
Part 8. Contact Apple support
If you do not know how to fix the problem, you can get expert help from Apple's support technicians by calling their official phone number. You may also locate Apple-authorized service provider near you to solve your problem.
Elva
staff Editor