Android Recovery
- 1. Recover Android Data+
-
- Recover Deleted Text Messages on Android
- Recover Contacts from Android
- Recover WhatsApp Messages from Android
- Recover Deleted Files from Android
- Recover Deleted Call logs on Android
- Recover Delete Items on Android
- Export Android Facebook Messages
- Recover Android Facebook Messages
- Android SD Card Recovery
- Recover Contacts from Android SIM
- View Deleted SMS on Android
- Find Lost Android Phone
- Recover Photos from Android
- Recover Contacts after Factory Reset
- Find Deleted Phone Numbers on Android Phones
- Retrieve Deleted Text Messages on Android
- Recover Android Media+
-
- View Deleted Pictures Android
- Recover Android Photos
- Android Video Recovery
- Recover Audio Files on Android
- Retrieve Screenshots on Android
- Android Photo Recover after Reset
- Undelete Android Photos
- Google Photo Recovery
- Recover Photos from Android Internal Memory
- Recover Photos from Android SD Card
- Video Recovery Software
- Recover Android Videos
- Top Alternatives+

• Filed to: Android Recovery • Proven solutions
When you're surfing on the Internet and find something interesting, shocking or resonating, you must be impatient to share with your friends via various communication tools, right? Then, what will you do? I guess lots of users will directly take a screenshot on mobile phone and send it to all people you want to share, right?
Thus, you must have saved lots of screenshots on Android and some of them might make sense for you. Then, it could be a big trouble when you find some of them are disappeared from your device, but fortunately, you can recover screenshots on Android with a simple solution.
Part 1. How to Recover Screenshots on Android Phone or Tablet within Few Clicks
In this article we are gonna give you simple tips and some good advice for your data protection. To do it, you need to find a tool as your daily assistant, here we could like to recommend dr.fone - Data Recovery (Android) for your reference. With it, you can easily find your lost screenshots with just few clicks and you can also use it to restore data like photos in gallery, videos, audio, contacts, Whatsapp images, call logs, messages, etc.
dr.fone - Data Recovery (Android)
Key features of dr.fone - Data Recovery(Android)
- Directly access to Android's internal memory and extract your needed data from broken, damaged or non-responsive Android within few clicks.
- View all data on broken Android without enabling USB debugging.
- The program supports almost 6,000 Android devices on the market, so you can deal with almost all kinds of Android backup and restore issues.
- Simple to use for both beginners and experts.
Steps on How to Recover Screenshots on Android Phone or Tablet within Few Clicks
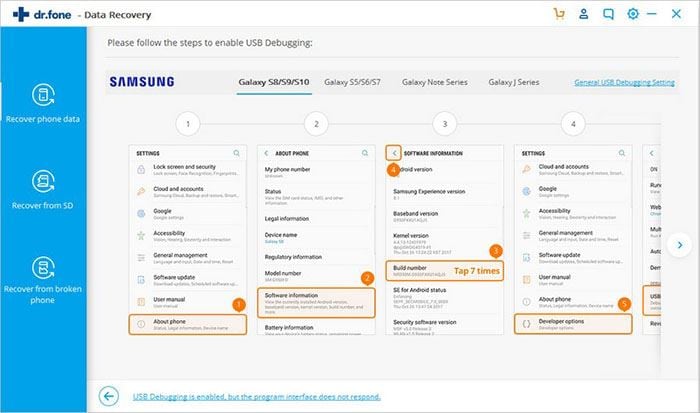
Step 1. Connect the Android with PC
Launch and run iSkysoft software on your computer and click on "Data Recovery" option. Now, connect the Android device to the computer and enable USB debugging on Android device.

In case the USB debugging is active on your device then the program interface would detect the settings automatically. However, you can follow the onscreen steps to enable it by yourself.
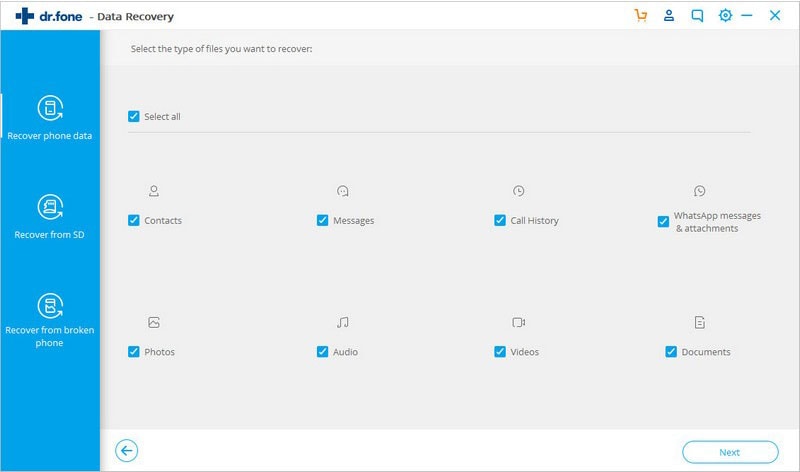
Step 2. Select Gallery for Scanning
The program would scan and analyze the data accordingly with different categories. Now, this is all about recovering the screenshots, so they are stored in photo format in the gallery.
Now, click on Gallery in the category menu or you want to scan the complete data then you can scan the complete device with the options given. After, you are done selecting your screenshots, click on Next to proceed.
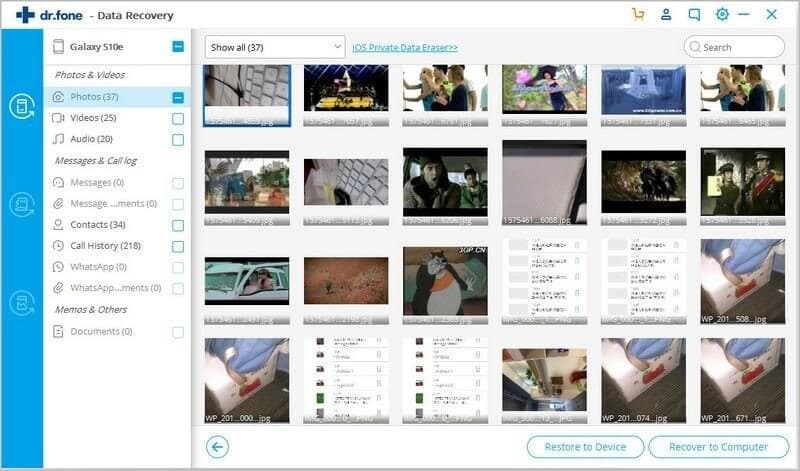
Step 3. Preview and Recover Screenshots
The program has all the options to dig deep inside your device for photos or another type of data. The option selected by you would display the results in its format, if you have ONLY selected photos, it would display all the photos on the main window.
This is a hassle free process and you don't have to check folders for relevant data type. You can now recover and select the screenshots you need. Select the screenshots you need and click on the "Recover" button.
Part 2. How to Take Screenshots on Android Effectively?
Taking a screenshot on Android could be an easy task if you're familiar with your Android. If you don't know how to do it, please follow the below steps:
- Locate the screen you want to capture on the device;
- Press the Power button and Volume down button simultaneously;
- When you hear a shutter noise on your phoen and a screenshot preview will appear on your phone.
- Check the screenshot in the gallery.

Obviously, this method are more convenient for users while you're only need to capture 1 or 2 screenshots. If you wish to capture coherent picture or take screenshots while you're playing games on Android, the above solution is not easy to handle. Then, you might need to ask help from a professional screen recorder tool, such as Android Screen Recorder.
With it, you can easily and quickly record all activities on Android without any complex operation, and you can also use it to take you needed screenshots on PC as you like. You can download this program on your computer and follow the detailed tutorial to record or take screenshots on Android easily.

Conclusion
This article mainly shows you how to efficiently recover screenshots on Android or laptop with dr.fone - Data Recovery (Android). Meanwhile, a bonus tip on easily taking screenshots on Android is also given. Hope it instrumental for you.
Elva
staff Editor