“I used Recuva to get back some lost data on my iPhone, but it was not able to read my iOS device. I tried it multiple times and on different computers, but Recuva is not compatible with iOS. Can someone please help me get my data back from iPhone 5?”
- A user question from Piriform forum
This is a recent query about Recuva iPhone application that a user has posted on the Piriform forum. While Recuva is a trusted data recovery tool, a lot of people are not able to use it on their iOS devices. This is because Recuva iOS compatibility issues are bound to happen if you are using its desktop application. Since Recuva for iPhone might not give positive results, it is better to look for some alternatives. We are here to help you recover your data from an iOS device in different foolproof ways, without using Recuva for iPhone.
Part 1: Does Recuva Recover Data from iPhone/iPad?
Unfortunately, Recuva does not support leading iPhone models as of now. The Recuva data recovery desktop application only supports some basic iPod models like iPod Nano or iPod Shuffle. Therefore, you can’t use Recuva iOS to perform data recovery on your iPhone or iPad. When you would try to search for the connected iOS device, the application won’t be able to detect it. Don’t worry – there are still some alternatives to Recuva iPhone recovery that you can try.
Part 2: Best iPhone Data Recovery Methods
Since Recuva iOS can’t help you get back your lost data from your iPhone, it is better to look for alternatives. If you have already maintained a backup of your data on iTunes or iCloud, then you can easily restore it. Though, if you haven’t maintained a backup yet, then consider using a data recovery tool for iPhone instead.
Method 1: Recover iPhone data from your iTunes backup
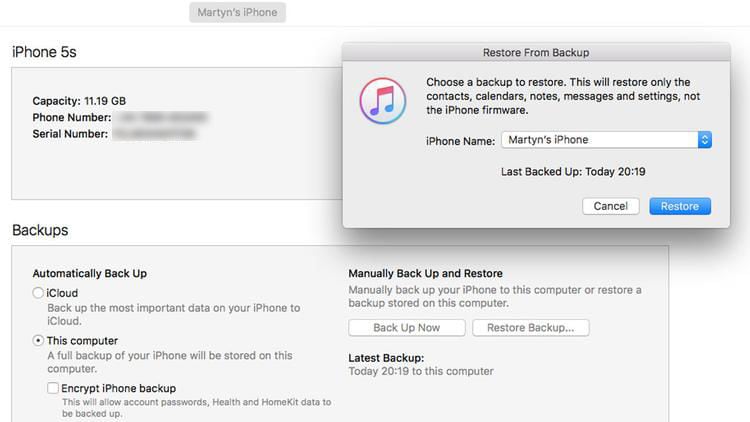
For all those users who have already taken a backup of their device on iTunes, this would be an ideal solution. You can just connect your iPhone to iTunes and restore an existing backup. Though, while doing so, the existing content on your iPhone would be erased. Here’s how you can recover iTunes backup content to iPhone quickly.
Step 1 Using a working cable, connect your iPhone to the system and launch an updated iTunes version on it.
Step 2 Click on the device icon and visit its summary to access its backup and restore options.
Step 3 From here, click on the “Restore iPhone” button and select a backup file that you wish to extract.
Step 4 Click on the “Restore” button and wait for a while as your iPhone would be restarted with the restored backup content.
Method 2: Recover iPhone data from your iCloud backup
Just like iTunes, you can also choose to recover iPhone data from an existing iCloud backup as well. Though, there are certain prerequisites that you should take care of while restoring data from an iCloud backup.
-
There should be an existing backup of your data, stored in iCloud.
-
You should know the iCloud credentials of the linked account.
-
Please note that when the iCloud backup is restored, it will erase the existing data present on your iPhone.
-
If you are already using your iPhone, then you need to reset it first. This is because we only get an option to restore iCloud backup while setting up a new device.
After carefully considering the pros and cons of this method, you can follow these steps to restore data from iCloud backup.
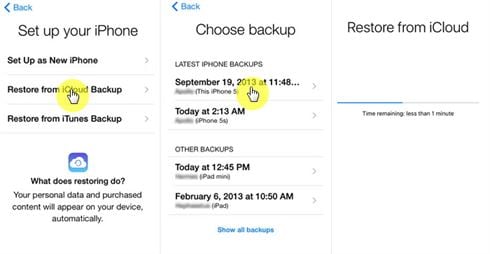
Step 1 Simply turn on your device for the first time. If you are already using it, then go to its Settings > General > Reset and erase all data and saved settings.
Step 2 While setting up your iPhone, choose to restore it from an iCloud backup.
Step 3 Log-in to your iCloud account by entering the correct credentials and select the relevant backup file from the list.
Step 4 Sit back and wait for a while as iCloud backup content would be loaded to your iOS device. Make sure that you have a stable internet connection so that the process won’t be halted in between.
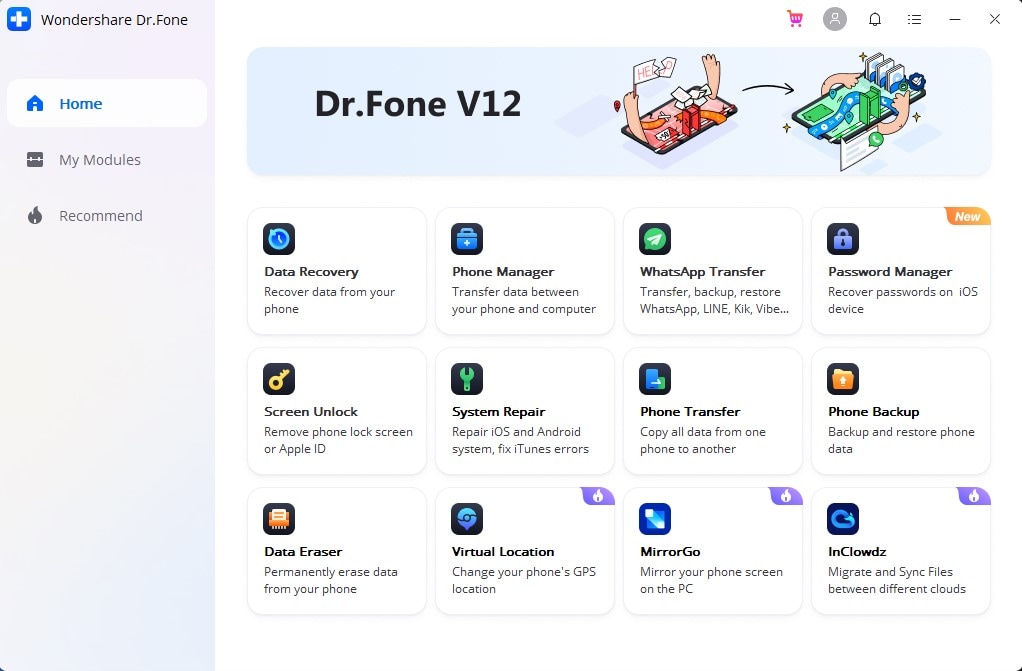
In case if you have not taken a previous backup of your data via iCloud or iTunes, then don’t worry. You can still get your lost files back from iPhone by using dr.fone – Recover (iOS). One of the most successful data recovery tools for iPhone, it can extract all types of data files in seconds. It doesn’t matter what could have caused the loss of data on your iPhone or what kind of content is deleted, you will get positive results with this remarkable tool. The free version of this Recuva iPhone alternative is available on its website that you can download without spending anything.
-
The application is extremely easy to use and it lets anyone perform data recovery on iPhone by following a stepwise process.
-
It can help you get back your photos, videos, contacts, messages, notes, call logs, and so much more.
-
The recovery tool supports every possible data loss condition like corrupt storage, accidental deletion, malware attack, etc.
-
dr.fone – Recover (iOS) is fully compatible with every leading iPhone model like iPhone 6, 7, 8, X, XS, XS Max, XR, etc. There is no need to jailbreak your device to use it as well.
-
Users can first preview the recovered data on its interface and selectively restore the files of their choice.
Before you proceed, just make sure you have dr.fone – Recover (iOS) installed on your Mac or Windows. You can buy its subscription or get its free trial version as well. To use this Recuva iOS alternative, you can follow these three basic steps:
Step 1 Connect your iPhone
Firstly, take a working cable and connect your iOS device to the system. If you are connecting it for the first time, then you need to trust the computer. Also, consider updating (and installing) iTunes on the system for seamless connectivity. Once your phone is connected, launch the dr.fone and go to the “Recover” module.
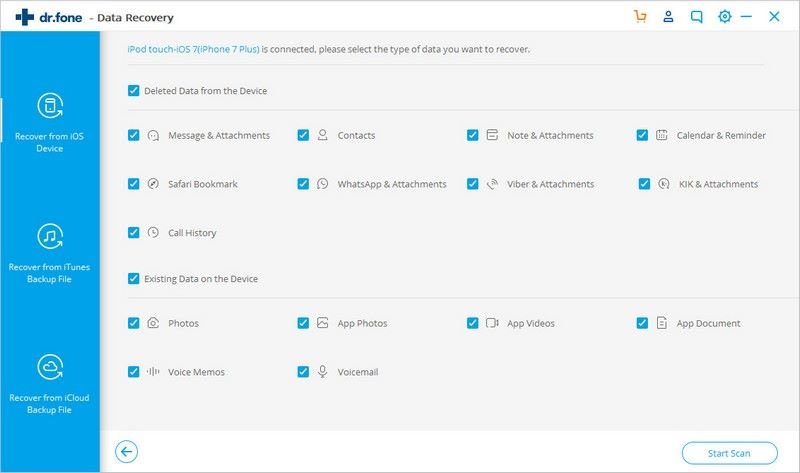
Step 2 Select the data type to recover
Go to the “Recover from iOS Device” section from the left and select the data types you wish to scan. You can look for either the deleted content or scan the entire device storage.
Step 3 Restore your data
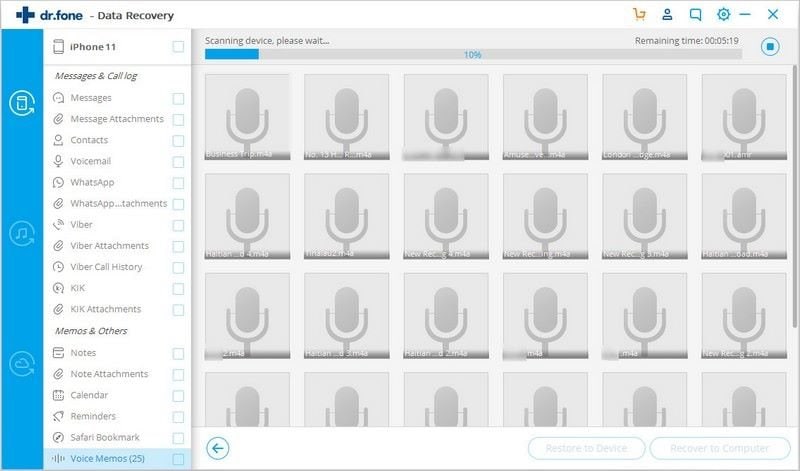
Once you start the scan, the application will try to retrieve all kinds of files from your iPhone. Although you can pause the scan, we do not recommend closing the application in between or removing your iPhone.
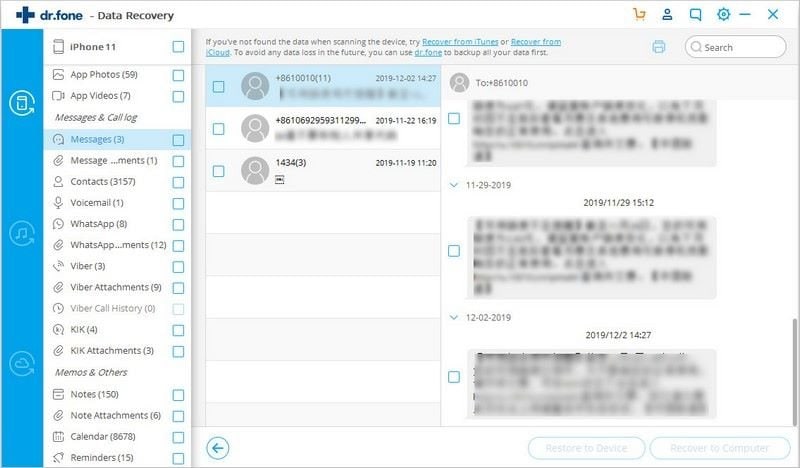
After the scan is finished, the results will be displayed under different categories. Now, you can just preview the extracted files on the right and pick the data you wish to get back. In the end, you can restore the data to your computer or directly to your iPhone. We recommend saving it to your system’s local storage before so that you can maintain its backup at the same time.
That’s it, folks! After reading this guide, you would be able to know more about Recuva iPhone recovery. Since Recuva does not support iOS devices as of now, it is better to consider an alternative. From all the provided options, dr.fone – Recover (iOS) is one of the best solutions to recover data from an iPhone. It is compatible with every leading iPhone model and features an intuitive interface. Also, it runs a highly sophisticated recovery algorithm, so that you can retrieve all kinds of lost or deleted content under every possible scenario.
Powerful Mac Data Recovery Software
-
It is compatible with both Windows and Mac operating system.
-
It supports a large number of storage device type including hard drives, USB flash drives, SD cards, etc.
-
All major types of files can be recovered including music, images, video, documents, emails, and archives.
-
It has a deep scan features for in-depth scanning of the hard drive for searching files to recover.

3,165,271 people have downloaded it



Elva
staff Editor