PC Inspector File Recovery is a data recovery program that reconstructs and thereby recovers accidentally deleted data. In this day and age where data recovery is practically a necessity, having access to data recovery tools such as PC Inspector File Recovery is a good idea. This software and others of its kind make it easy for users to easily restore files to their original state. If you are prone to data loss, this article will not only show you how you can use PC Inspector File Recovery to get you lost data back but also provide you with a much more efficient alternative.
Part 1: The Best PC Inspector File Recovery for Windows and Mac Alternative Software
PC Inspector File Recovery may be a good program but there is a software recovery tool that promises even better performance and quality while at the same time making the recovery process as simple as can be. This program is iSkysoft Data Recovery for Windows (or iSkysoft Data Recovery for Mac).
Key Features of Recoverit (IS):
-
It offers four different recovery modes depending on the type of data and the circumstances leading to the data loss.
-
The program scans the device and displays a preview of the files to be recovered. It can be used to recover all types of data including photos, documents and emails.
-
It comes with a powerful and easy to use interface.
-
Scanning is quick and easy. You can also pause the scanning process at any time if you happen to see the files you are looking for while scanning.

3,165,867 people have downloaded it
Step-by-Step Guide to Recover Lost Files
Step 1 Download Recoverit (IS)
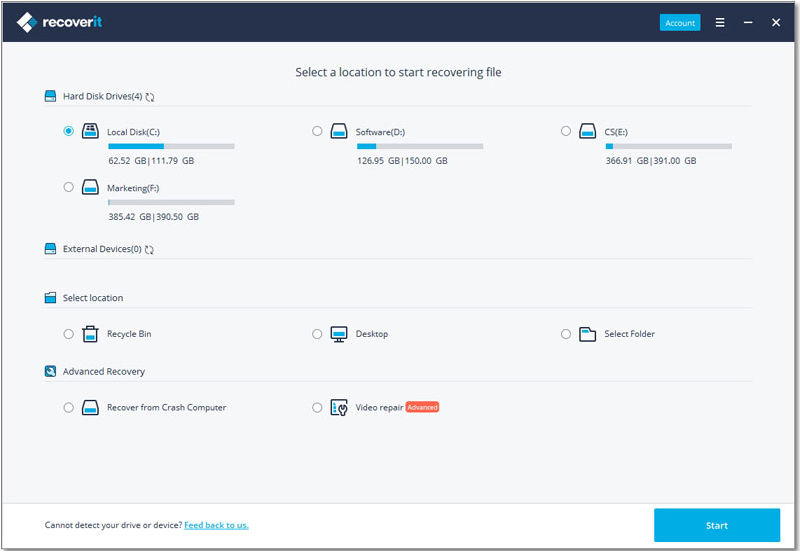
Download and install Recoverit (IS) to your computer. Run the program and for the primary window, select "Lost File Recovery". You Should see the following window.
Step 2 Scan the Drive
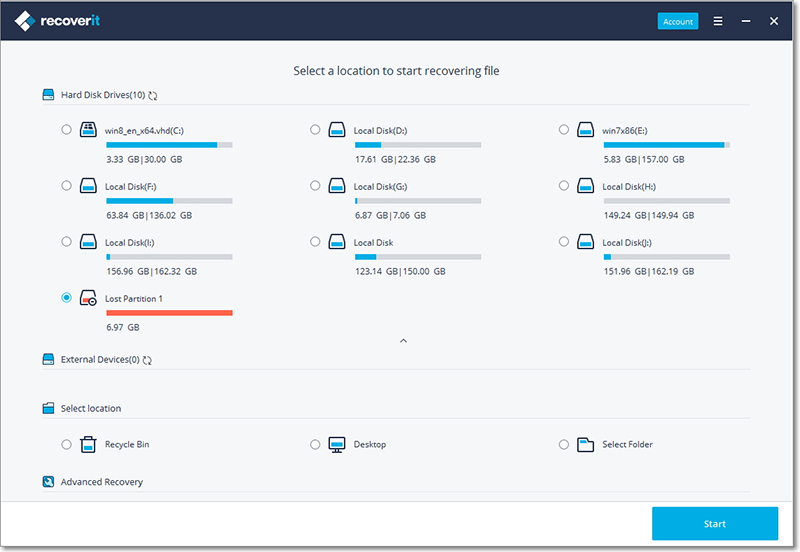
Select the drive that contains the data you would like to recover and then click on "Start" to begin the scanning process.
Step 3 Start to Recover Lost File
Once the scanning process is complete, all of the contents of the selected drive will be displayed. You can preview the files and then select the files you would like to recover. Click on "Recover" to save the files to a different location. It is recommended that you select a different drive, an external storage device is highly recommended.
Part 2: How Does PC Inspector File Recovery Work
As we've mentioned before, PC Inspector File Recovery is a highly reliable, highly effective data recovery software. To demonstrate its strengths and weaknesses, let's take a look of how the software can be used to recover lost data from any of your devices.
Step-by-Step Guide to Recover Lost Files Using PC Inspector
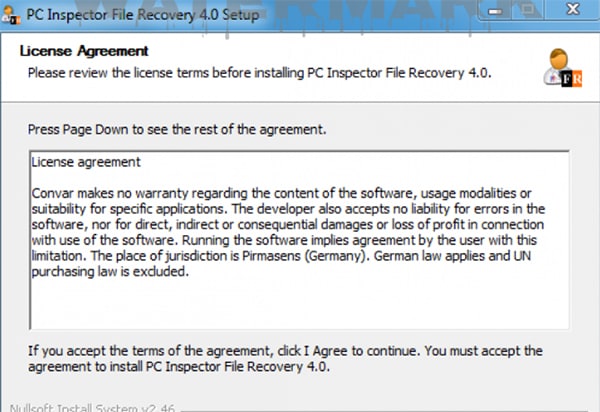
Step 1 Begin by downloading PC Inspector File Recovery and install it. It is important that you install the program on another disk other that the one you want to recover files from. Doing this will reduce the risk of overwriting or damaging the deleted or damaged files.
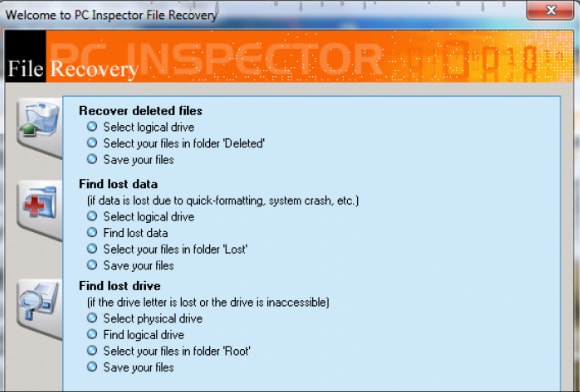
Step 2 Run PC Inspector and you should see a number of options. These options are divided into 3 categories: recover deleted files, find lost data and find lost drive. Choose "Find lost Data" if you lost your data due to a quick formatting or a system or drive crash. You should choose "Find lost Drive" if the entire drive is inaccessible for some reason, maybe due to a damaged partition. Click on the icon next to the category you want to select.
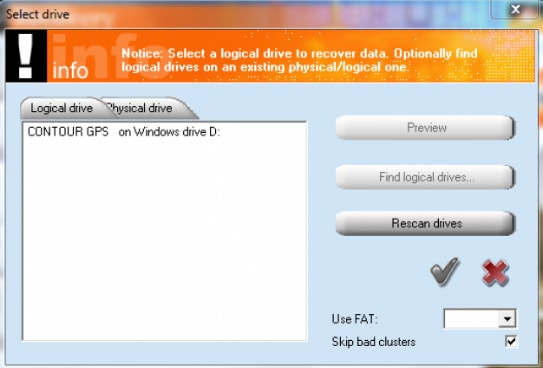
Step 3 For the purpose of this tutorial we are using the recover deleted files option to recover deleted files from an SD card. Once you have selected the option, the program will scan all of the drives that are attached to the computer and show you a list of those available (those you can recover files from). Choose the appropriate drive from the list to begin.
Step 4 You can check whether you selected the correct drive by clicking on the "Preview" button. This will show you all of the contents of the drive's root directory. This way you can make sure that it contains the folders toy expect. You can't however, browse through the contents of a folder.
Once you are sure you have selected the correct folder, click on the "Green Tick" and the program will scan it for deleted files. This process could take a few seconds or a few minutes depending on the size of the drive.
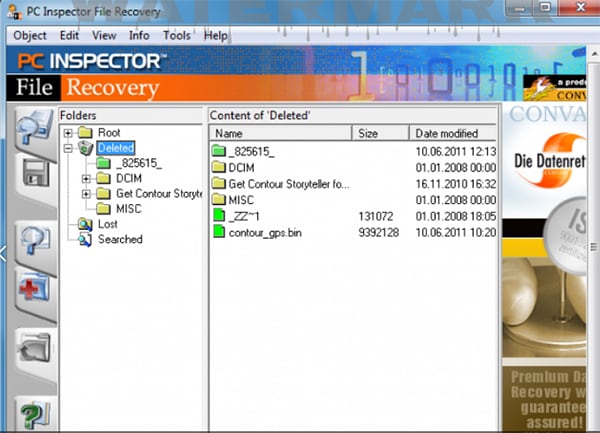
Step 5 On the left side, you will see a number of folders. Because we want to recover photos, we have selected the DCIM folder. Since the files have not been overwritten, they appear with their original file names and a green mark that indicates they can be recovered. If the files had been overwritten or the drive had been highly fragmented, the filenames would have had red and yellow symbols, indicating that they are not recoverable.
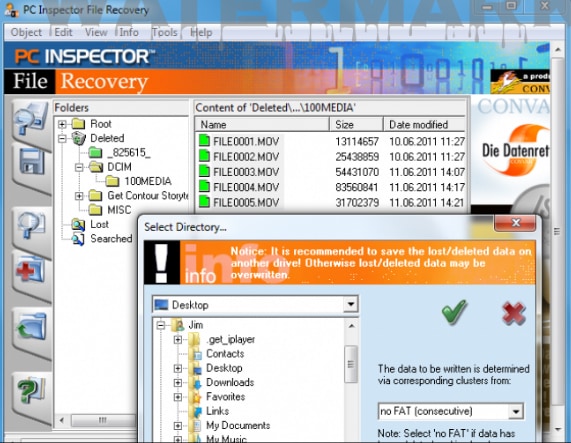
Select the files you would like to recover, right click and choose "Save to…" A new window will open where you can choose the destination folder for the recovered files. Click on the "Green Tick" to recover the files.
The recovery process may take a few minutes after which you should have all of the recovered files saved in the selected folder. While PC Inspector may be effective, there are a few shortcomings of using this recovery program. Some of them include:
-
You have to install the program on a different drive to prevent overwriting the deleted data. This makes the program itself a danger to your data.
-
As the tutorial above clearly shows, using this program is not very easy. It is not easy to figure out if you’ve never used it before.
-
There are some files that may be unrecoverable



Elva
staff Editor