Free File Recovery
- Recover Files Free+
- Top Free File Recovery List+
-
- 7 Data Recovery Crack and Serial Keys
- Top 10 Free Data Recovery Software [2020]
- Best Free Partition Recovery Software 2020
- Top 5 Free SD Card Recovery Software 2020
- Top 5 Free Hard Disk Recovery Software
- Top 5 Alternatives to iCare Data Recovery for Windows
- 5 Best Image Recovery Software
- Top 5 Best Media Recovery Free Download Software
- The Best Easy Data Recovery Software
- Top 10 Free Data Recovery Software 2021
- Top 10 Data Recovery Software for PC
- Top 10 Free USB Recovery Softwares Review [2020]
- Top 8 Free Windows 10 Recovery Tool Reviews [2020]
- Top 5 Advanced Disk Recovery Alternatives
- Best Diskdigger Video Recovery Solutions
- Free File Recovery Reviews+
-
- Active File Recovery Review With Pros & Cons
- Easy Recovery Free Review
- iCare Data Recovery Review
- iCare Data Recovery for Mac Review
- Mac Free Any Data Recovery Review
- Kroll Ontrack Data Recovery Review
- PC Inspector File Recovery Alternative
- Recover My Files Review
- Wise Data Recovery Software Review
- FreeUndelete Review
- Gihosoft Free Android Recovery Review

• Filed to: Free File Recovery • Proven solutions
Have you recently lost some of your important photos and can’t seem to get them back?
If your answer is “yes”, then this Recuva photo recovery tutorial would certainly be the last post that you will read. From accidental deletion to corrupt storage and malware attack to a formatted drive – there could be all kinds of reasons for losing our photos. Thankfully, with the use of a right data recovery tool (like Recuva image recovery), you can easily get your lost data back. In this post, we will explore the working of Recuva photo recovery tool and also discuss its shortcomings and alternatives too.
Part 1: How to Recover Deleted Photos using Recuva?
Recuva by CCleaner is a popular data recovery tool that works on every major Windows version. While the Recuva photo recovery app is not yet available for Mac, Windows users can just download it for free from its website. Although, after doing the Recuva photo recovery software free download, you might not be able to meet your requirements. This is because most of the advanced features of the tool are only available for its premium version.
- Recuva supports the recovery of every popular photo format.
- Apart from photos, you can extract your videos, documents, and other important files.
- The recovery application will display the health of the extracted data and will let you preview your photos as well.
- Users are allowed to save the photos to any location of their choice.
- Recuva image recovery lets us scan the internal drive or any other connected source.
If you want to use Recuva photo recovery and get back your lost images, then follow these steps:
Step 1 Pick a data type and location to scan
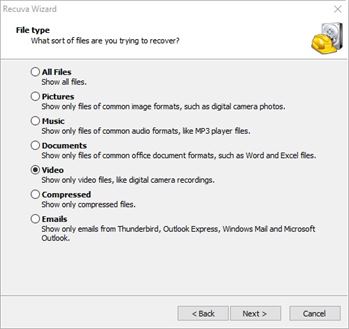
Firstly, you need to install and run Recuva photo recovery on your system and pick the kind of data you wish to scan. For instance, in this case, it will be “Pictures”.
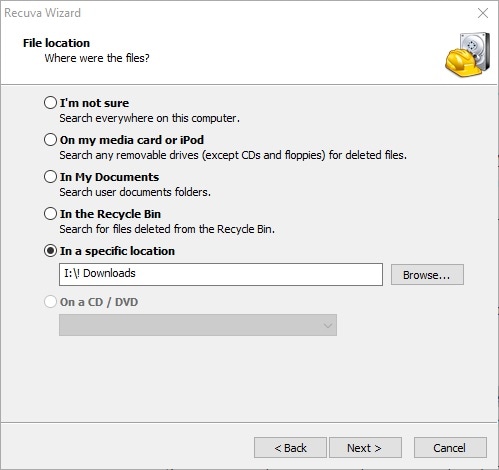
As you would proceed with the wizard, you will be asked to select a location to scan as well. You can choose a specific location from the list or browse to the folder from where you have lost your files.
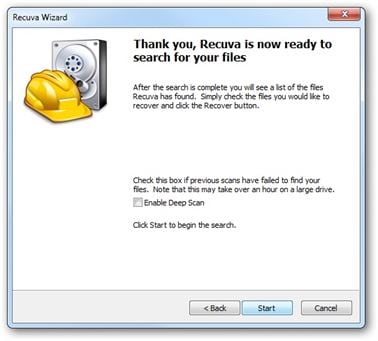
After selecting everything, you will get the following prompt. If you want, you can enable the “Deep Scan” option from here. This will perform a more extensive and time-consuming scan on the system.
Step 2 Look for your lost photos
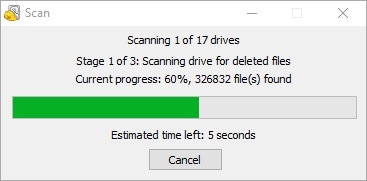
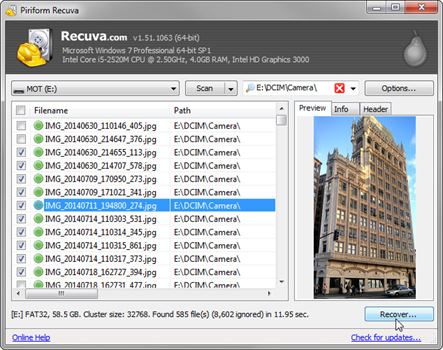
When you click on the “Start” button, Recuva image recovery will perform a thorough scan of the specific location. Simply sit back and wait for a while for the Recuva photo recovery process to end.
The extracted data will be displayed under different categories according to its health. Data in red is not in good condition and might not be extracted entirely. On the other hand, files marked in green can easily be restored while yellow-marked files are in the intermediate state.

Step 3 Restore your photos
In the end, you can preview your images on the interface of Recuva photo recovery. Select the files you wish to get back and click on the “Recover” button.
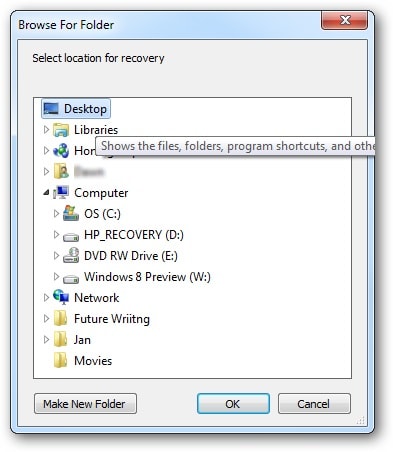
This will open a browser window so that you can select a location where you wish to save your photos.
Part 2: General limitations of Recuva Photo Recovery
Even though Recuva photo recovery is an extremely popular tool, it has numerous pitfalls. Here are some of the common limitations of Recuva image recovery that you might also encounter.
- The tool is not always successful in retrieving files of a prominent size. For instance, if your file is of a few megabytes, then you might not get it back entirely.
- Even after retrieving a photo or video, chances are that you might not be able to view or play it.
- Most of the high-end features of Recuva photo recovery are only available for its premium version.
- It provides limited support for RAW, CRW, or PSD file recovery.
- As of now, Recuva for Mac is not available and only Windows users can take its assistance.
Part 3: Better Photo Recovery Software than Recuva: Recoverit (IS)
Since Recuva photo recovery has low data retrieval rate and no availability for Mac, users often look for its alternative. We recommend trying Recoverit (IS), which is one of the most advanced data recovery tools out there. The application supports more than a thousand different kinds of data types, so that you can get back every category of content. It is known for its high data recovery rate and even offers a free version as well. No matter what the situation is, you can get back your lost photos using this professional recovery tool.

Recoverit (IS)
A Life Saver to Solve Your Data Loss Problems!
- It features an extremely friendly user interface that does not require any prior technical knowledge.
- You can get back all kinds of photos like JPG, PNG, BMP, GIF, TIFF, PSD, RAW, CRW, and so much more.
- Not just photos, it can also help you recover your videos, audios, documents, and compressed files as well.
- The application supports different recovery scans – quick and deep, that you can pick as per your needs.
- It is known to yield high data recovery results in all kinds of scenarios like malware attack, accidental data deletion, lost partition, formatted disk, and so on.
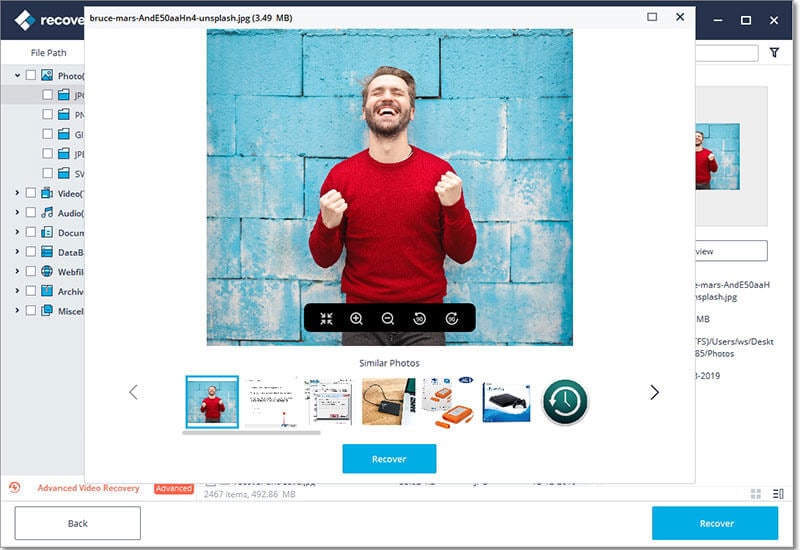
- You can preview your photos extracted by Recoverit (IS) and restore them to a safe location selectively
To learn how to get back your lost photos using Recoverit (IS), the following steps can be taken.
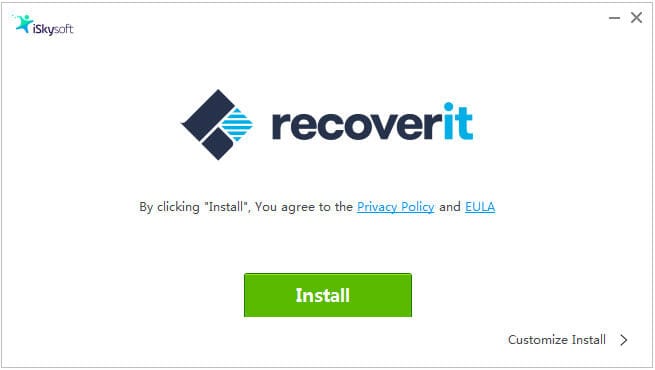
Step 1 Download and install
Download, install and launch the Recoverit (IS) application on your computer.
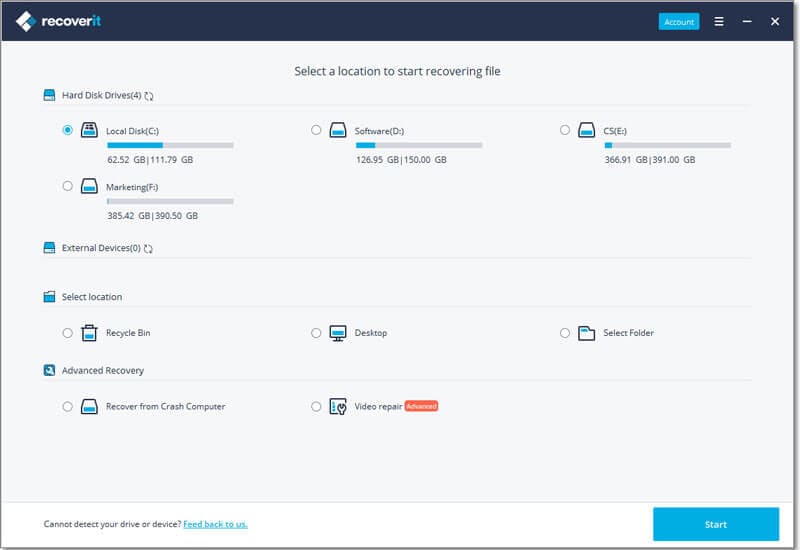
Step 2 Choose a location to scan
Furthermore, you need to select where you wish to recover data from your system or an external device. Mark the location of your choice and start the recovery process.
Step 3 Recover your lost photos
Since the data recovery process might take a while, you can just hold on and let the process be completed.
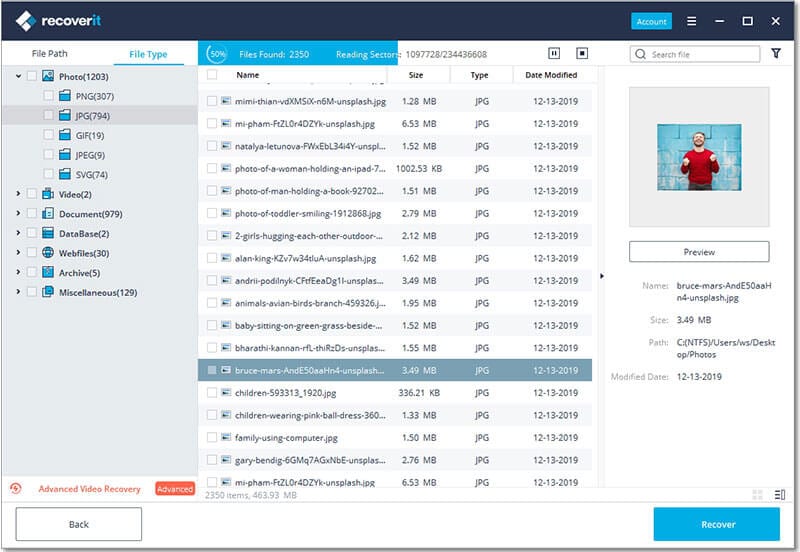
In the end, the application will display the extracted photos in different categories. You can easily preview your photos here and select the ones you wish to save. Click on the “Recover” button after making the appropriate selections and save your photos to a secure location.
That’s it! By taking the assistance of Recoverit (IS), you can easily get back your lost or inaccessible photos. It offers a wide range of features that will overcome the limitations of Recuva photo recovery. Apart from a quick scan, you can also do an all-around recovery (deep scan) of the source. This will let you get back all kinds of photos and other data files for sure. Go ahead and give this freely available Windows and Mac data recovery tool a try and recover your lost photos in minutes.
Elva
staff Editor