Recycle Bin / Trash Recovery
- Recycle Bin Recovery+
-
- A Full Guide on Recycle Bin Management and Recovery in Windows
- Every Recycle Bin Windows 10 Solution You Need
- Recycle Bin Windows 7 Solutions
- How to Fix Corrupted Recycle Bin in Windows and Restore Lost Data
- How to Find the Recycle Bin Location of Your Desktop
- Full Guide on Removing/Restoring Recycle Bin on PC
- Top Ways to Recycle Bin Data Recovery
- Where is Recycle Bin - How to Locate Recycle Bin on Windows
- How to Recover Deleted Files from Recycle Bin
- Easiest Way to Restore Deleted Files from Recycle Bin
- All You Need to Know About Hidden Recycle Bin
- Mac Trash Recovery+
-
- How to Securely Empty the Trash On Your Mac
- Tried-and-True Solution: How to Force Empty Trash Mac
- How to Restore Deleted Files from Trash on Mac
- 3 Easy Ways to Empty Trash in Gmail
- Easy Ways to Recover Emails Deleted from Trash
- How to Recover Deleted Mail from Trash on Mac
- Empty Trash From Your Mac and iPhone Easily and Securely
- Your Full Guide for Anything Related to Mac Trash
- How Find Recycle Bin and Restore Deleted Files on Android
- How to Empty Trash on iPhone/iPad/iPod (iOS 12 Supported)
- How to Empty Google Drive Trash and Undo Empty Trash
- How to Delete Trash on Mac Securely and Permanently
- Try These Multiple Methods to Recover Deleted Trash on Mac
- 3 Ways to Empty Trash on Mac Completely
- How to Undo Empty Trash Mac
- Recover Emptied Trash on macOS Mojave

• Filed to: Recycle Bin Recovery • Proven solutions
To download more stuff you need to have a free space on your device and that free space is created with a timely service of your trash bin. However, iPhone/iPod/iPad doesn’t have a trash can in specific. You can get your photos, app, videos and documents deleted but there is no trash can for that. This guide is particularly written with deep thorough research and guides to accompany you at the time of troubleshooting for the storage of your device.
Let’s dive into the space and get it cleared with the best possible ways we have here.
- Part 1. Where Is Trash on iPhone?
- Part 2. Why Do We Need to Empty Trash on iPhone?
- Part 3. How to Empty Trash on iPhone?
- Part 4. The Best Solution to Empty Trash on Your iPhone Permanently
- Part 5. How to Restore Deleted or Lost Files from “Trash” on Your iPhone?
- Part 6. Step by Step Guide to Recover Your Lost Data on iPhone Device
Part 1. Where Is Trash on iPhone?
iPhone don’t have any trash can particularly however there is a recently deleted tab that keeps all the deletion record of photos and videos. It don’t have a specific folder where all the deleted items are sent but with every app that has something disposable is given with a trash option to delete extra items.
In these deleted items, you can keep the data safe for 30 days but if you didn’t restore it before that it would permanently delete the files that you kept safely.
Part 2. Why Do We Need to Empty Trash on iPhone?
When you are installing a new app or downloading large videos what you need the most is a free space on your iPhone that you can utilize and install those apps.
To keep a better optimization of your storage we should empty trash sometimes. However, there is a humble tip from our side that says to keep a backup of your data before you trash them.
Part 3. How to Empty Trash on iPhone?
As iPhone doesn’t have any trash app particularly it has trash bin menu inbuilt with the primary apps to get the data trashed when not in use. Following these guides you can easily deal with the trash items on your different iPhone apps.
Option 1. How to empty trash on the photo app
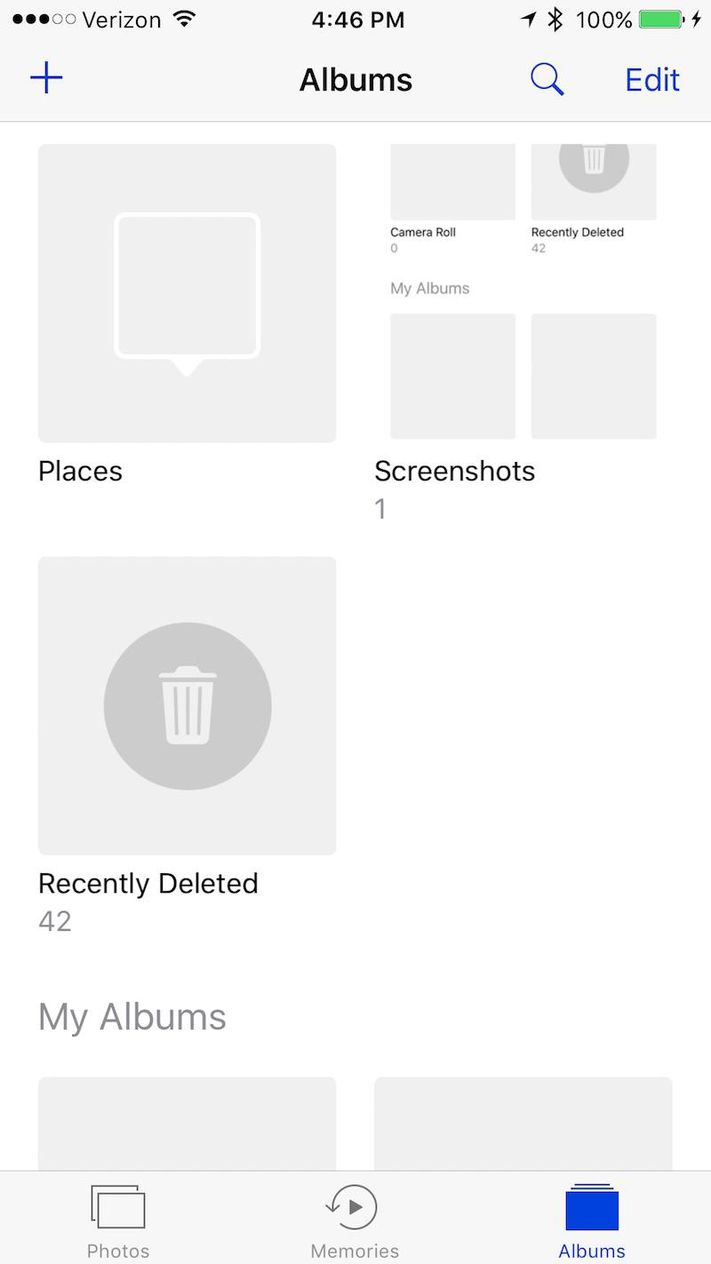
- On your photos app select the photos you want to delete or you can use the multiselect option to take more than one photo at a time.
- Now, click on the “Trash” icon on your phone to get them deleted.
- These photos will be found in the “Recent Deleted” folder in album. Open the folder, click “Edit” on the top right of your iPhone.
- You can now click “Delete All” or only select the items you need to get them permanently removed from your iPhone.
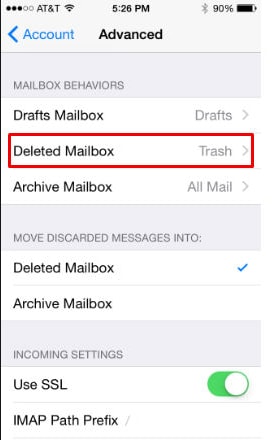
Option 2. How to empty trash on mail app
- Open the Mail application on the main menu.
- Choose the email account you want to empty the trash for. In case of multiple email accounts you need to follow the same process as this.
- Now, tap on the Trash icon and click on the Edit button on the top right corner of your phone screen.
- You will now get an option saying Delete All , confirm that option by clicking on it and delete all emails in the trash folder permanently.
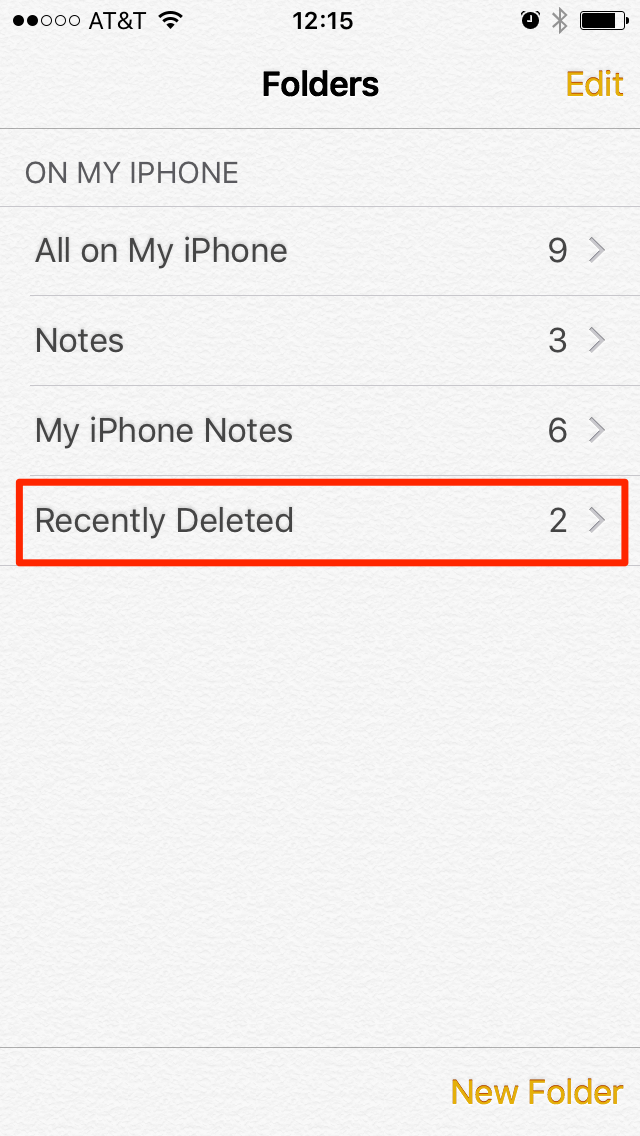
Option 3. How to empty trash on notes app
- Go to the Notes app on your iPhone.
- Now, tap on Edit option on the top right corner of your screen.
- Select Delete All located in the bottom right corner of your screen.
Part 4. The Best Solution to Empty Trash on Your iPhone Permanently
dr.fone - Data Eraser (iOS) is the best tool that you can use to empty the trash bin on your iPhone permanently without going to different apps and doing it manually. It gives you an easy and simple interface to clean and speed up your iPhone device in just few clicks.
- It cleans all the stubborn junk data on your iPhone.
- Clears the history and cache generated timely.
- Get your iPhone full of space for new apps and data.
- You will get a wonderful speed on your iPhone.
- It would compress your photos mildly without losing the quality to free up space.
- Easy and simple interface that requires no technical knowledge.
Part 5. How to Restore Deleted or Lost Files from “Trash” on Your iPhone?
Recovering accidently deleted data from Trash is a hectic task to do. Isn’t it?
But as we always say, there is always a solution to your technical difficulties and iSkysoft is dedicated to do that for you. iSkysoft iPhone Data Recovery toolbox is the most efficient and reliable tool that you can use to recover deleted data from trash folder.
In this ultimate guide we are going to make you literate about the best options that you can follow to recover any kind of data on your iOS device.

dr.fone - Data Recovery (iOS)
Why iskysoft is the best tool to choose?
- It provides data recovery options in various scenarios than any other recovery software. iSkysoft always protects your privacy so you don’t have to think twice before running this program for any data leaks.
- It can recover all your data including Call, SMS, audio, videos, documents, emails, whatsapp chats and much more.
- This software supports all the iPhones starting from iPhone-4 to till date, iPad pro, iPad mini, iPad Air and iPod touch 4 and 5.
Part 6. Step by Step Guide to Recover Your Lost Data on iPhone Device
Step 1 Plug in your iOS device to the computer.
Install iSkysoft iOS data recovery toolbox on your computer and use a USB cable to connect your iOS device to it. To make sure you are going good, you must click on Trust this computer pop up on your iOS device. Once you have made a successful connection, you may click on Recover on the main screen of your software. This would take you to the iOS device recovery tab by default.

Note: In order to get your device successfully connected, you need to download and install the latest version of iTunes.
Step 2 Scan your iOS device for lost data.
Now, in this tab you have got two options which says Deleted Data from the Device and Existing Data on the Device. It depends on you that what kind of data you want to recover and choose accordingly. You can check the file types you want to scan for in both the options as per your needs.
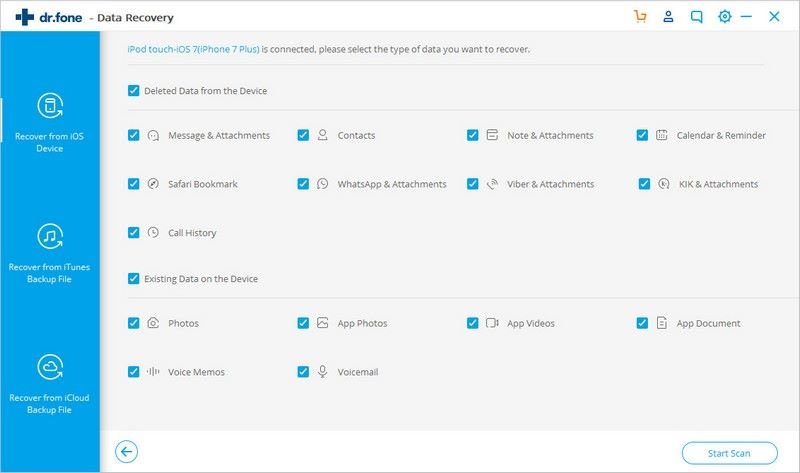
Once you are done selecting what kind of lost files you want to scan for you need to click on the Start Scan option in the bottom right corner of your screen to start the scanning process. Please note that it might take some time depending on the size of data you have selected on your device. If in case, you find the data you were looking for during the scan you can Pause the scan and stop the process.
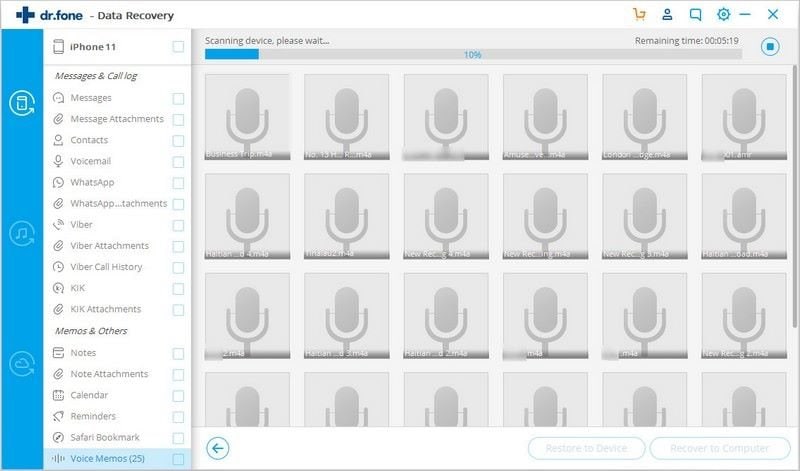
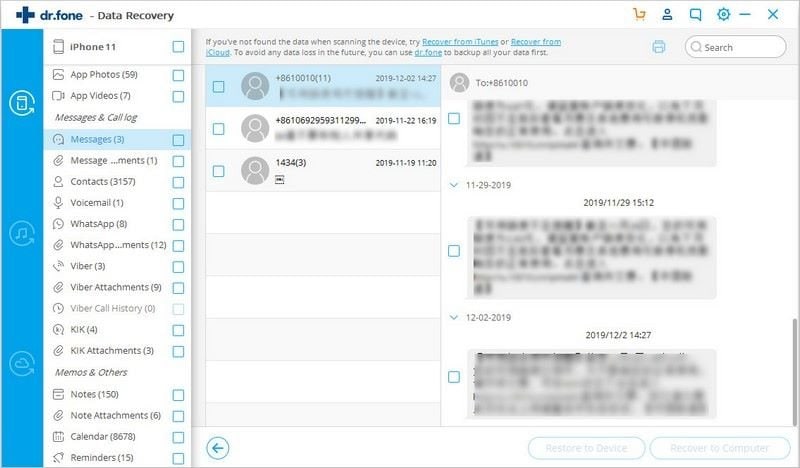
Step 3 Now you can preview your data after scanning.
Once the scanning is done, you will get the results displayed on your screen and then you can choose what kind of file you want to preview on your left side panel. If you have a lot of files that you are looking for then better use search option to type and get your data file easily.

Note: If you have scanned for both existing and deleted data then you can refine the scan results with the filter option to only show the existing or the deleted one.
Step 4 Recover your iOS data to your computer.
Until now, you have got your data and you are looking forward to save it on your computer as everything needs to be in position. Now, you need to checkbox all the files you want to recover and click on Recover to Computer option located at the bottom of your screen. Final step to go now, choose a safe and virus free folder to save the recovered files there.

The last and very important point that is left here is that, if you have recovered iMessages, texts, notes and contacts then you need to select the option Export to Computer and Restore to Device. You must remember to keep your device plugged in to the computer until the process is completed. It must be remembered because it’s a two stage process.
Conclusion
In this guide we have explained it all and you are now equipped with a great knowledge about your iOS device. Data deletion and restoring it back are two aspects that are vice-versa. This guide shows you that if you would do all the things particularly by going app to app then there is a possibility that you might erase the data you need and recover the data you don’t need.
We have explained all the steps that you can perform on your device and then a reliable and simple solution that you can choose to do all the things at once without any mistake. So what are you thinking? It’s time to pass the message on to your loved ones and family who are facing the same situations as you before you found this ultimate guide.
Elva
staff Editor