
• Filed to: iPhone Recovery • Proven solutions
Is it possible to extract voicemail from my iPhone iTunes backup?
Yes, it is possible to export your voicemail messages from iPhone to computer using suitable applications such as dr.fone. This is a great tool for securely saving your voicemails to your computer, using its powerful features. Whether you want to extract voicemail from iTunes, iCloud or directly from your iPhone, this tool gives you the flexibility to do so using some simple steps as laid out in this article.
Voicemails from your iPhone device or your iTunes and iCloud accounts can be extracted using the this smart dr.fone - iOS Data Recovery tool. This is an application that helps in the extraction of data from any of these three sources. It has features that help you do so in an easy, stress-free manner. You can extract them in formats that can be listened to on a number of players.
Why Choose This Software to Extract Voicemails from iPhone:
- Multiple extraction methods: dr.fone iPhone Voicemail Extractor helps you to recover voicemails from iTunes, iCloud and directly from your iPhone device.
- Variety of audio formats: Whether you want the voicemails extracted in MP3 or WAV format, you can do so easily with this tool.
- Compatibility across all iOS devices: You can extract voicemails from iPhone backup files to your iPod, iPad or MAC. Basically, as long as you have a device that runs on iOS, you can use dr.fone iPhone Voicemail Extractor to extract voicemails.
- Multiple File Tipes: Apart from voicemail, this software can also help you export contacts, text messages, photos, videos, notes, calendars, etc.
Method 1. How to Directly Extract/Export Voicemails from iPhone
Directly extracting voicemails from iPhone devices is a breeze when you use the dr.fone iPhone Voicemail Extractor tool. Please note that in the following process, it not only scan and display the voicemails on your iPhone, but also the ones that you have deleted. But you have the choice to only export the wanted voicemail to your computer.
Step-by-Step Guide to Extract Voicemails from iPhone
Step 1. Select Recovery Mode
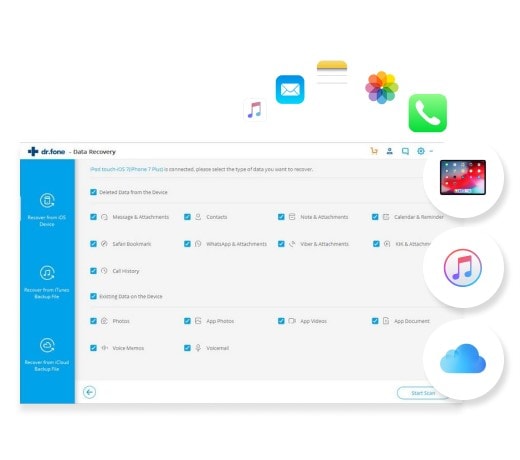
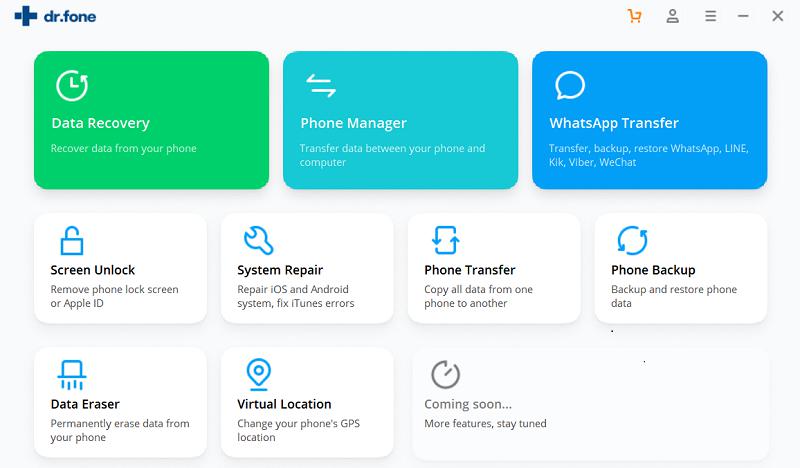
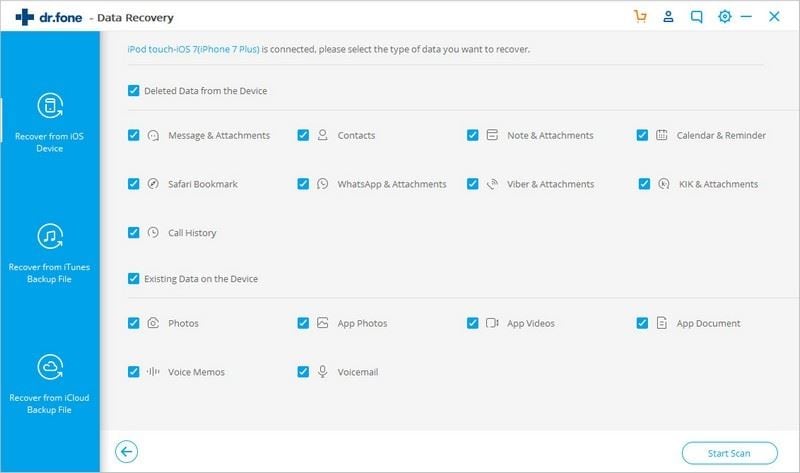
After downloading the dr.fone iPhone Voicemail Extractor from the "Free Download" in this page, install it and then run the program. Using a USB cable, connect your iPhone to the PC/MAC. You will then have several options to select from, on the msin screen; select "Data Recovery" menu, then you will directly navigate to "Recover from iOS Device" mode.
Step 2. Scan Your iPhone Voicemail
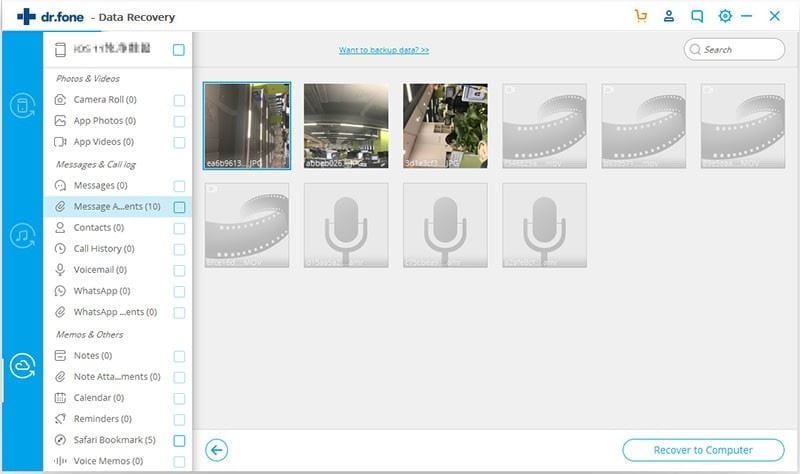
On the screen, select the type of files you want to export, and click on the "Start Scan" button. Here you can simply uncheck all of them, but select "Voicemail" option. dr.fone iPhone Voicemail Extractor will go through the voicemail on your iPhone device allowing you to preview them.
Step 3. Extract iPhone Voicemail as Needed
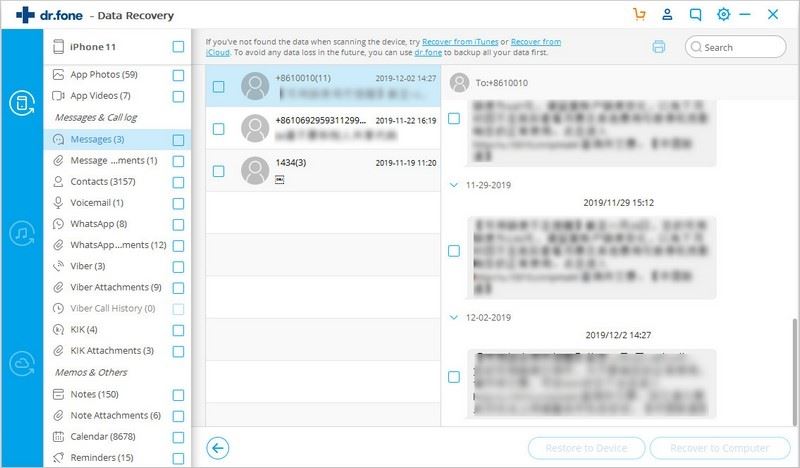
You will then be presented with a preview of the Voicemails stored on your iPhone and you can listen to them right from the computer to decide which ones you want to extract. After making your selection, extract voicemails from iPhone by clicking on the "Recover to Computer" button.
Method 2. How to Extract Voicemails from iTunes Backup
The Voicemails stored in your iTunes account cannot be directly extracted to your PC/Mac unless you use dr.fone iPhone Voicemail Extractor in the following manner:
Step 1. Open the Software
Download and install dr.fone on your computer and then launch it. On the "Data Recovery" menu screen, select "Recover From iTunes backup file" mode. There will be a list of all the backup files that you have stored in your account; click on the latest backup file and then click the "Start Scan" button. Wait until the scanning is completed.
Step 2. Extract iPhone Voicemails from iTunes Backup
When it finished the scanning process, you can preview the voicemails in your iTunes backup file. You can then play each of the voicemails so you can select those that you want to extract. Click on the "Export" button to extract voicemails from your iPhone backup file from iTunes.

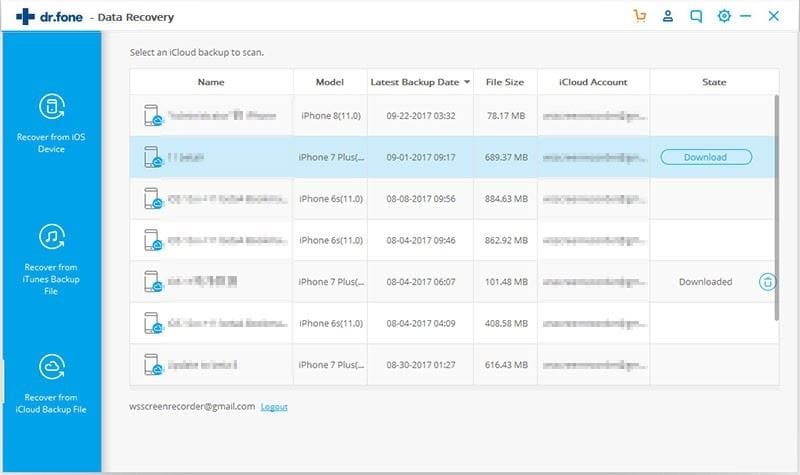
Method 3. How to Extract Voicemails from iCloud Backup
Extracting iPhone Voicemails from your iCloud account is just as easy. Follow the laid down steps to do so:
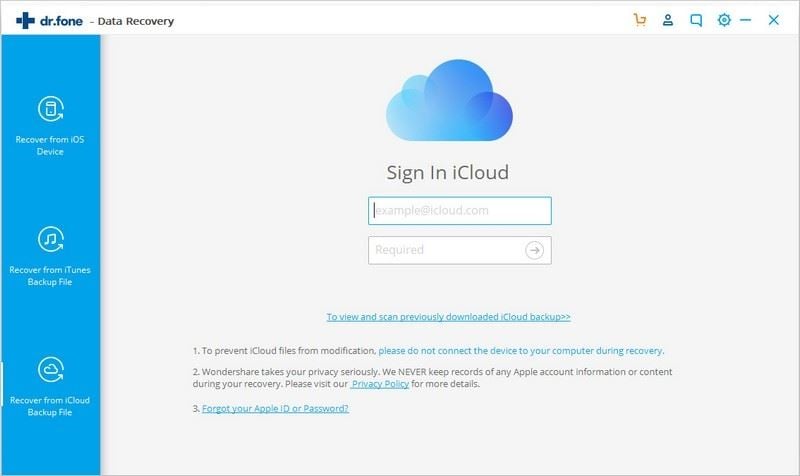
Step 1. Log into Your iCloud Account
Launch dr.fone iPhone Voicemail Extractor and after you click "Data Recovery" menu, select "Recover From iCloud backup file" mode. On the iCloud login page, use your ID and password to access the contents of your account.
Step 2. Download iPhone Data on iCloud
After selecting your desired iCloud backup file, click on the "Download" button to send all voicemails to your PC/MAC. This can take a while depending on the number and size of the voicemails. You need to choose the target file types when the download of your backup file is complete. Click on the "Next" button so that the software can scan the content of your backup file.

Step 3: Extract iPhone Voicemails from iCloud Backup
In the preview window, uncheck all displayed categories and only leave the Voicemail item in the Message & Call Log category. Play the voicemail messages so you can select those that you want to extract to your PC/MAC. After making your selection, click on the "Recover" button to complete the process.
Voicemails are a great way of getting communications from important contacts when you are out of range, or your iPhone is switched off. Storing them on your computer, iTunes or iCloud is a great way of keeping them for future reference. With dr.fone - iOS Data Recovery, you have a surefire way of extracting voicemails from iPhone device or Internet backup accounts.
Elva
staff Editor