How to Recover Data from Trash on Mac
Recoverit (IS) has the ability to crawl through any location on your Mac and get lost data. These locations include the hard drive, sectors, partitions, external storage devices and even the Trash.
When you clean out the Trash on your Mac, the files are not immediately removed. They are physically available, but you cannot view or use these files. A Deep Scan will immediately retrieve the lost data. When you perform a Deep Scan, it is quite involving and can take a long while to be completed. In order to save time, you can start off by using the Quick Scan mode, and if you do not get the file that you want, you can now use the Deep Scan mode.
Here are the steps to follow to scan your Trash for lost data:
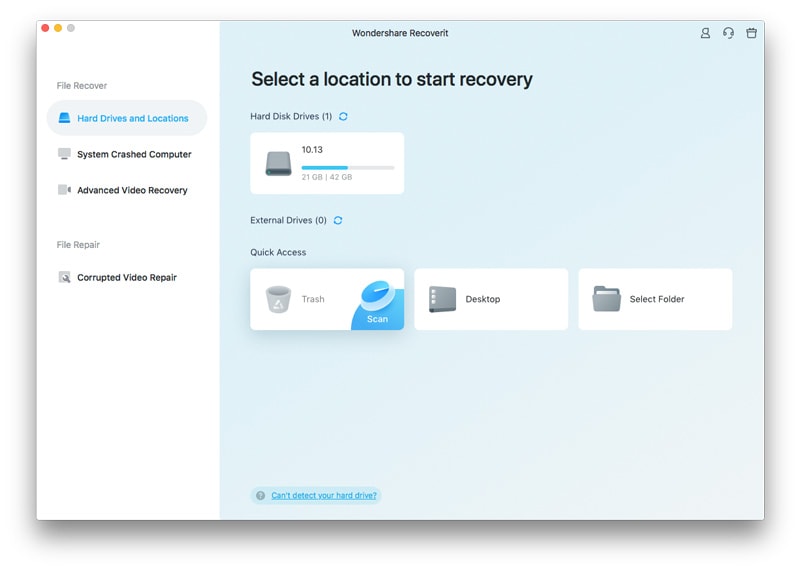
Step 1: Select the Trash location
Proceed to “Select location” and then select “Trash”. Now click on “Start” in order to begin the Quick Scan mode.
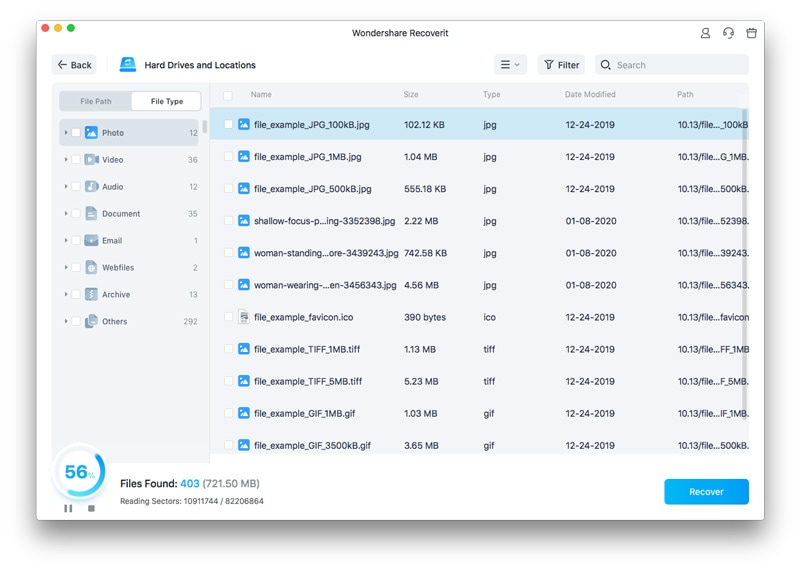
Step 2: Scan the Trash
After completion of the Quick Scan, go to the “File Type” category located on the panel to the left of your screen. You may now filter through the results of the Quick Scan for the desired files.
If the desired file has not been found using the Quick Scan mode, navigate to the bottom of your screen and then choose “Deep Scan”. This mode will go deep into your disk and locate the desired file. Remember that the Deep Scan will take some time so you must be patient.
Step 3: Preview and recover the data
On the panel to the left of your screen, get the previews of the recovered files. It will be easy to find the files that you need since Recoverit (IS) lists the files in categories.
Now choose your desired files and then click on “Recover”. Your file will be launched and then you can save it to your desired destination folder.